Integrate OpenVPN on Linux
Using emnify, you can create a virtual private network (VPN) for your mobile IoT/M2M devices fitted with emnify SIMs. Data traffic is exchanged between the devices and the application server through an OpenVPN tunnel, enabling direct communication with the IPs of the mobile devices—no network address translation (NAT) applied.
The tunnel is established between the emnify Core Network and the customer’s VPN gateway or server.
The Secure your devices with OpenVPN video provides a step-by-step walk-through.
Required preparation in the emnify Portal
Any traffic exchanged with mobile devices is encrypted before being transmitted over the public internet, which adds an additional layer of security and privacy. No VPN software needs to be installed on the device, or there aren’t any required configuration changes necessary. The default emnify APN also supports VPN flows.
Download the VPN configuration file
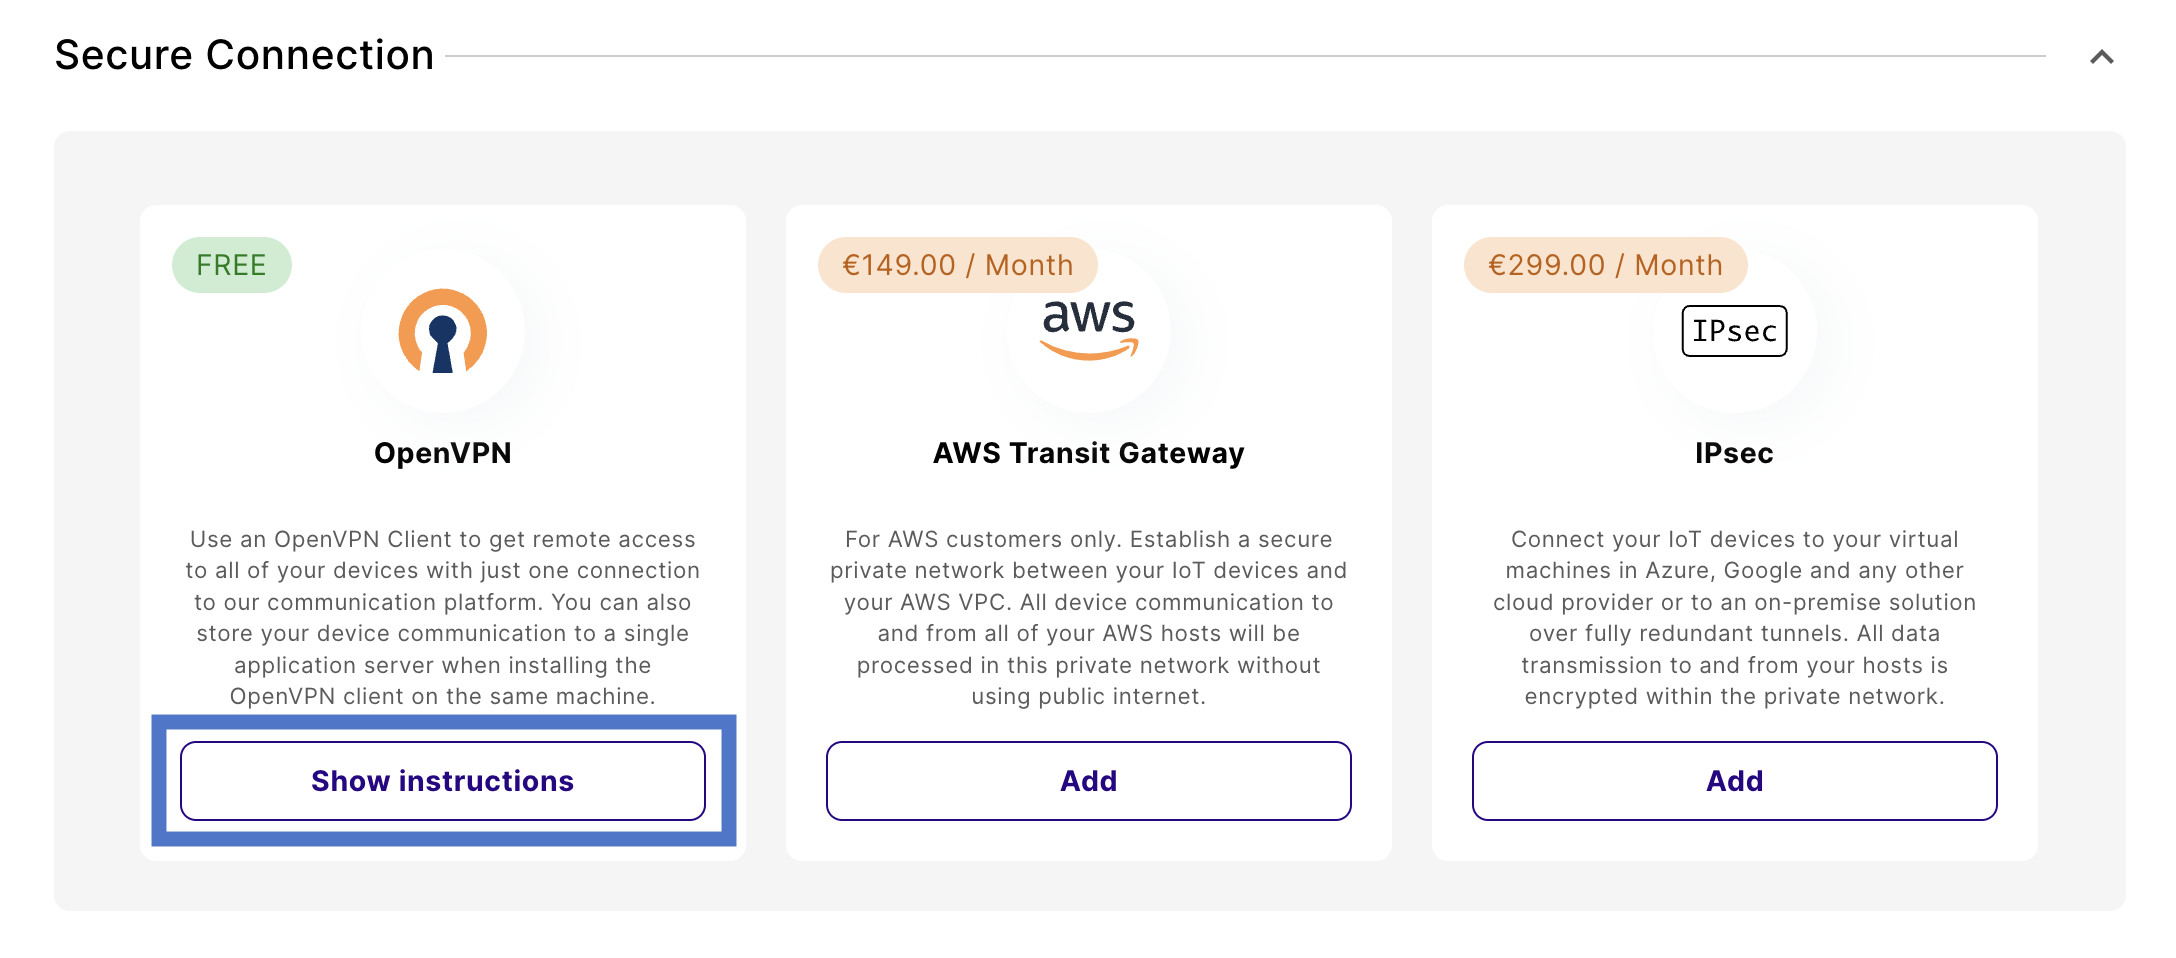
Navigate to Integrations and find the Secure Connection section.
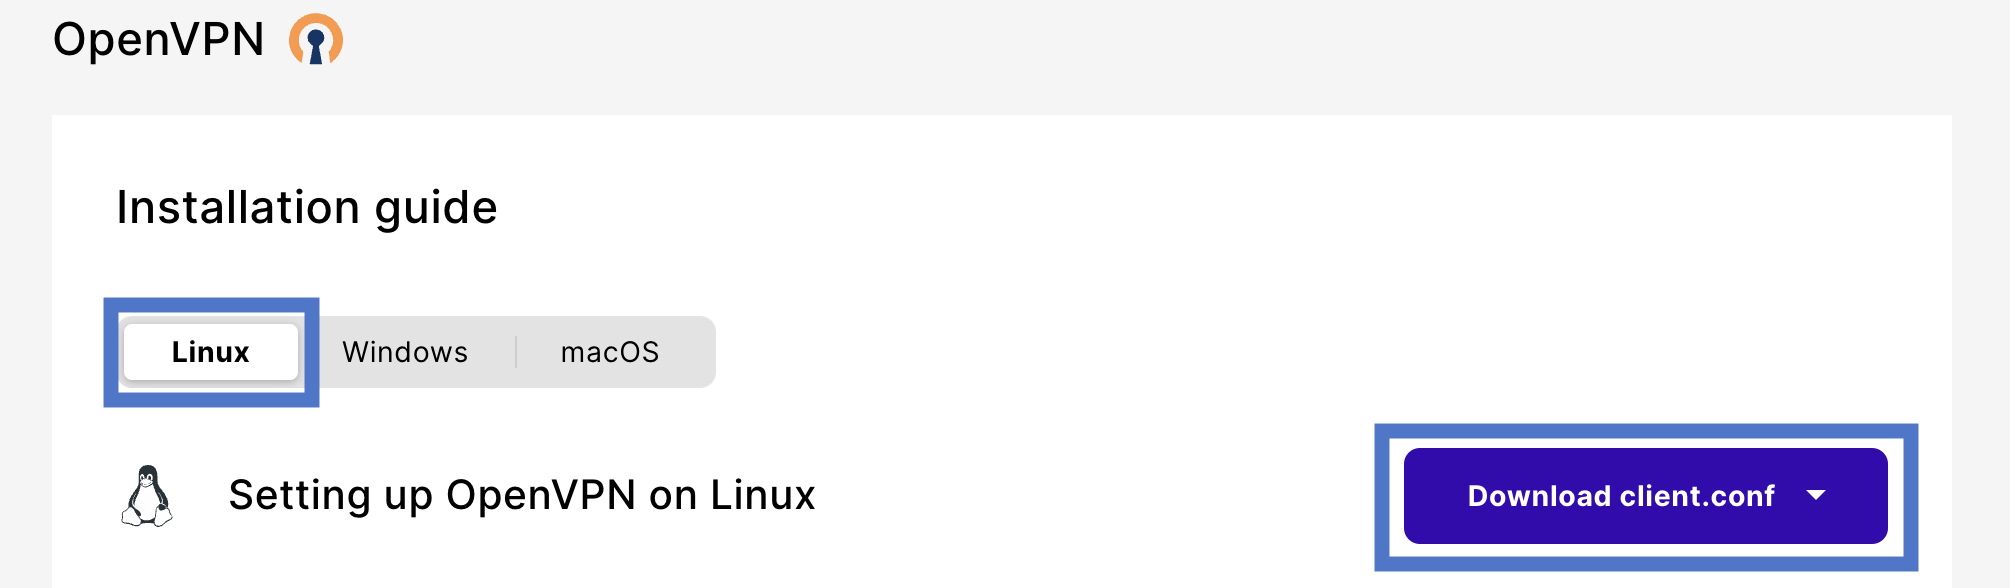
Once downloaded, store that file on your server in the folder /etc/openvpn.
Change the internet breakout region
Navigate to Device Policies in the emnify Portal.
In Service Policies, select the policy assigned to the devices you want to secure and expand the policy details.
Changes save automatically.
Set up the OpenVPN client on Linux/Ubuntu
Install the OpenVPN software
First, install the OpenVPN package:
Create credentials for authentication
Once you install the software and download the configuration file, setting up authentication is next.
Create a file called credentials.txt in the folder /etc/openvpn.
You can use your user credentials to authenticate or use an application token (recommended).
Authentication with user credentials
The content of the credentials.txt must be two lines.
The first line is your username, and the second is your password.
If you don’t want to store your credentials, you can also choose to enter them each time the VPN tunnel is established.
If you prefer that option, comment out the line auth-user-pass /etc/openvpn/credentials.txt in the client.conf file.
Authentication with an application token
When you run the OpenVPN client on a VPN gateway or application server, using a dedicated application token is recommended.
In this case, the first line in the credentials.txt file needs to contain your emnify organization identifier. Instead of the password on the second line, store the application token.
You can create application tokens in the emnify Portal. For instructions, see Application tokens.
Once created, copy the token into the credentials file. The content of the credentials file would then look like this:
When you log in to the emnify Portal, it shows this data under the VPN settings.
Protect the credentials file
You should keep the credentials.txt file only readable by root and not by other server users.
You can ensure this with the following commands:
Start and monitor the OpenVPN connection
Now you can start the VPN client by running:
The OpenVPN daemon logs into /var/log/syslog.
If everything works, it looks like this:
Find the static private IP of your VPN client
The emnify OpenVPN server allocates a static IP address to the tun interface of your VPN client. This IP also stays the same when your VPN client is reconnecting or if you move the tunnel to a different machine. So you can use it on your mobile devices to address your application. Nevertheless, you should never configure the IP directly on your devices but use a DNS to resolve it.
Once the tunnel is established, you can see that IP address on your tun interface.
In this example, the IP address is 10.64.0.224:
Test successful data connectivity
If the VPN tunnel is established successfully, you can connect directly to your mobile devices’ private IP addresses.
For testing, you can choose any of your devices that are currently in an active data session.
Now you can ping that private IP address:
For this to work, your device must run an IP stack responding to ICMP echo requests. This might differ for embedded devices that implement only partial IP stack functionality.
You can use any network protocol.
For example, if your device runs an sshd daemon you can log into it via SSH.
Enable access for servers behind the VPN client
If you have multiple servers behind your VPN gateway that need to communicate with your mobile device, you can apply masquerading using iptables to hide them behind the single IP address of your VPN client.
First, you need to enable IP forwarding on your VPN gateway (if it isn’t already active):
After, you need to enable masquerading for the tun interface by running:
You can also forward connections coming to specific ports to an application server behind your VPN gateway by using DNAT.
For example, to forward to an internal HTTP server at IP 192.168.100.21 use:
To make these settings persistent, you can use the iptables-persistent package.