Order and auto-register SIMs
Order and auto-register SIMs
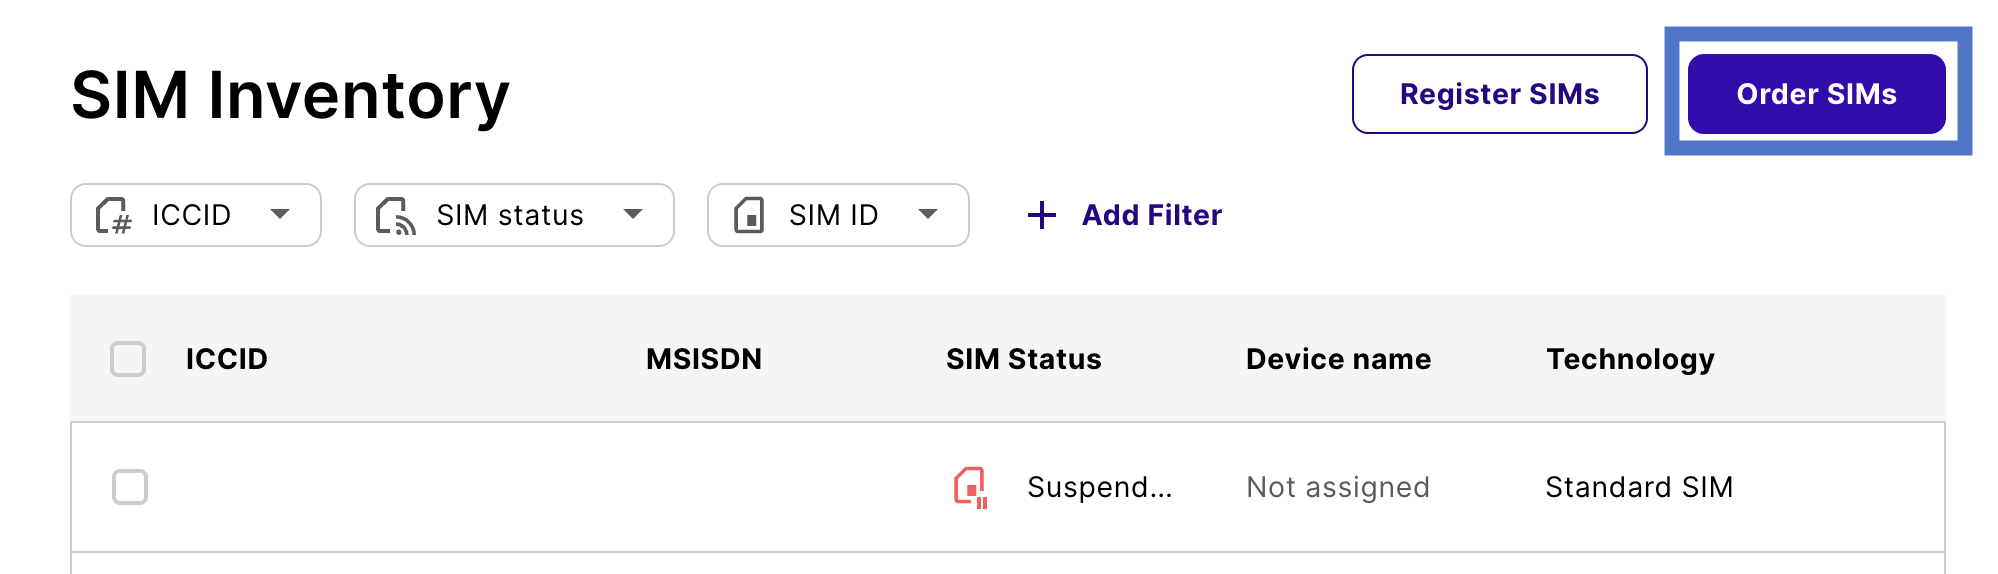
Here’s how you can order SIM cards any time in the emnify Portal SIM Shop.
First time ordering SIM cards on emnify?
If you’re new to emnify and interested in testing services free of charge, see Order free trial SIMs.
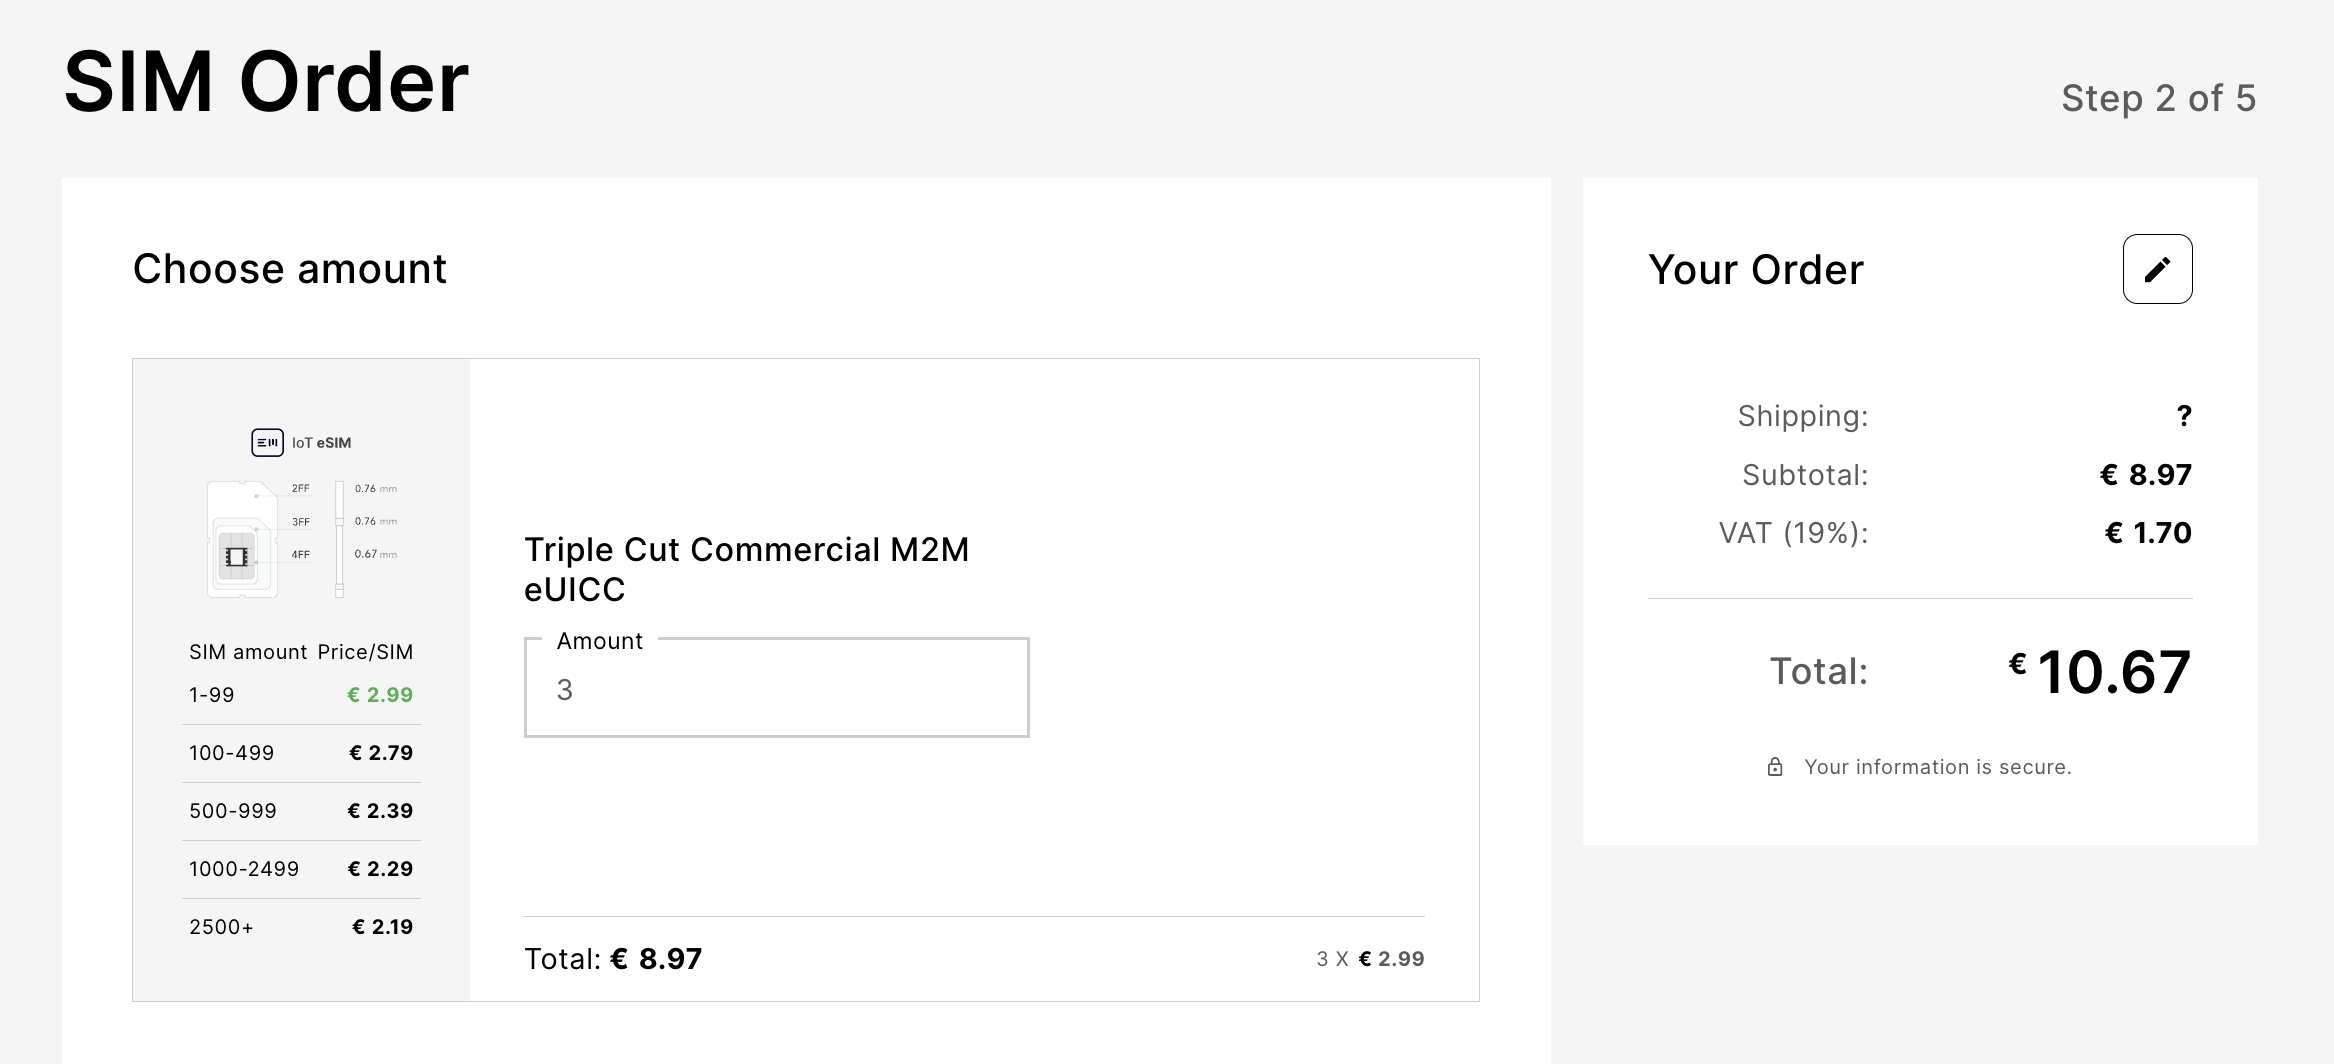
Click Step 2 - Choose Amount to confirm your choice.
In use cases where devices are mobile, emnify highly recommends choosing the form factor that fits the device exactly, not multi-cut ones that include a smaller size. The pluggable SIMs are more durable and provide firmer contact with the device than the multi-cut.
For more information about the various form factors and quality grades, see emnify eSIMs.
You’ll land on the SIM Order page that shows an overview of your order so far. Here, you can specify the amount of each SIM type you want to receive.
Next on the Set up your SIMs page, you have the option to auto-register the SIMs for this order directly to your account.
- Ensure the Auto register SIMs toggle is switched on.
- Follow the form to configure the device and be sure to specify the default name and device policies.
Once you select auto-registration, the SIMs are customized to your account and returns are no longer possible.
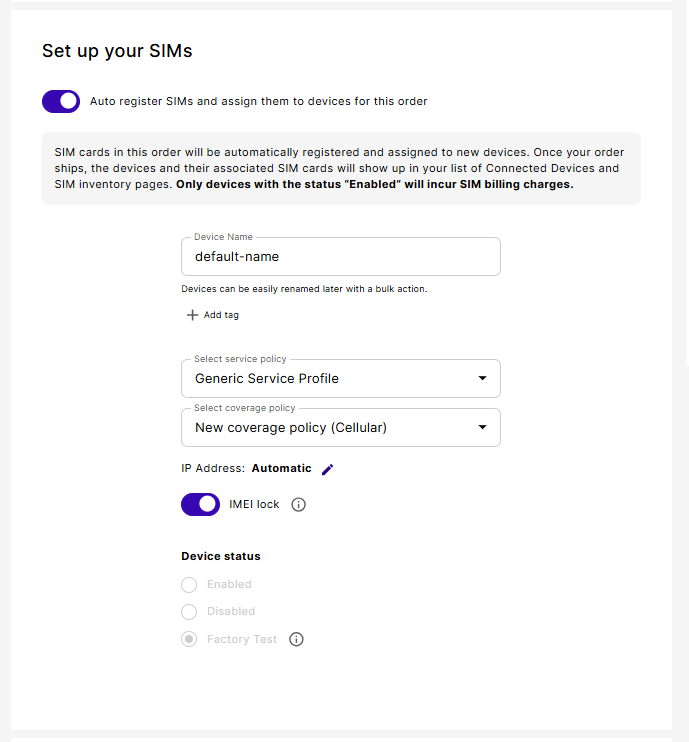
You can rename device names in bulk later. You also have the option to leave the device status as Disabled to avoid incurring costs and activate them when you’re ready.
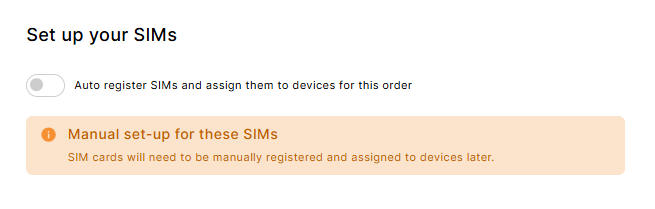
If you prefer to register the SIM batches in your account at a later time, switch the Auto register SIMs toggle off and use the batch identification code (BIC) to manually register the SIMs.
Enter your Invoice details. If you order physical SIMs that require delivery, enter Shipping details and specify your Shipping option.
Up to 10 delivery addresses can be saved in the account for future orders.
Assuming there are no errors, you should receive a confirmation, and the emnify team begins processing your order.
Once your order is processed, a PDF invoice is sent to your invoice email. You can update this during checkout or in your organization settings.
You’ll be notified when the SIM cards are shipped.