Deploy the emnify Consumer eSIM Global on Omnissa Workspace ONE UEM
This guide explains how to deploy and activate the emnify Consumer eSIM Global using Omnissa Workspace ONE Unified Endpoint Management (UEM). It includes instructions for checking device compatibility, enrolling Apple devices, ordering eSIM profiles, activating them remotely through Workspace ONE UEM, and configuring the APN settings.
This process is tailored to enterprise environments using Apple devices with Workspace ONE UEM and Apple Business Manager.
Step 1: Check device and OS compatibility
Before proceeding, ensure that your devices meet the minimum system requirements for Workspace ONE UEM:
- Android: Supported on Android 5.0 and later.
For more information, see Managing Android Applications using Omnissa Workspace ONE UEM. - iOS: Supported on iOS 11.0 and higher.
For more information, see Introduction to Managing iOS Devices. - Browsers: For a list of supported browsers, refer to Working in the UEM Console.
Step 2: Enroll your devices in Workspace ONE UEM
Before activating the eSIM, devices must be enrolled in Workspace ONE UEM. Apple devices should first be registered in Apple Business Manager to use Automated Device Enrollment (ADE).
For devices in Apple Business Manager
Register devices in Apple Business Manager.
See Device deployment in Apple Business Manager for reference.
Enroll devices via ADE in Workspace ONE UEM
See Automated Device Enrollment in Omnissa MDM for integration instructions.
For devices not in Apple Business Manager
Install the Workspace ONE Intelligent Hub app from the App Store on each device.
Enroll your Apple device with Workspace ONE Intelligent Hub.
See Hub-Based Enrollment for requirements and instructions.
Integrate the Workspace ONE Intelligent Hub app with the Workspace ONE UEM.
See Workspace ONE Intelligent Hub for iOS for configuration details.
For assistance, contact your designated Omnissa Technical Account Manager.
Step 3: Order eSIM profiles
For your first eSIM profile order, contact your emnify sales representative. emnify activates the ordering of eSIM profiles in the Webshop for you.
Once the eSIM is available in the Webshop, you can use the regular ordering of SIMs.
The emnify Webshop is currently in development. eSIM fulfillment isn’t yet automated and it may take 1-2 business days until the eSIM appears in your account.
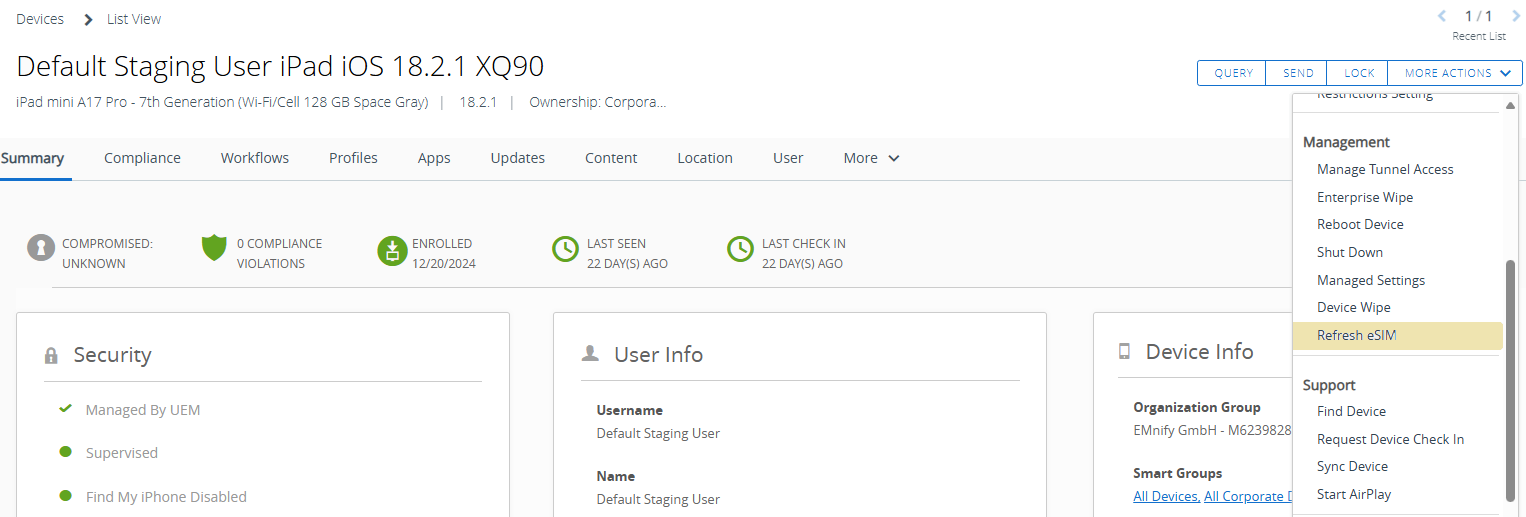
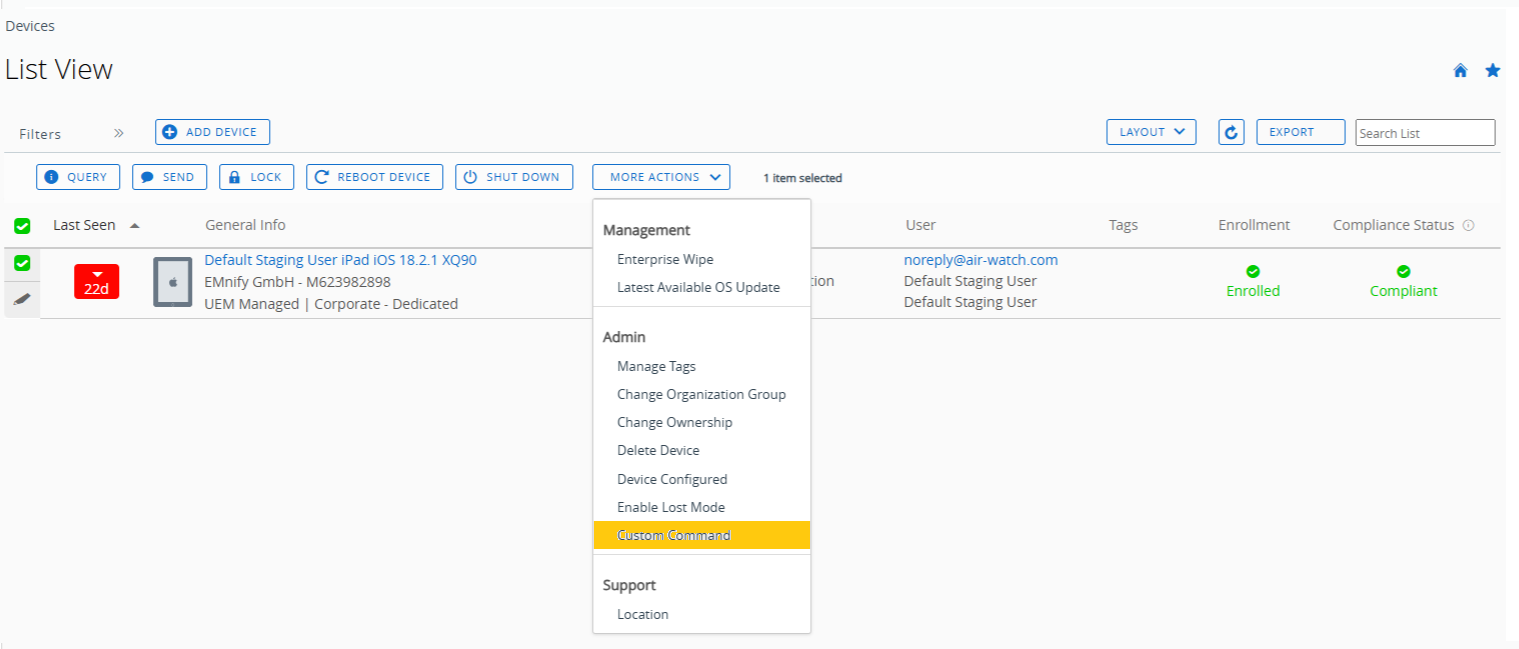
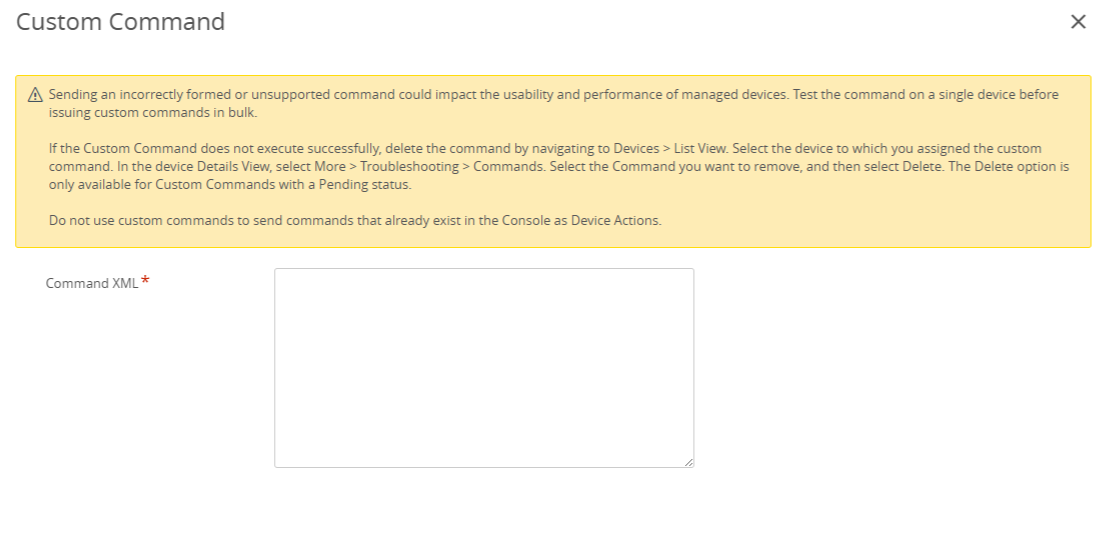
Step 4: Activate your eSIM via Workspace ONE UEM
Before sending the activation command, make sure:
- Selected devices under the device list are ON, and
- Devices are connected to Wi-Fi or cellular
Activate a single eSIM


Activate multiple eSIMs in bulk
Most devices complete activation within 2-3 minutes of issuing the refresh command, assuming network connectivity is stable.
- Devices must remain powered on and connected to a network.
- You don’t need to take any action on the device.
Step 5: Configure the APN on the device
After activation, the Access Point Name (APN) must be set to em.
You can configure the APN:
- Manually on the device, or
- Remotely via Workspace ONE UEM
Remote APN configuration
For individual devices:
- Administrators can create and assign a Device Profile with the necessary APN setting.
- You can tailor this profile to specific device requirements and push it directly to the targeted device.
For multiple devices:
- Use Smart Groups to assign the APN profile at scale.
- All devices within that group receive the settings automatically.
- This approach ensures consistency and efficiency in large-scale deployments.
Platform support may vary. Available APN configuration options depend on the device’s operating system (for example, Android or iOS) and its management mode (for example, Work Managed or BYOD).
For detailed guidance on creating and deploying APN profiles, see Add a Device Profile in the Omnissa documentation.
Once the APN is set, the device establishes data connection. You can verify by browsing the internet or streaming videos.