Deploy the emnify Consumer eSIM Global on Jamf Pro
This guide explains how to deploy and activate the emnify Consumer eSIM Global using Jamf Pro Mobile Device Management (MDM). It includes enrolling Apple devices, ordering eSIM profiles, activating them remotely through Jamf Pro, and configuring the APN settings.
This process is tailored to enterprise environments using Apple devices with Jamf Pro and Apple Business Manager.
Step 1: Enroll devices in Jamf Pro
There are two supported methods for enrolling Apple devices into Jamf Pro for mass deployment:
- Automated Device Enrollment (ADE) via Apple Business Manager
Devices pre-registered in Apple Business Manager are automatically assigned to Jamf Pro during the initial setup. This zero-touch method ensures that upon first power-on, the device contacts Jamf and configures itself. - Enrollment using Apple Configurator
Utilize the Apple Configurator (available on macOS) to manually enroll multiple iPads via USB. This approach is efficient for large-scale configuration and doesn't rely on Wi-Fi during initial setup.
Once enrolled, Jamf Pro allows remote management including configuration profiles, apps, and commands like Reset cellular plan to trigger eSIM activation.
Some helpful resources:
- Apple Business Manager Guide
- Deploying iOS Devices Using Apple Configurator 2 and Jamf Pro
- Automated Device Enrollment Integration
This process is currently only supported on iPad devices, pending additional compatibility validation for other device models.
Step 2: Order eSIM profiles
You can order eSIM profiles via email.
- Contact your emnify sales representative with your request.
- Fill out the required order form and either:
- Attach it to your email request, or
- Upload it to emnify's secure transfer folder (contact your sales representative for access).
- Next, emnify provisions the eSIM.
- You must create a virtual representation of the device associated with the eSIM. For instructions, see Create a device.
- Finally, you receive the eSIM profile, including the ICCID, once provisioning is complete via emnify's secure share folder.
The emnify Web Shop is currently in development. Once it's launched, you'll be able to purchase eSIMs and related services directly online.
Step 3: Activate your eSIMs with Jamf Pro
Verify the device's network details
After enrolling the device:
-
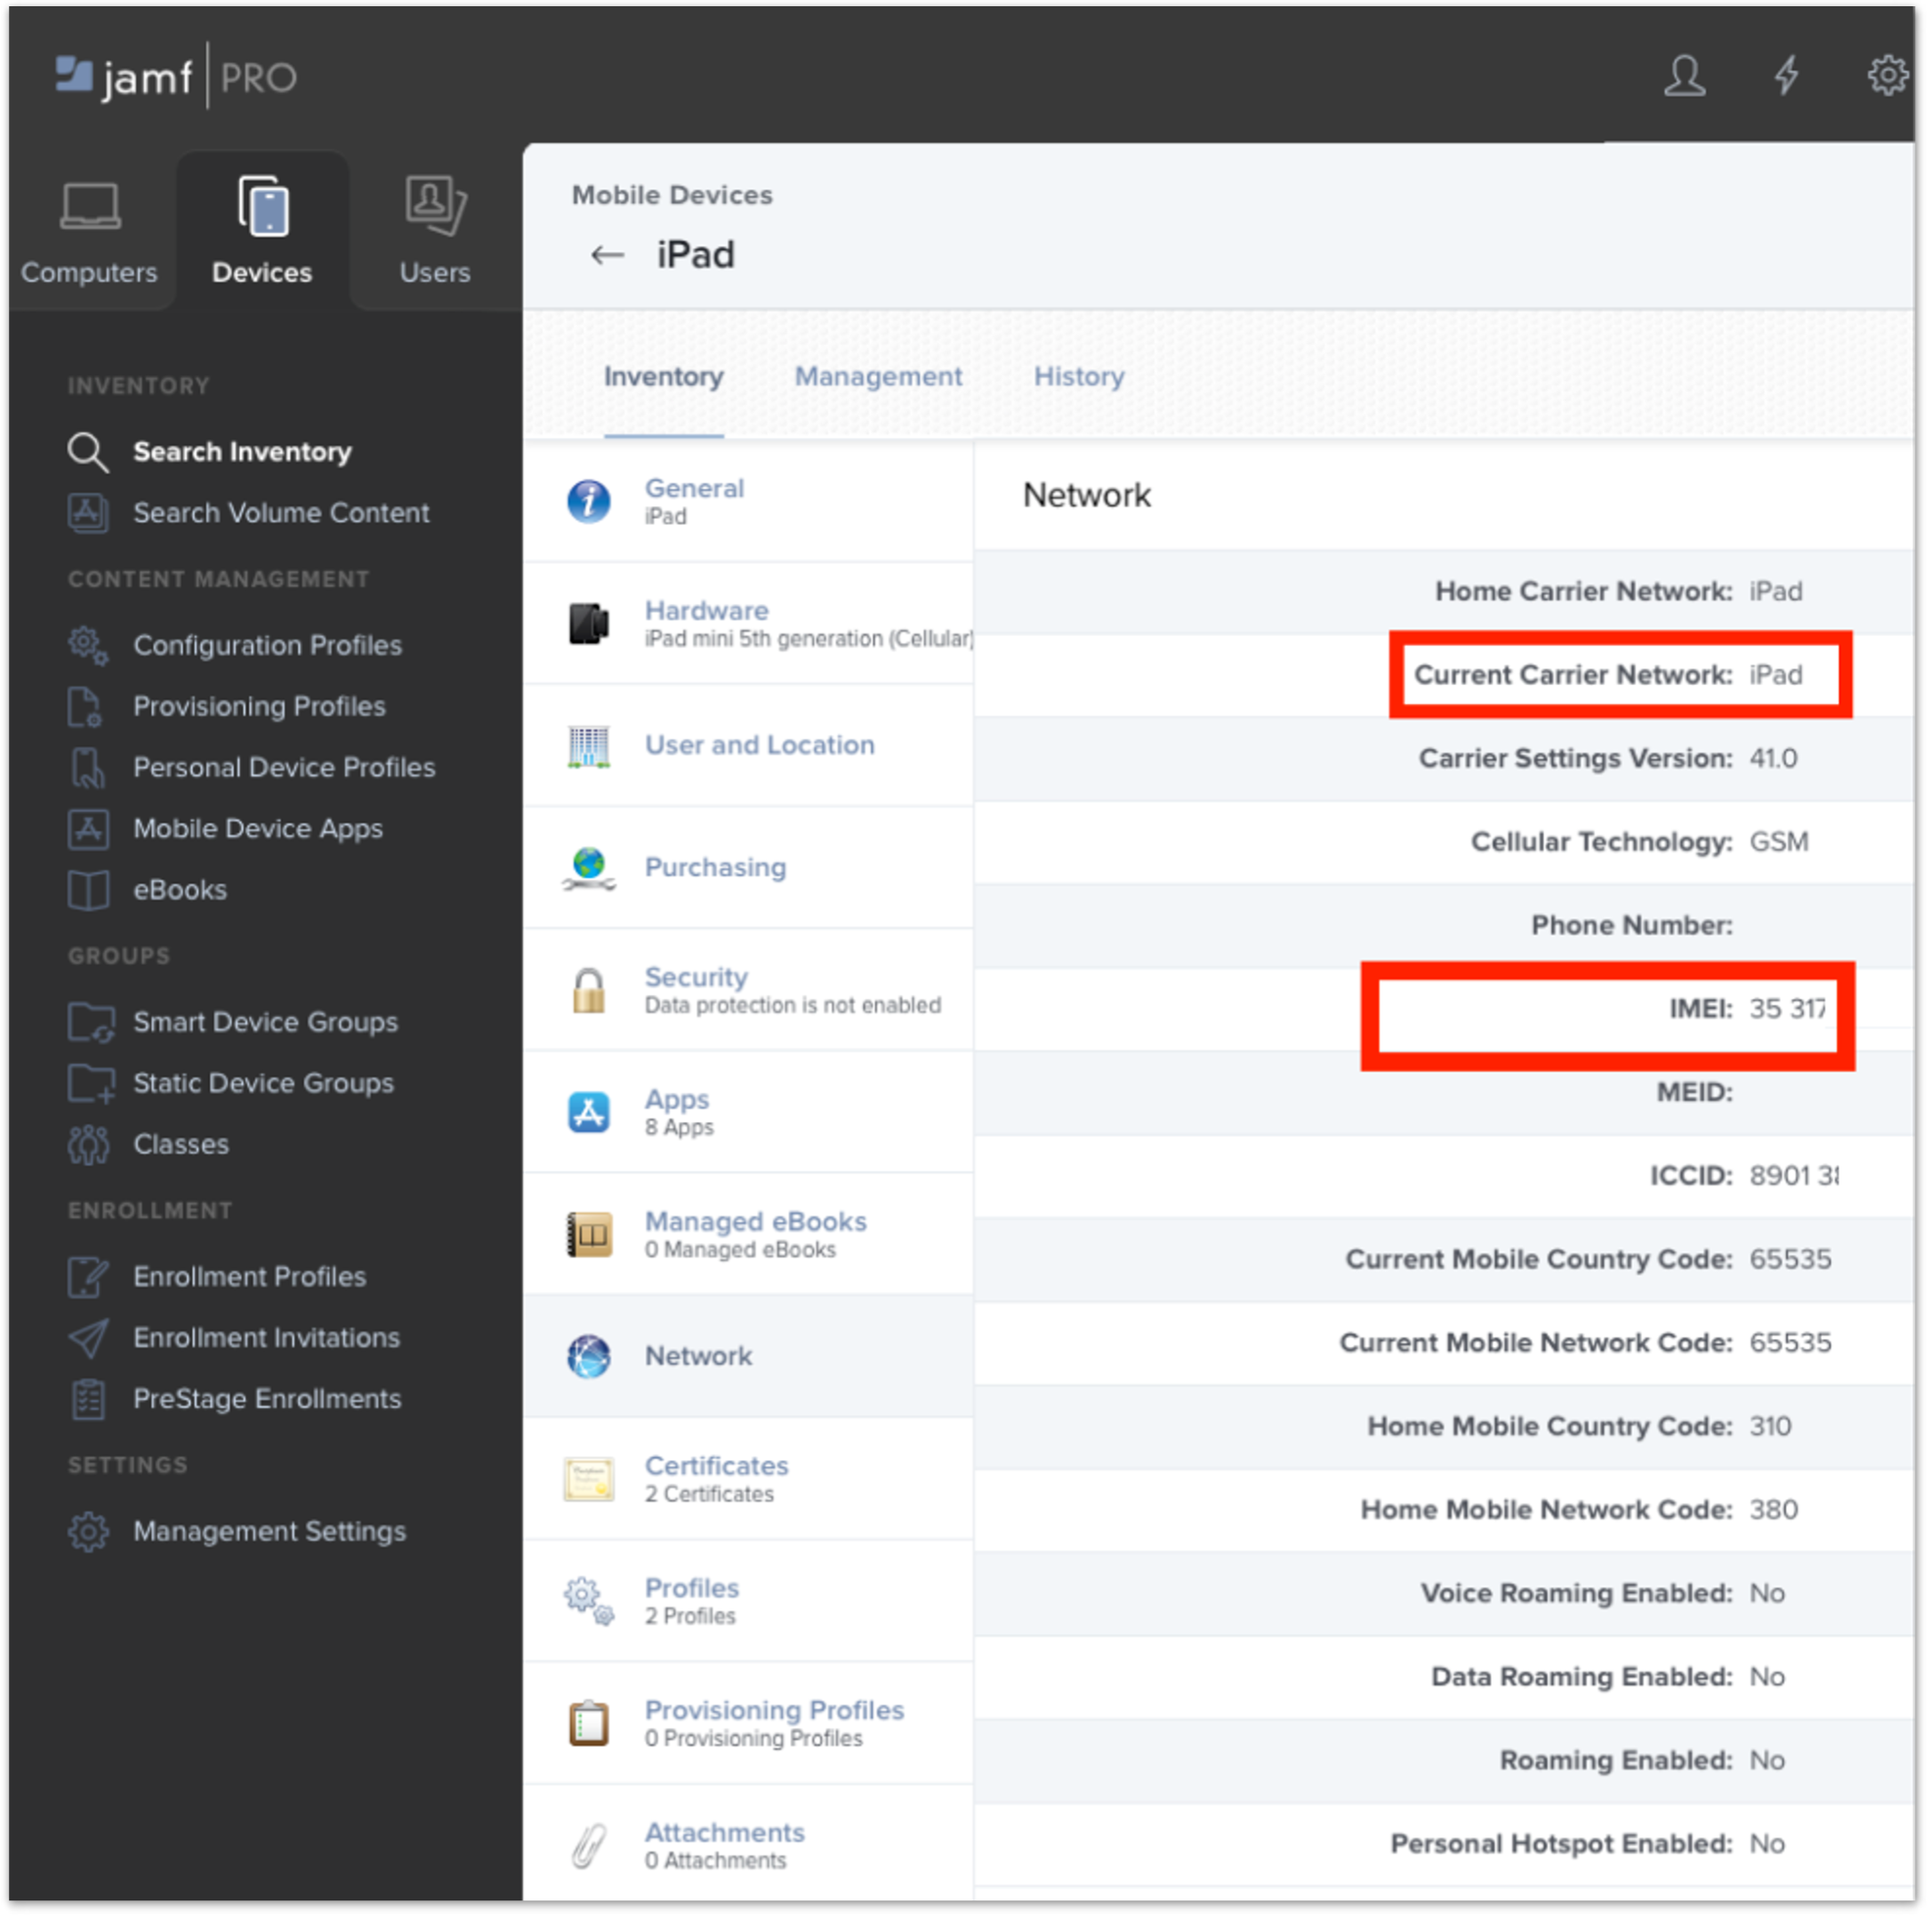
In Jamf Pro, navigate to Devices > Search Inventory.
-
Select a device and review the Network section.
If the eSIM is inactive, the Carrier Network field reads as iPad.
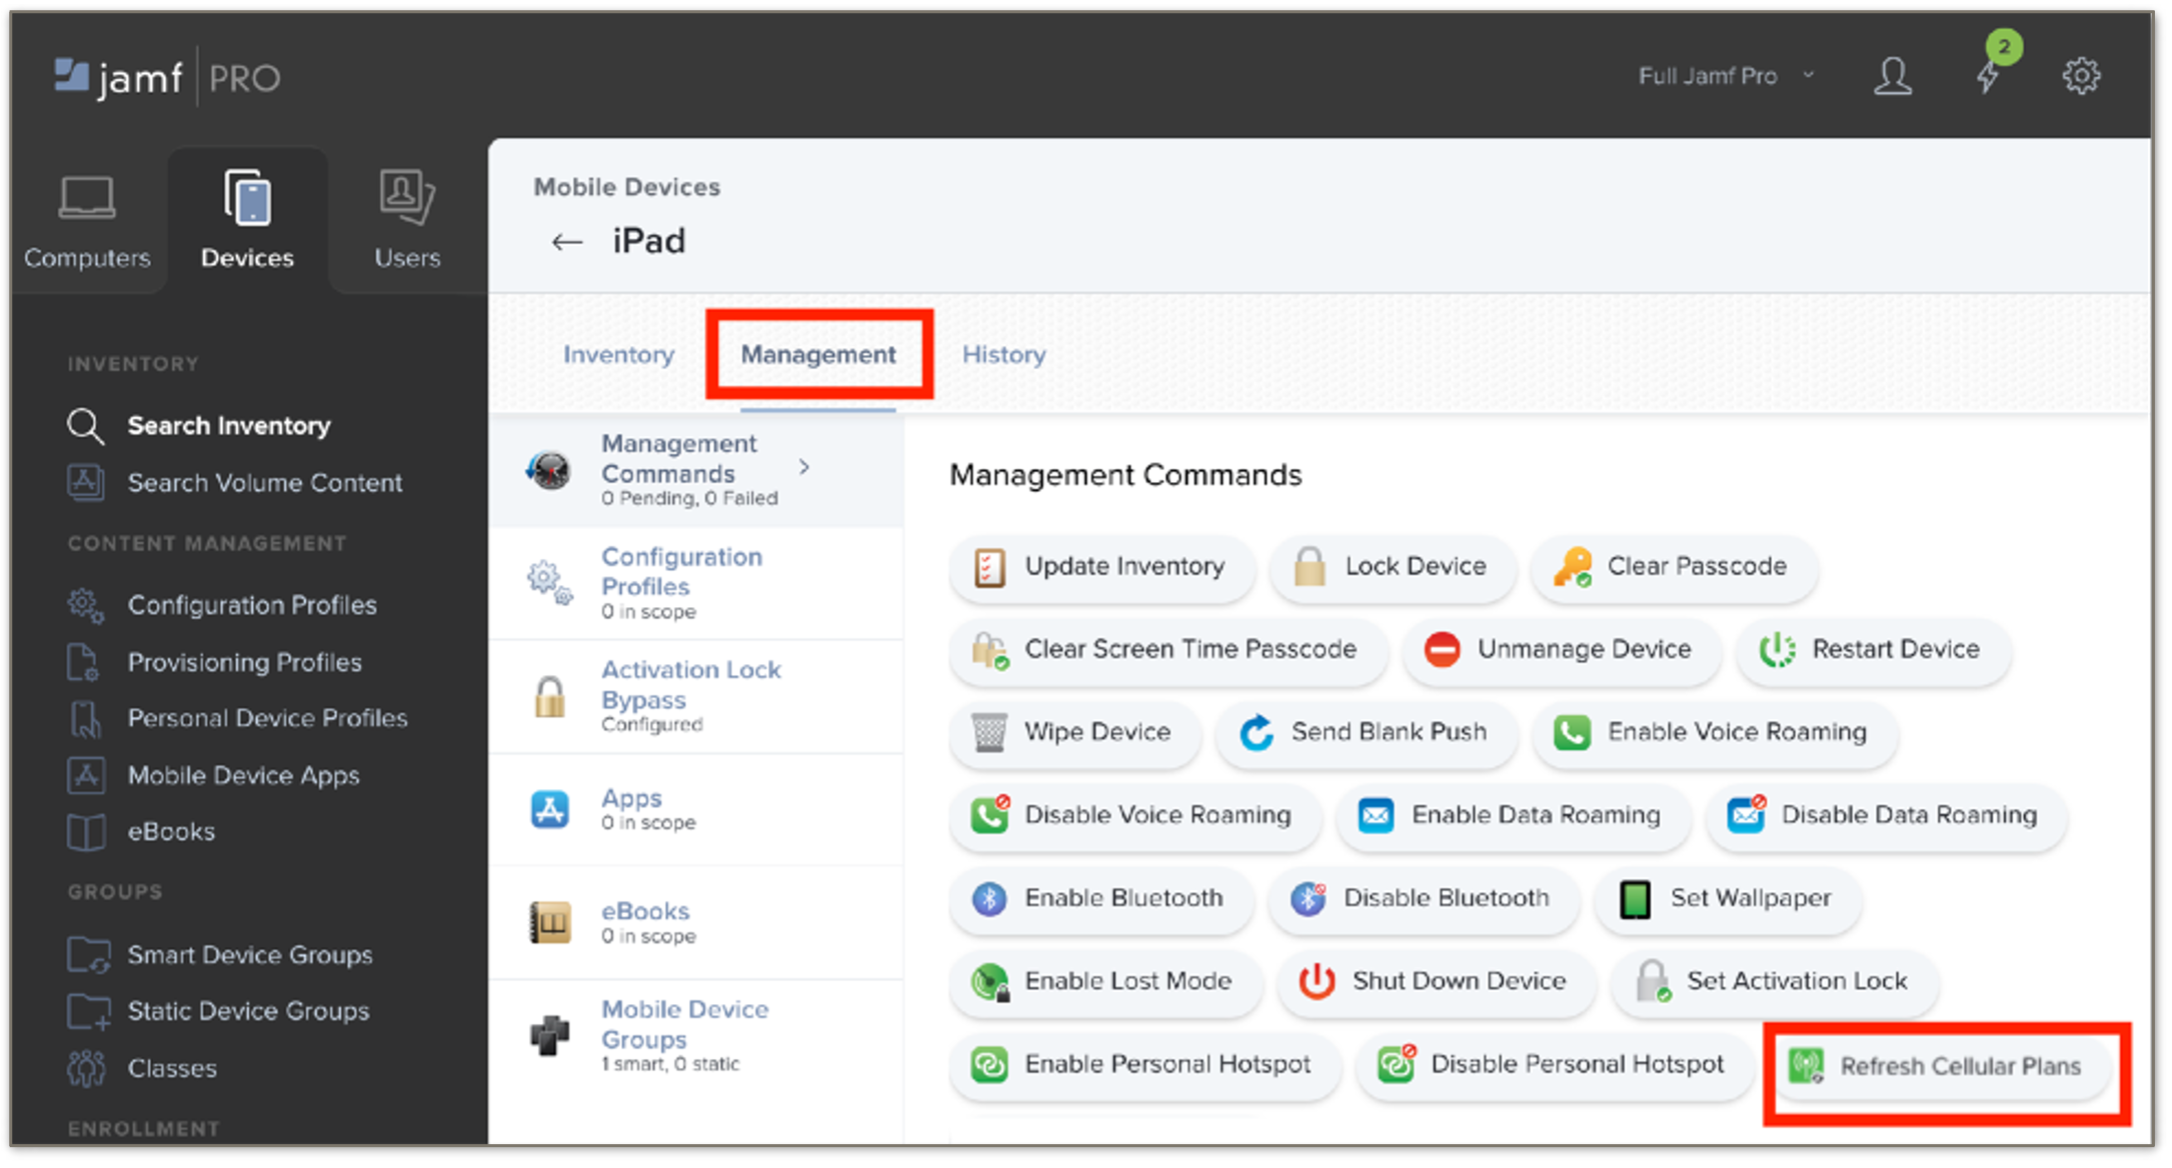
Activate cellular data services
-
Switch to the Management tab and click Refresh cellular plans.
-
When prompted, enter the emnify eSIM Server URL:
https://rsp-0026.oberthur.net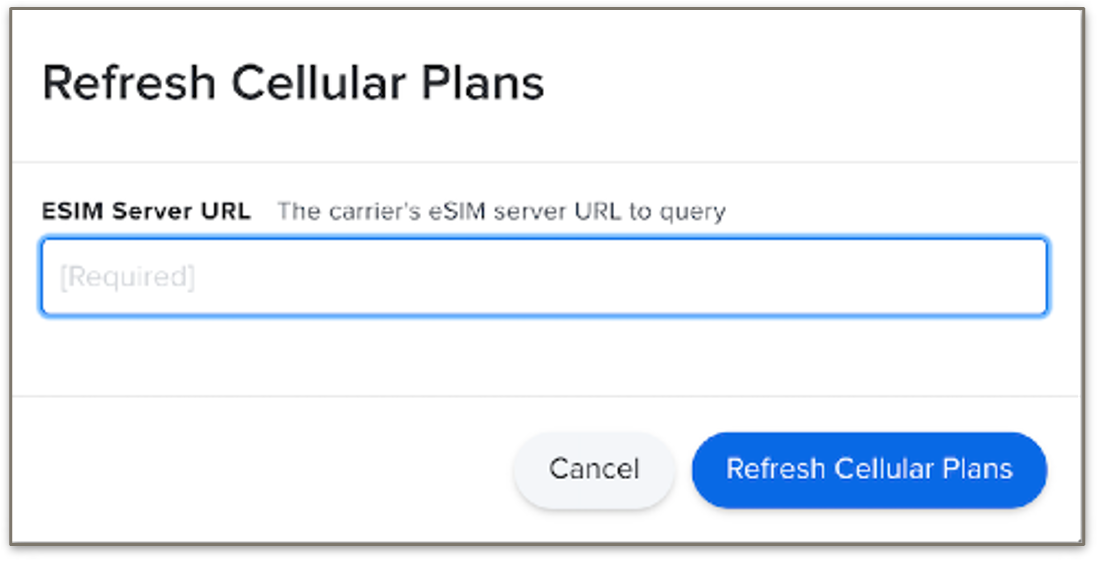
Upon successful activation, cellular connectivity is established, indicated by signal bars on the device.
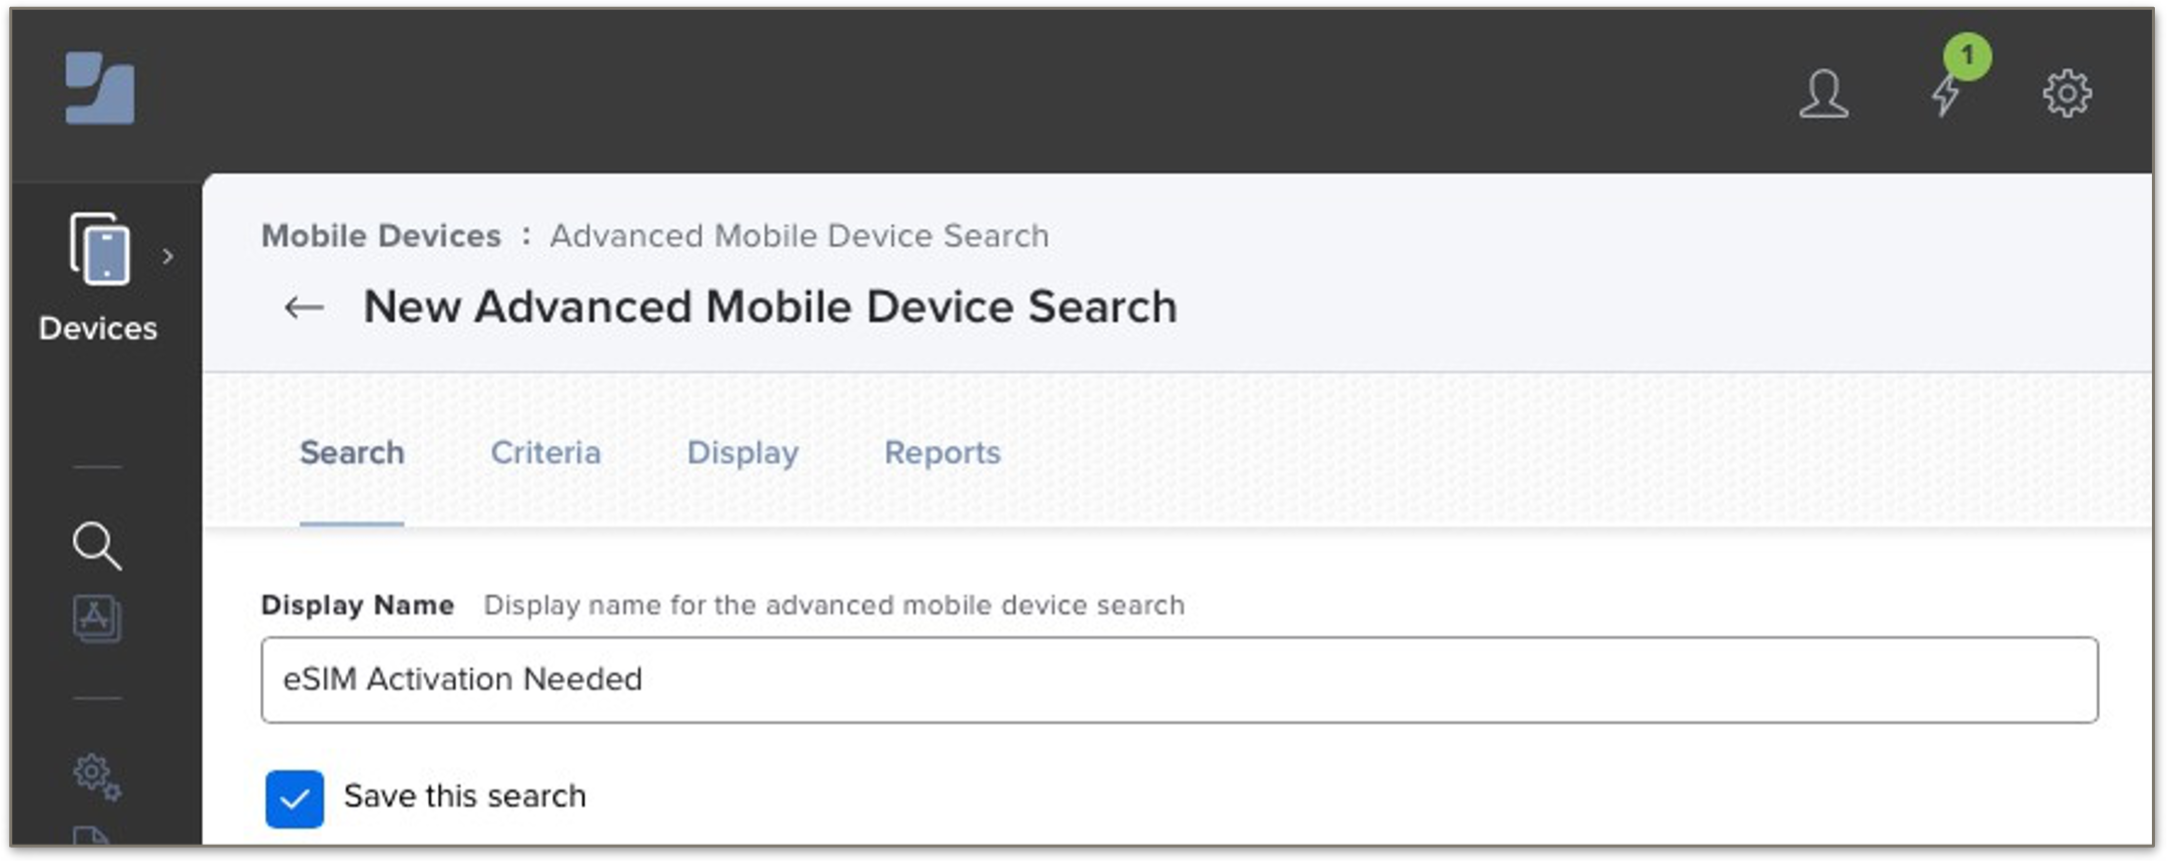
Step 4: Identify inactive devices
-
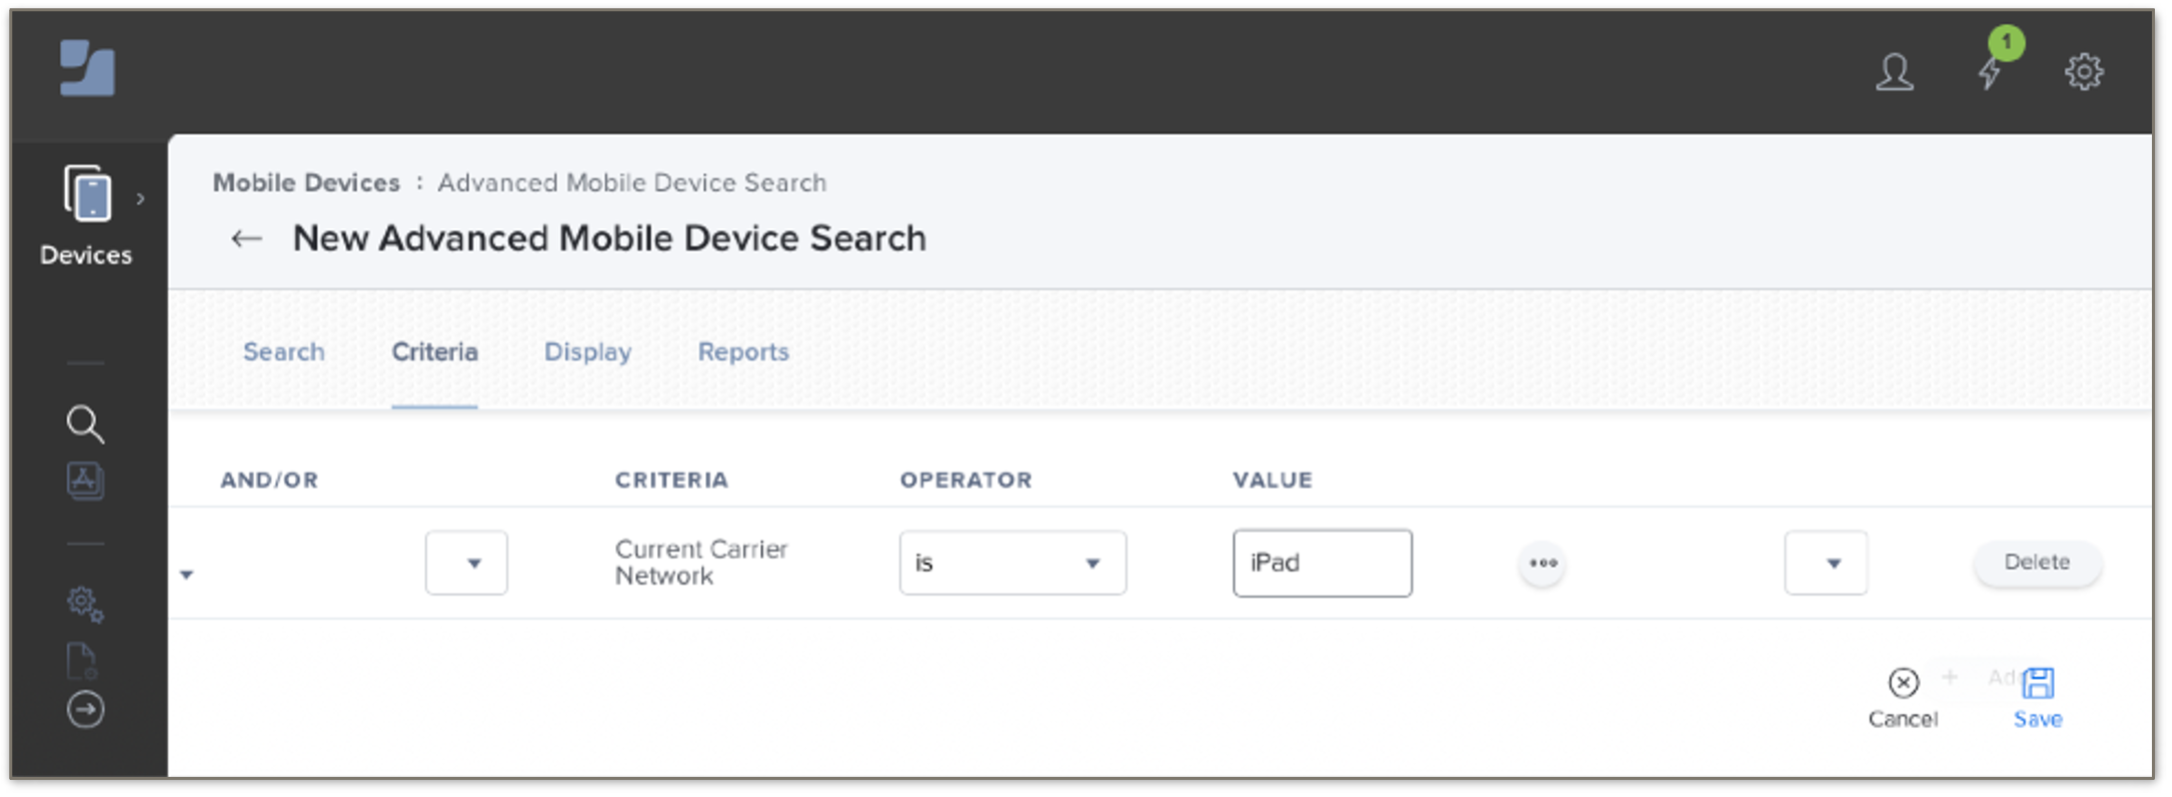
Navigate to Devices > Advanced Mobile Device Searches.
-
Click New to create a new search.

-
In the Criteria tab, filter for devices where the Current Network Carrier field is set to iPad. This indicates inactive devices.
-
Optionally, you can also:
-
Add date filters to target specific enrollment batches.
-
Exclude devices by name, serial number, or groups if you don't intend to activate them.
-
Use directory service attributes (for example, department) to refine targeting.
-
Save and name the search for future use.
-
-
Once you have your Advanced Search criteria set the way you want, click Save and then View to display the results.
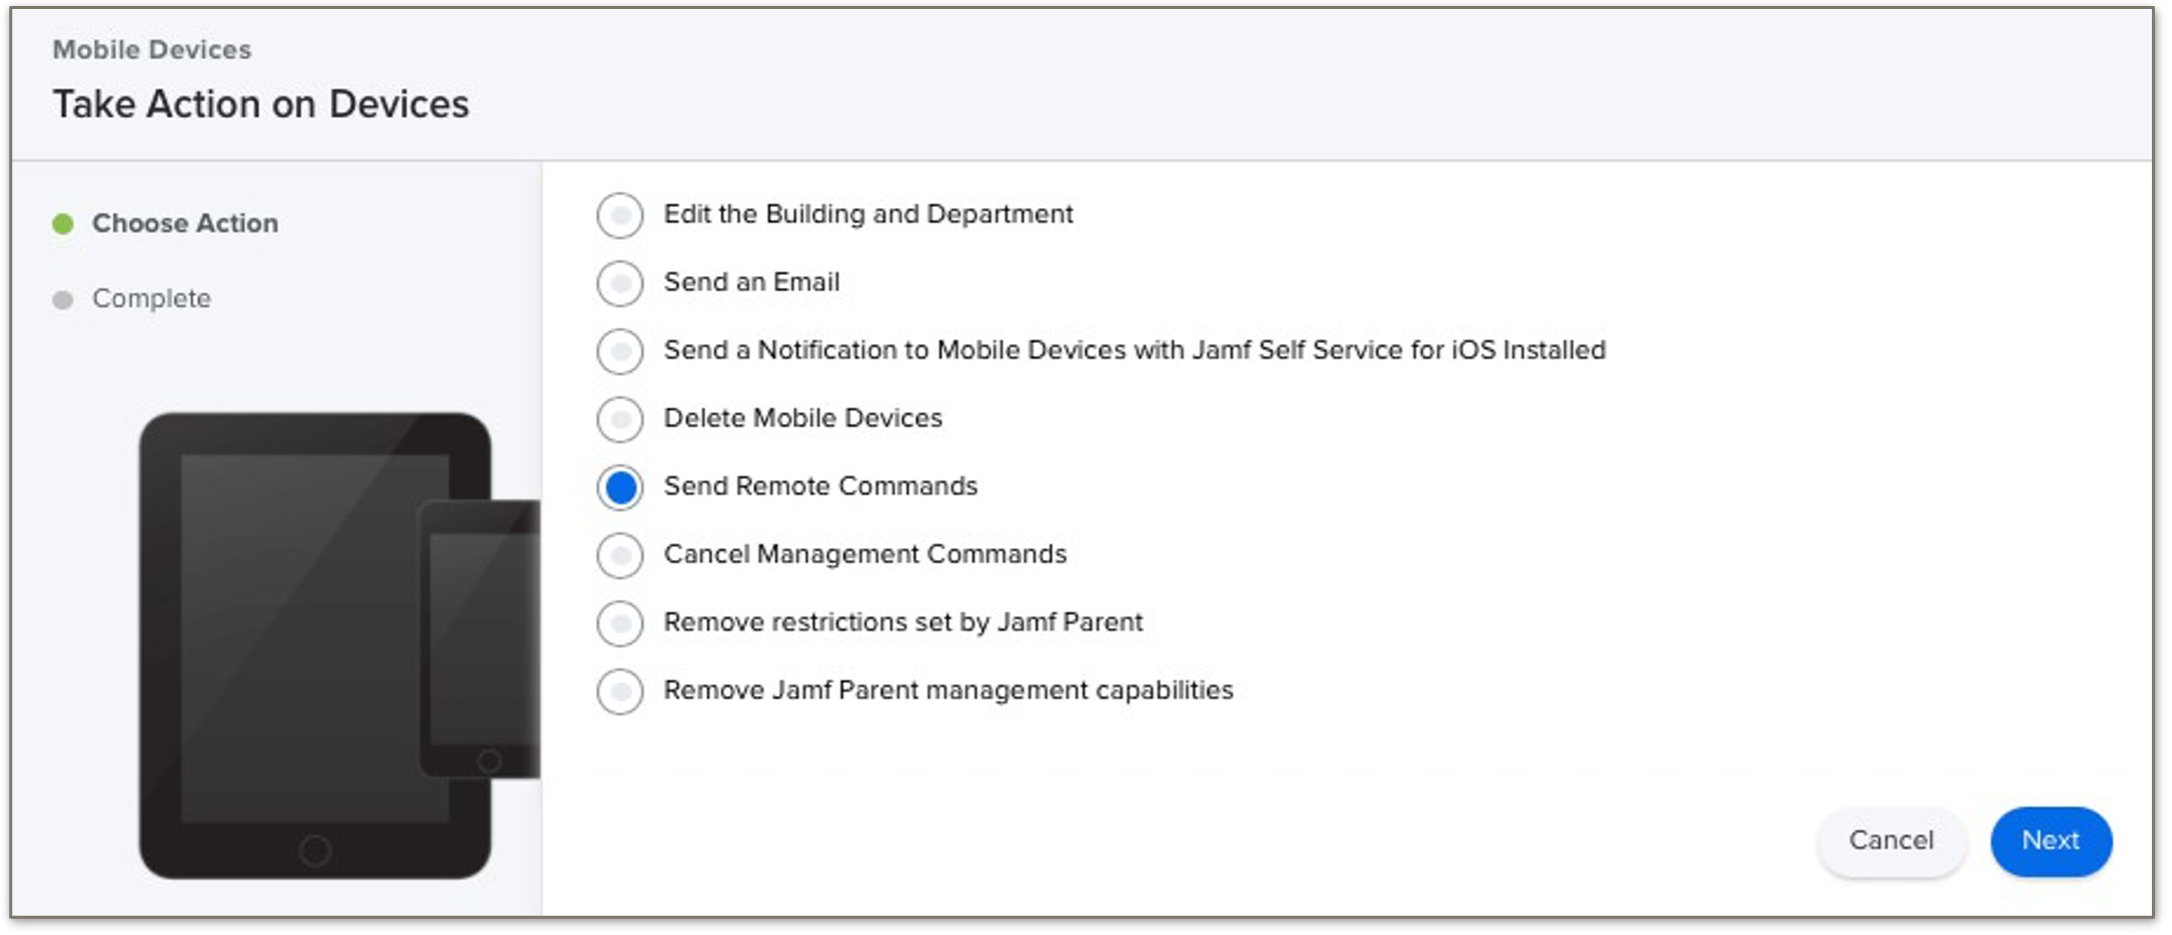
Step 5: Activate cell plans in bulk
-
From your Advanced Search results, click Actions.
-
In Choose Action, select Send Remote Commands and click Next.
-
Select Refresh cellular plan and enter the emnify eSIM Server URL again:
https://rsp-0026.oberthur.netThen, click Next.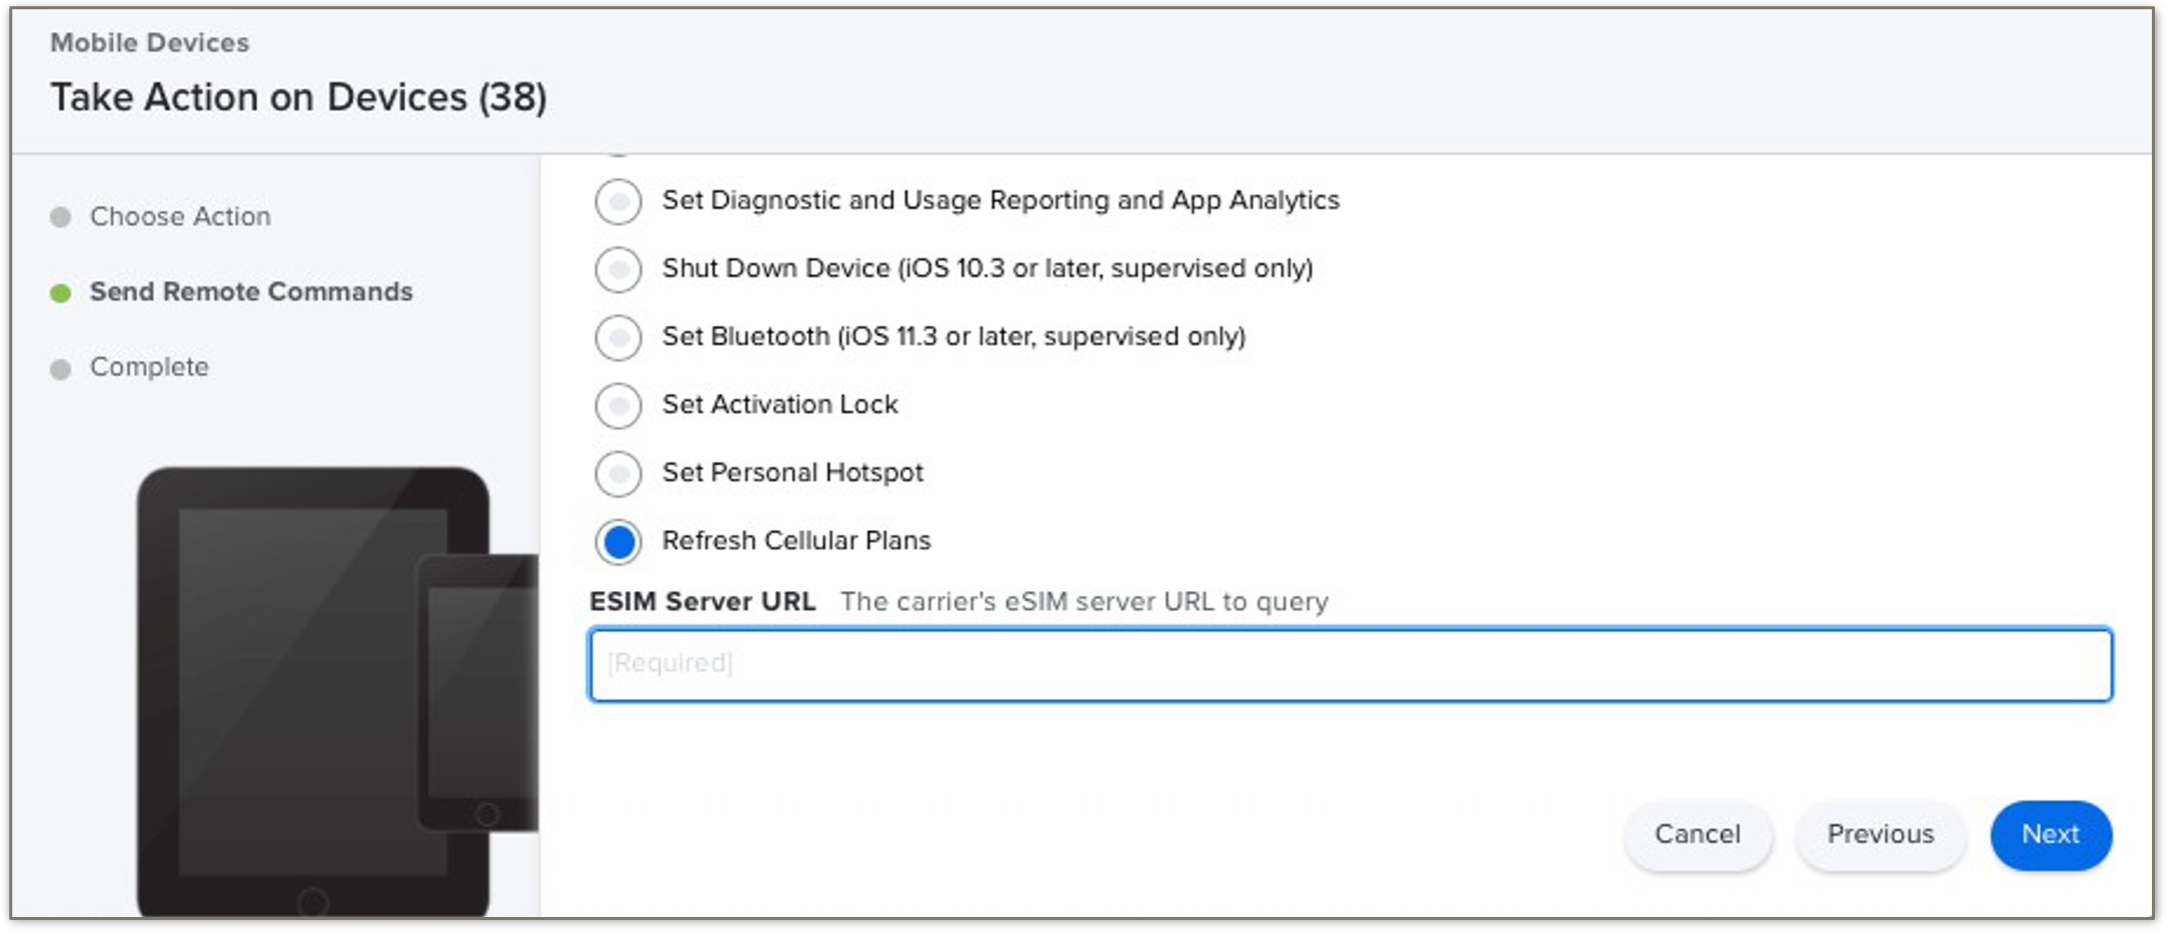
-
Finally, confirm and dispatch the command.
Step 6: Configure the APN on the device
After activation, the Access Point Name (APN) must be set to em.
You can configure the APN:
- Manually on the device, or
- Remotely via Jamf