Deploy the emnify Consumer eSIM Global on Microsoft Intune
This guide walks you through deploying and activating the emnify Consumer eSIM Global using Microsoft Intune. It covers checking device compatibility, enrolling supported devices, ordering eSIM profiles, activating eSIMs remotely using Intune’s cellular plan management capabilities, and configuring the APN.
Step 1: Check device and OS compatibility
Before proceeding, ensure that your devices meet the minimum OS requirements for Microsoft Intune:
- Android
- User-based management: Android 10.0 and later
- User-less management methods: Android 8.0 and later
- iOS
- iOS 16.X and later
For the full list, see Operating systems and browsers supported by Microsoft Intune.
Step 2: Enroll your devices in Microsoft Intune
Devices must be enrolled in Microsoft Intune before you can deploy or activate an eSIM.
Choose your enrollment method based on device type and organization requirements:
- Overview: Microsoft Intune enrollment
- Enroll Android devices
- Enroll Windows client devices
- Enroll iOS and iPad OS devices
- Enroll macOS devices
For assistance, contact your assigned Microsoft Intune Technical Account Manager.
Step 3: Order eSIM profiles
For your first eSIM profile order, contact your emnify sales representative. They enable eSIM profile ordering in the Webshop for your account.
Once the eSIM is available in the Webshop, you can use the regular ordering of SIMs.
The emnify Webshop is currently in development. eSIM fulfillment isn’t yet automated and it may take 1-2 business days until the eSIM appears in your account.
Step 4: Activate your eSIM via Microsoft Intune
Before sending the activation command, make sure:
- Selected devices under the device list are ON, and
- Devices are connected to Wi-Fi or cellular
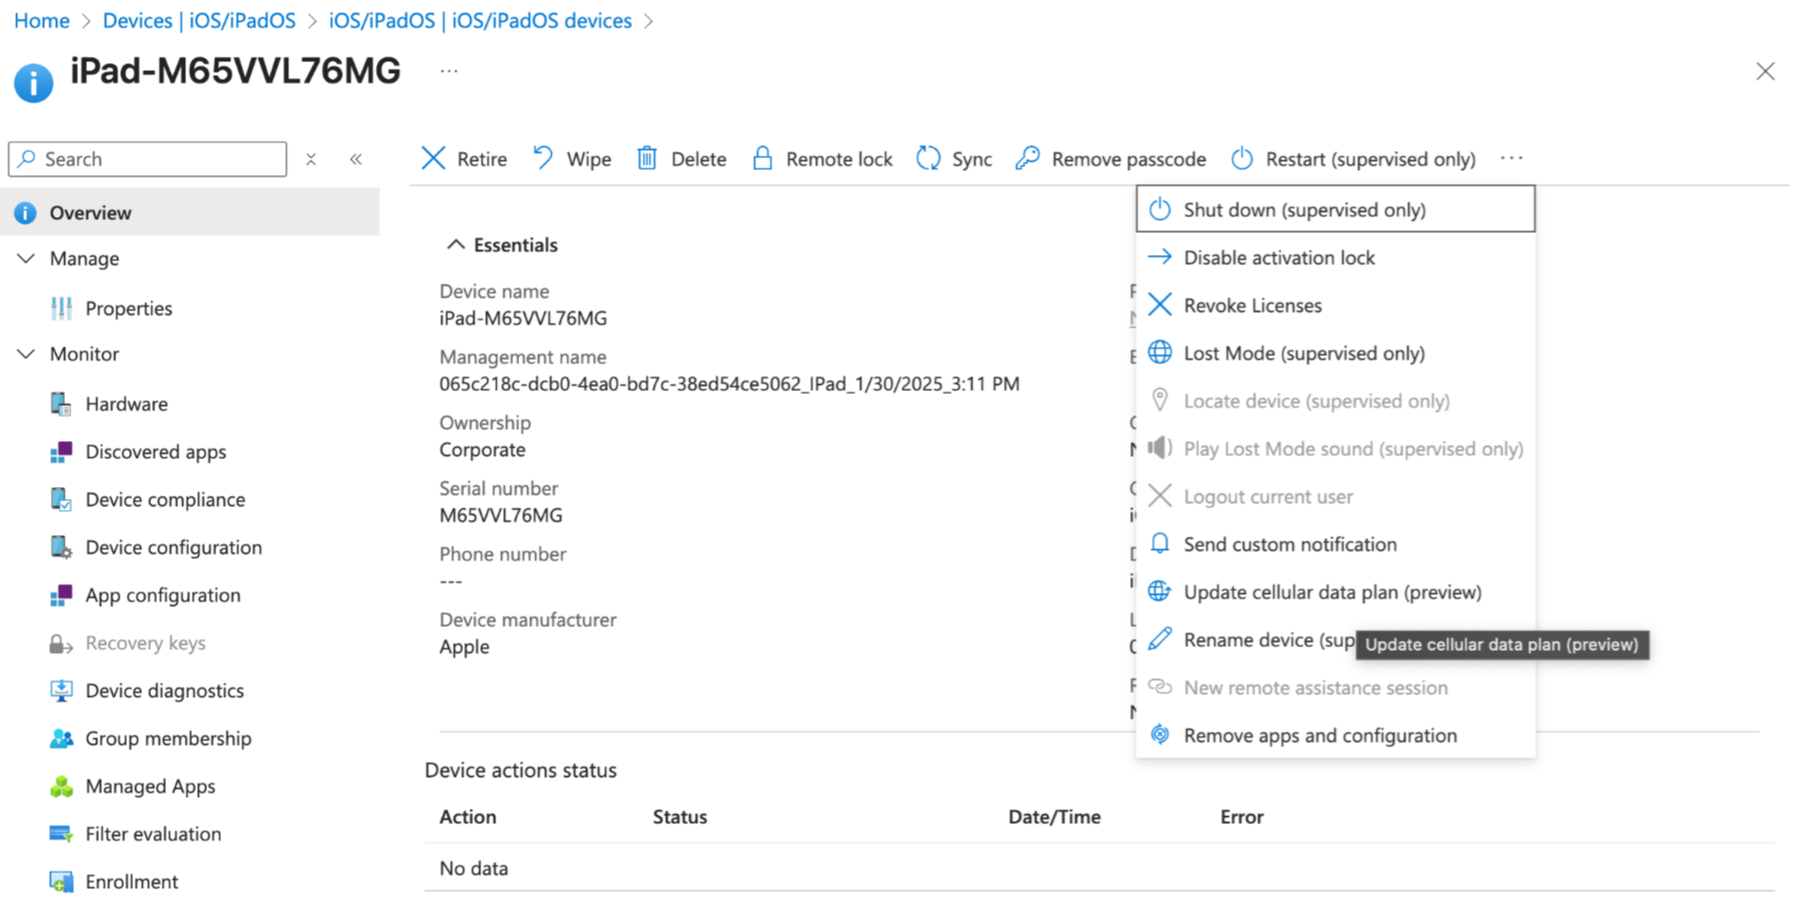
Microsoft Intune supports eSIM activation through its Update cellular data plan remote action for iOS and iPadOS devices. For more information, see Update cellular data plan for iOS/iPadOS devices.
Activate a single eSIM
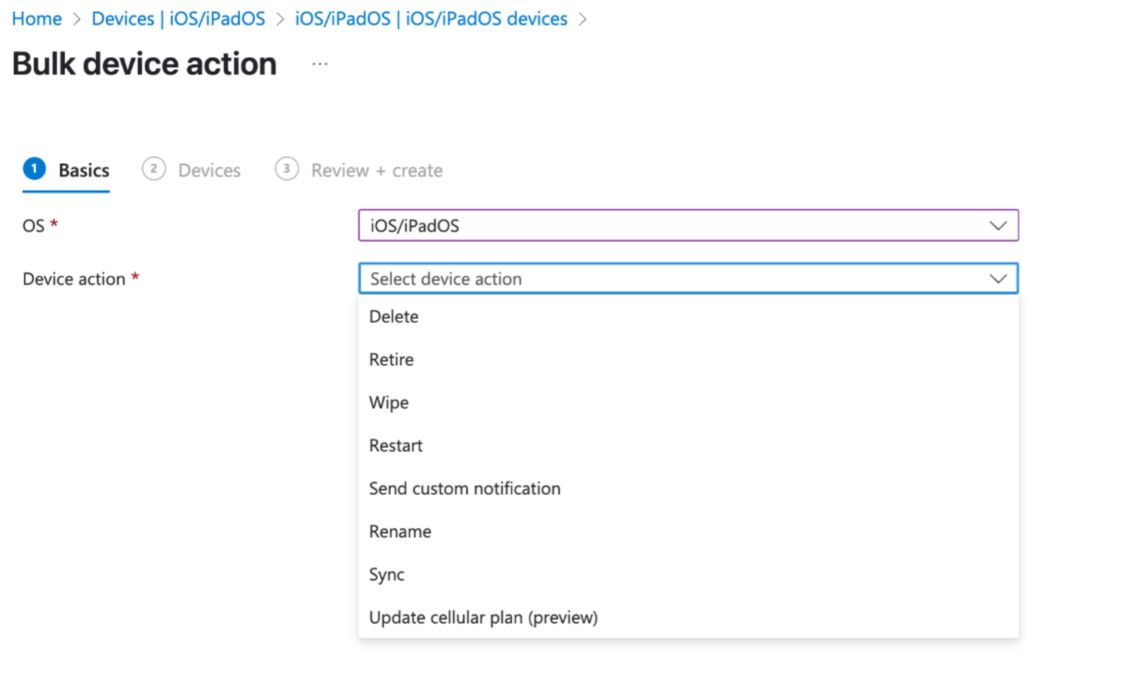
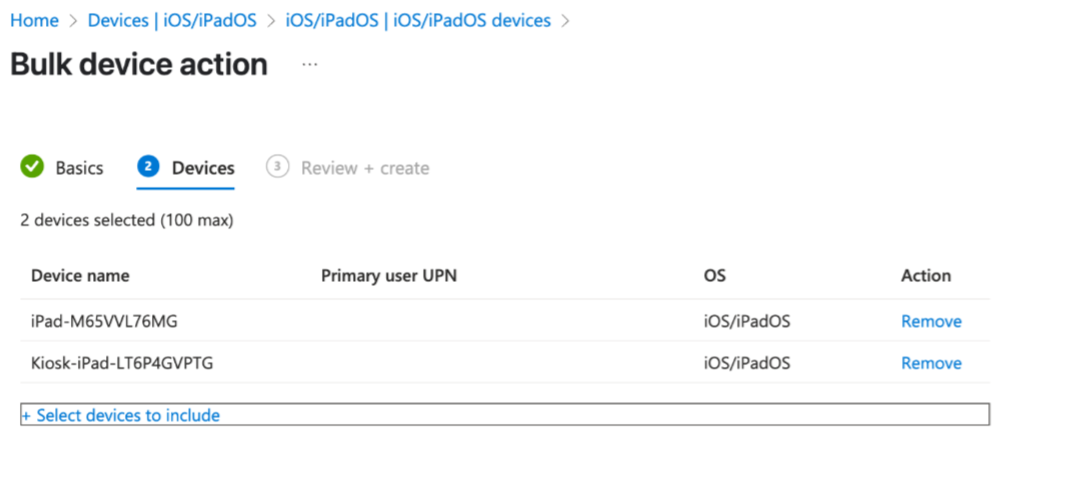
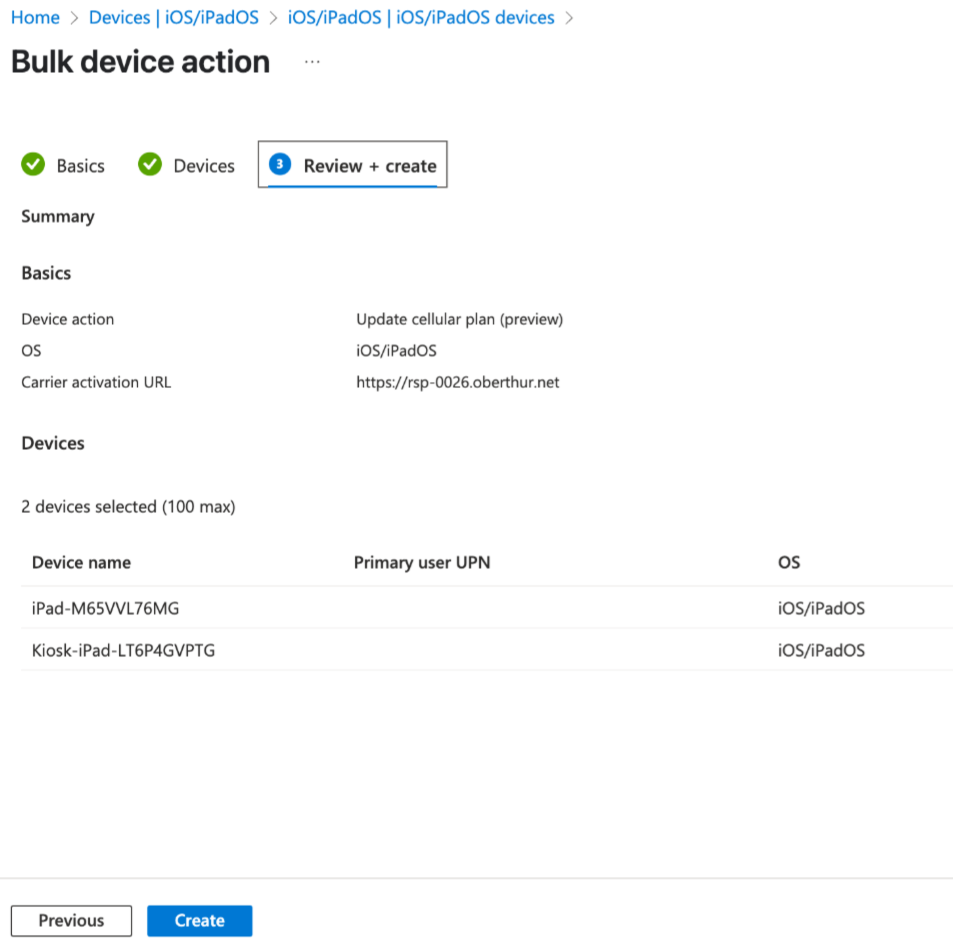
Activate multiple eSIMs in bulk

Enter the emnify SM-DP+ URL in Enter carrier activation server URL: https://rsp-3128.idemia.io
Then, click Next.

Step 5: Configure the APN on the device
After activation, the Access Point Name (APN) must be set to em.
Once the APN is set, the device establishes data connection. You can verify by browsing the internet or streaming videos.