Deploy the emnify Consumer eSIM Global on Jamf Pro
This guide explains how to deploy and activate the emnify Consumer eSIM Global using Jamf Pro Mobile Device Management (MDM). It includes enrolling Apple devices, ordering eSIM profiles, activating them remotely through Jamf Pro, and configuring the APN settings.
This process is tailored to enterprise environments using Apple devices with Jamf Pro and Apple Business Manager.
Step 1: Enroll devices in Jamf Pro
There are two supported methods for enrolling Apple devices into Jamf Pro for mass deployment:
- Automated Device Enrollment (ADE) via Apple Business Manager
Devices pre-registered in Apple Business Manager are automatically assigned to Jamf Pro during the initial setup.
This zero-touch method ensures that upon first power-on, the device contacts Jamf and configures itself. - Enrollment using Apple Configurator
Utilize the Apple Configurator (available on macOS) to manually enroll multiple iPads via USB.
This approach is efficient for large-scale configuration and doesn’t rely on Wi-Fi during initial setup.
Once enrolled, Jamf Pro allows remote management including configuration profiles, apps, and commands like Reset cellular plan to trigger eSIM activation.
Some helpful resources:
- Apple Business Manager Guide
- Deploying iOS Devices Using Apple Configurator 2 and Jamf Pro
- Automated Device Enrollment Integration
Step 2: Order eSIM profiles
For your first eSIM profile order, contact your emnify sales representative. They enable eSIM profile ordering in the Webshop for your account.
Once the eSIM is available in the Webshop, you can use the regular ordering of SIMs.
The emnify Webshop is currently in development. eSIM fulfillment isn’t yet automated and it may take 1-2 business days until the eSIM appears in your account.
Step 3: Activate your eSIMs with Jamf Pro
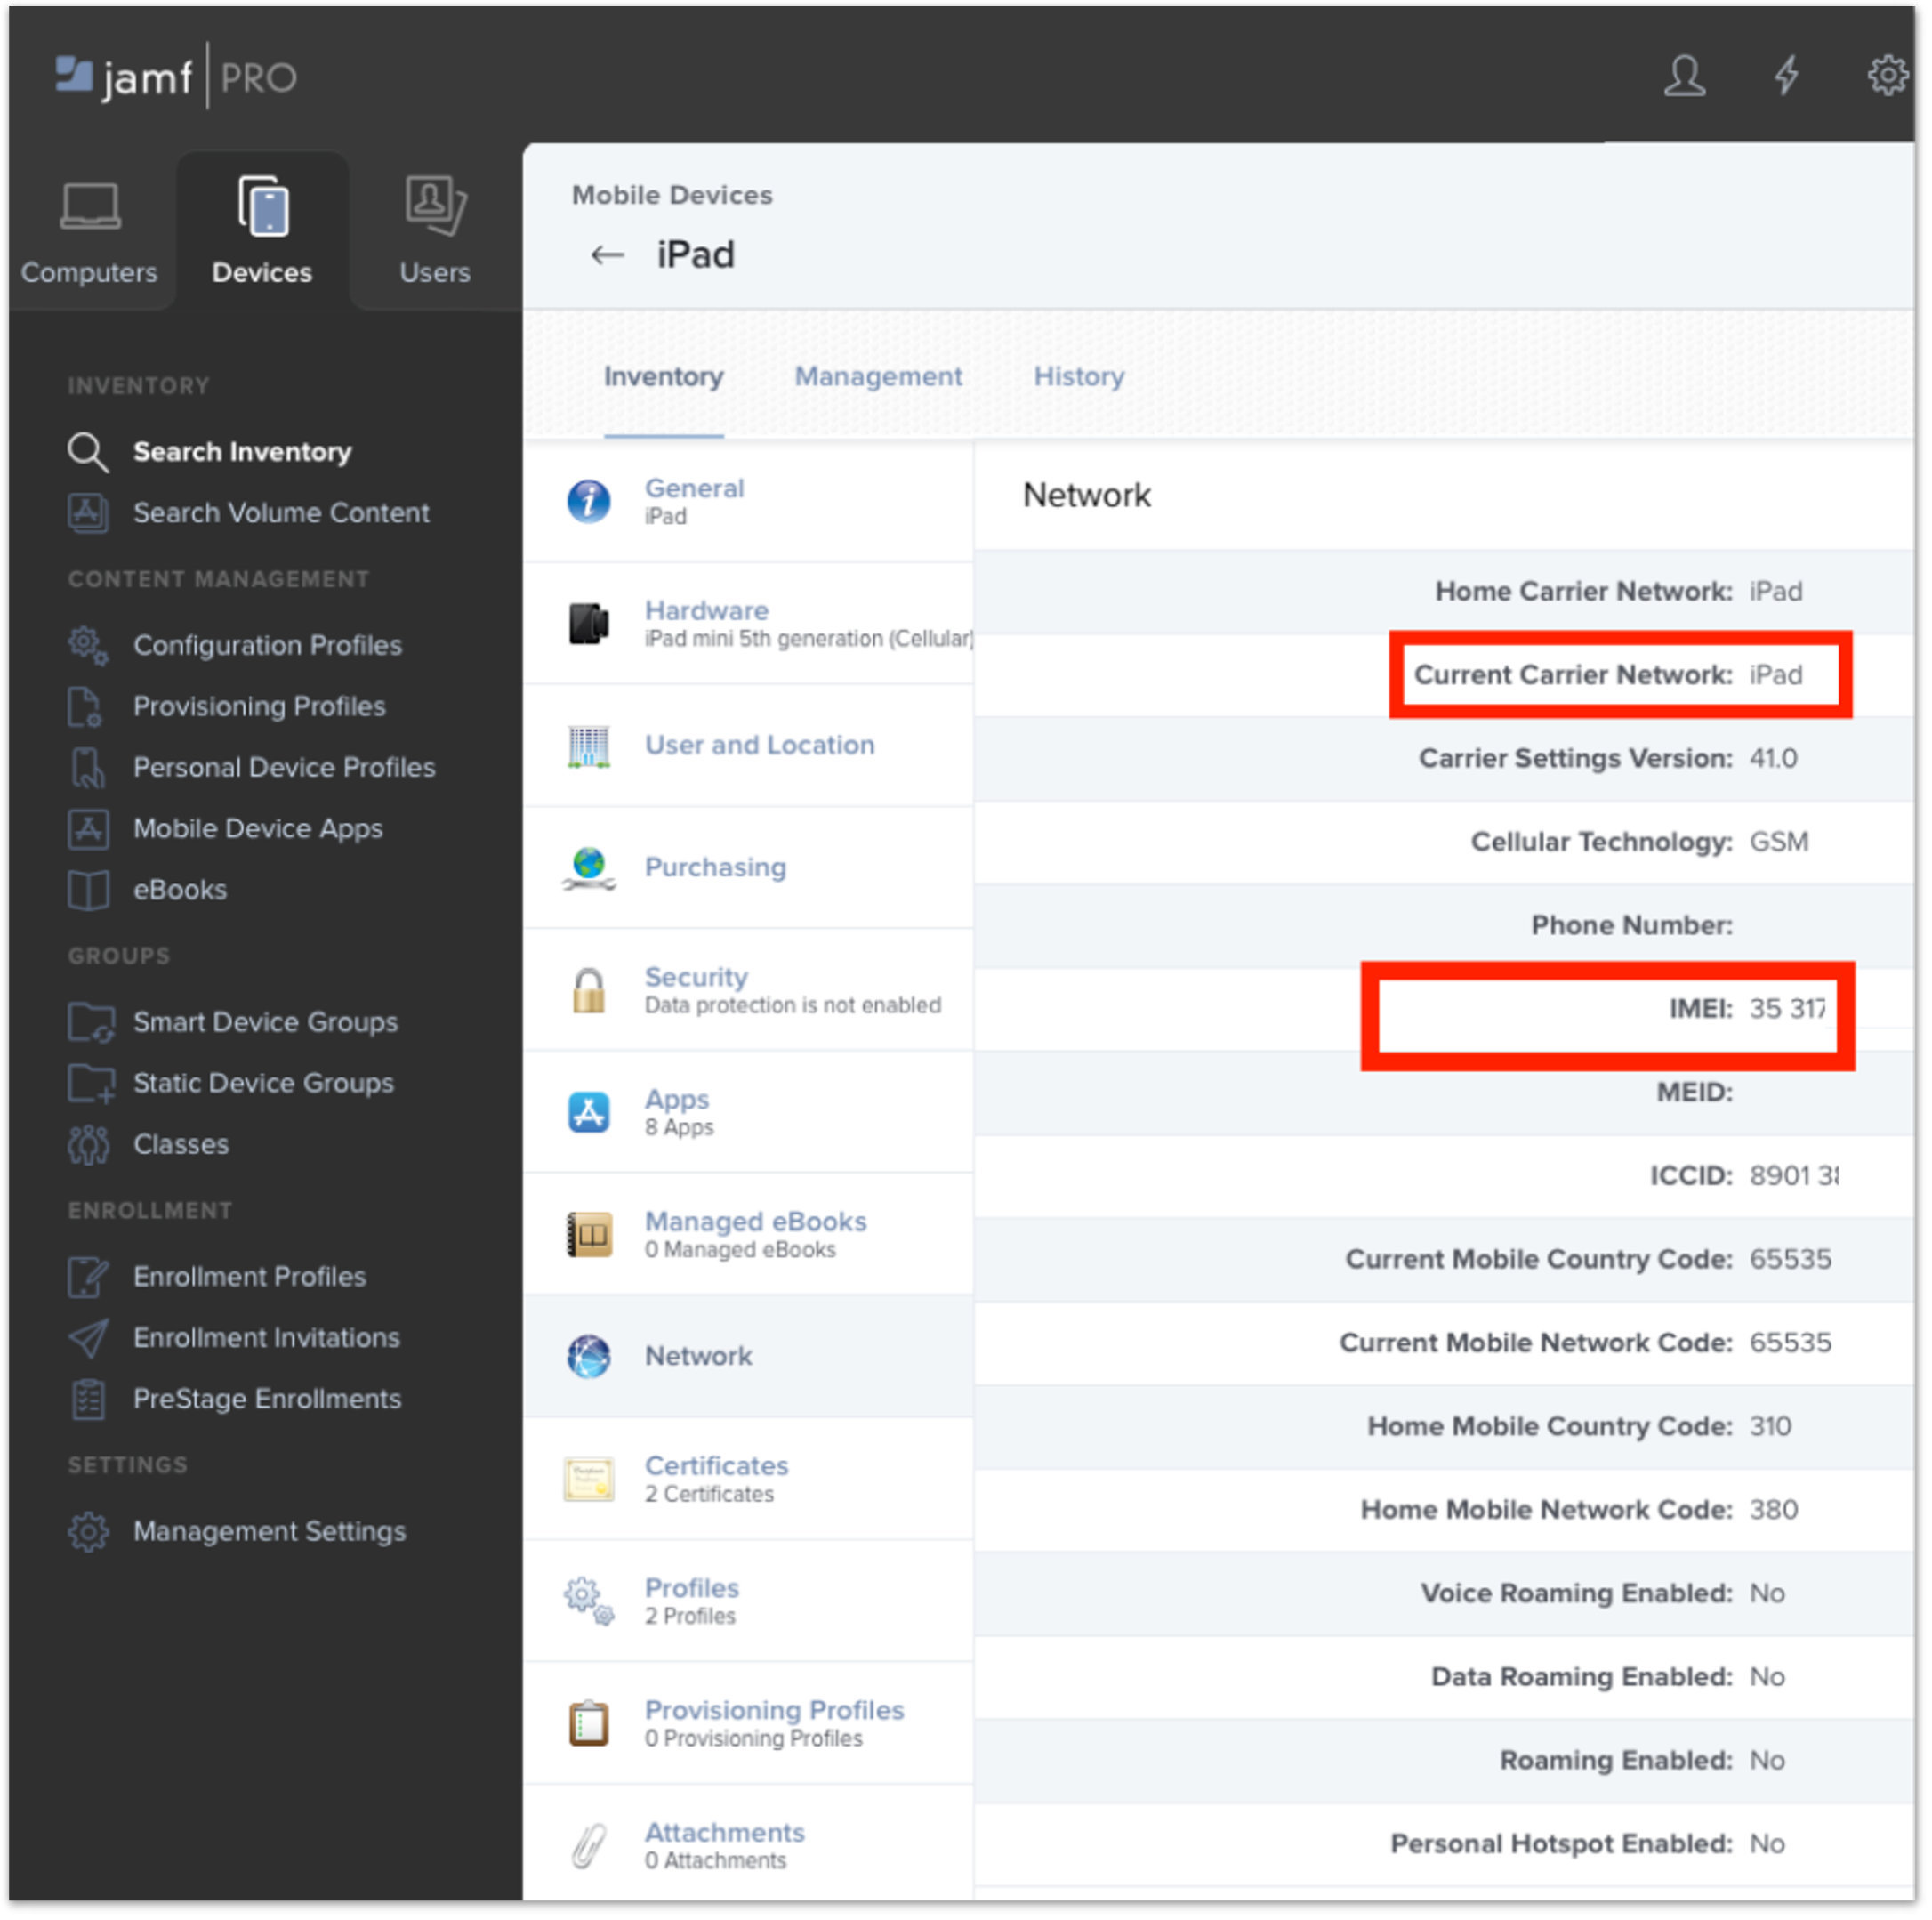
Verify the device’s network details
After enrolling the device:
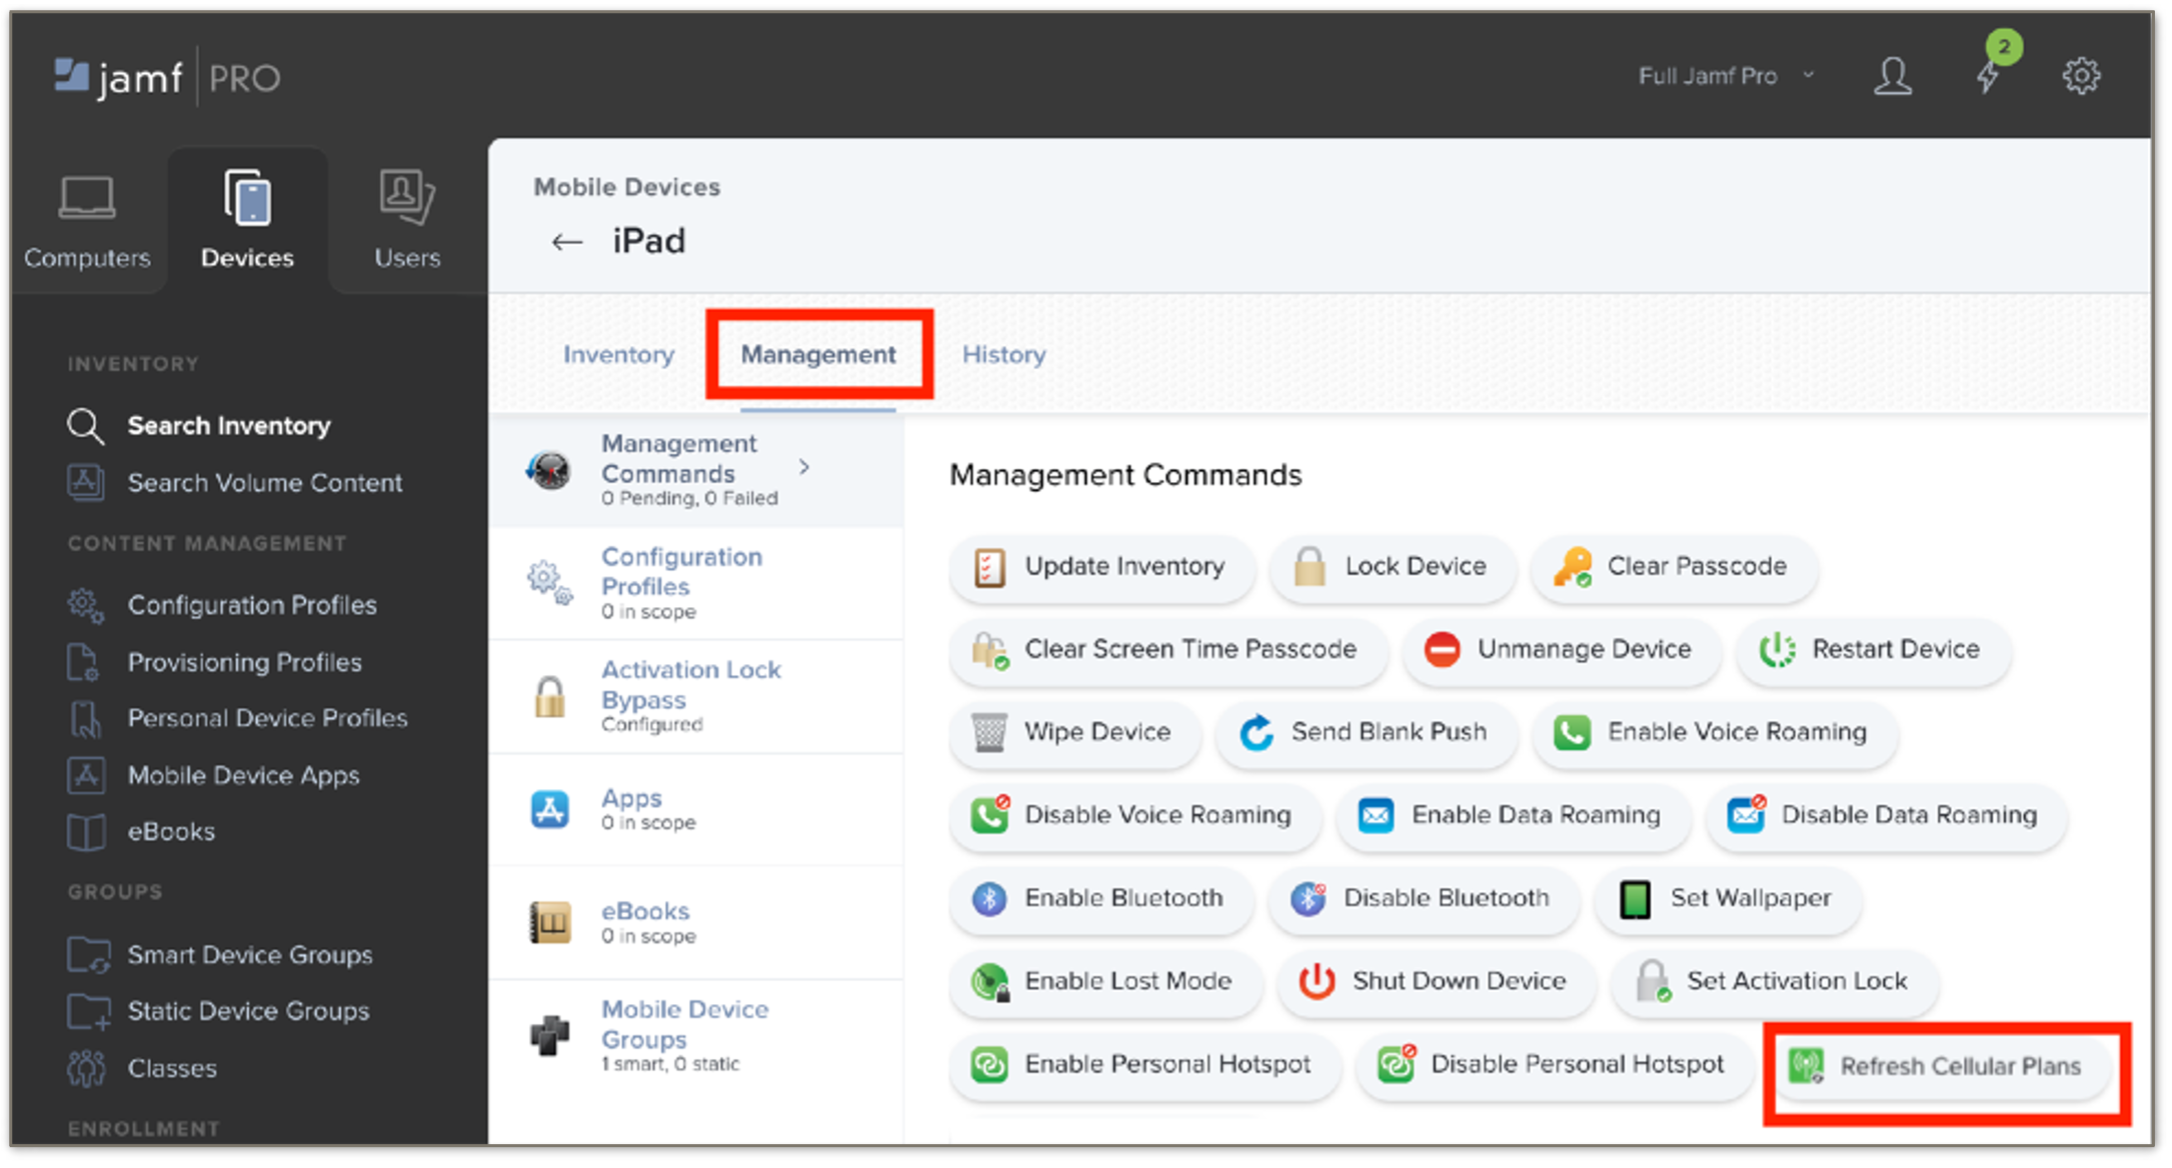
Activate cellular data services
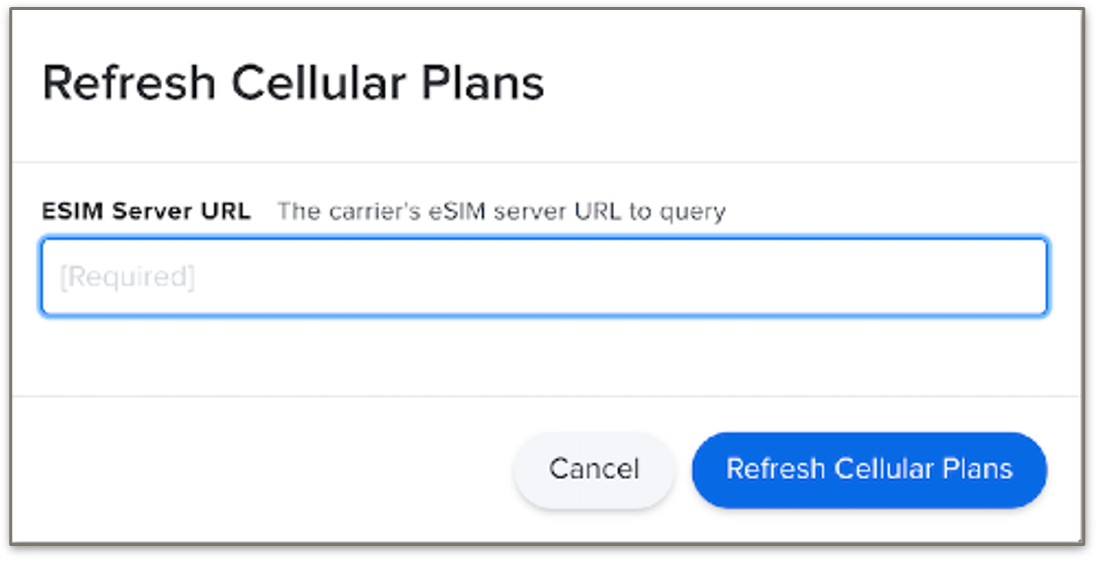
Upon successful activation, cellular connectivity is established, indicated by signal bars on the device.
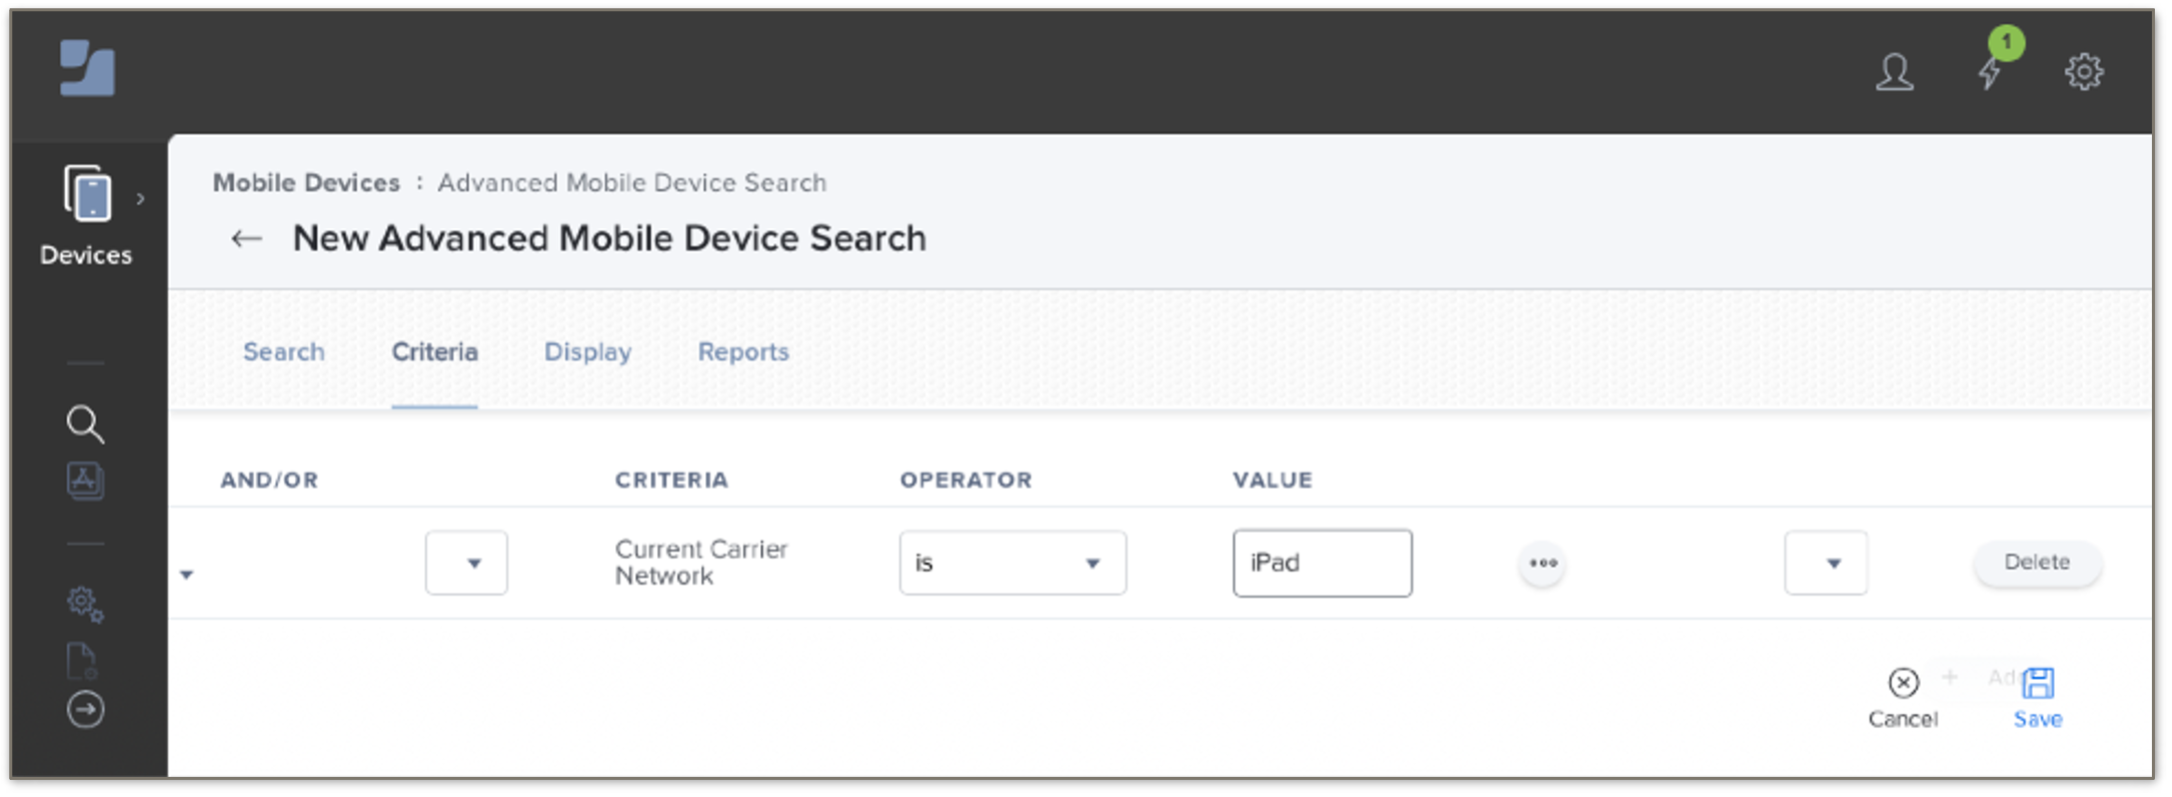
Step 4: Identify inactive devices

In the Criteria tab, filter for devices where the Current Network Carrier field is set to iPad. This indicates inactive devices.

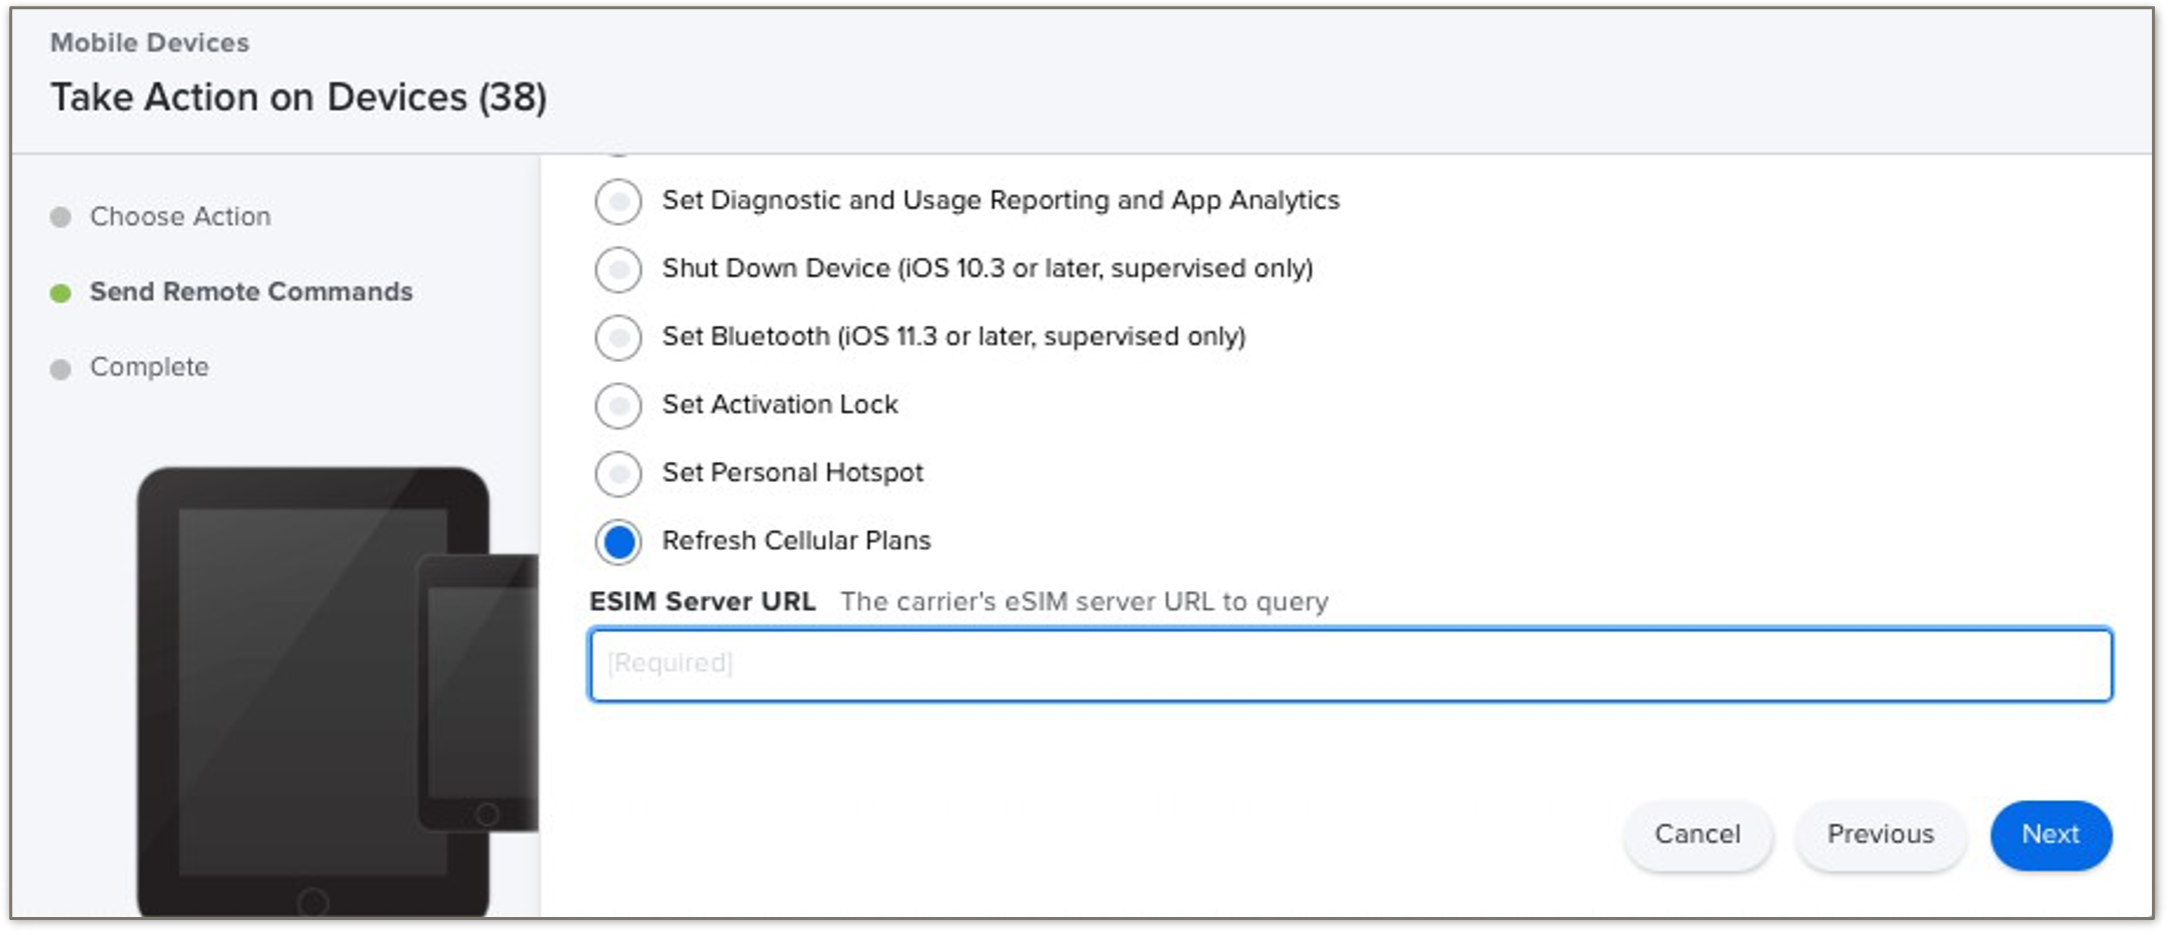
Step 5: Activate cell plans in bulk

Step 6: Configure the APN on the device
After activation, the Access Point Name (APN) must be set to em.
You can configure the APN:
- Manually on the device, or
- Remotely via Jamf