

Manage satellite connectivity
Identify satellite connections and usage
Connected Devices lets you identify which devices are attached to a satellite non-terrestrial network (NTN). This information is available in the Connectivity Status column, which shows NB-IoT (GEO) when you establish a connection.
You can also review information about your satellite SIMs and data usage in Reports under Satellite Report.
Show satellite usage column in Connected Devices
Satellite usage is displayed separately from terrestrial cellular network usage. This column doesn’t show by default, so follow these steps reveal it:

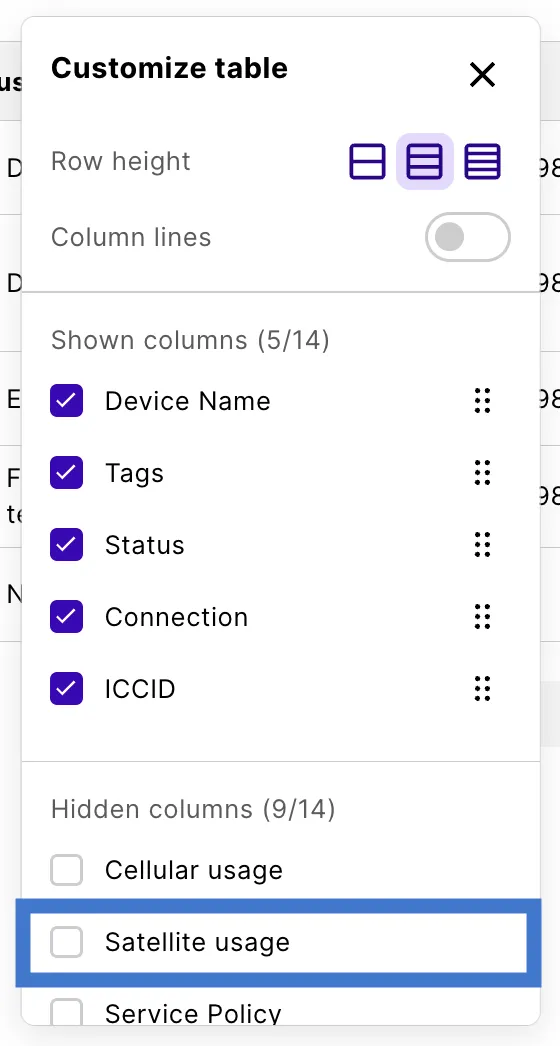
Changes save automatically.

If you ever want to revert to the original layout, select Reset settings.
Filter satellite capable devices
Filters allow you to query devices based on satellite capability.
The table now shows devices attached to satellite capable SIMs. Your filtered value is also saved in the URL as a query parameter.

To remove a filter or value, click the corresponding X.
View connection details
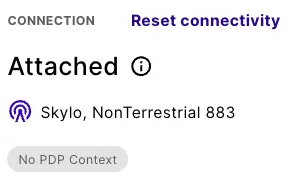
All device information is available in device details:

Allow or block satellite data
You can permit or block your devices’ satellite data usage in the Device Policies section of the emnify Portal.
In Service Policies, choose the policy you want to update and expand the policy details.
Limit monthly satellite data usage
To protect your monthly data plan allowance from being drained by abusive devices, you can configure a satellite data limit for your devices in Device Policies on the emnify Portal.
The satellite limit restricts the monthly consumption per device on the selected service policy and helps preserve your data allowance from unexpected losses. Your limit is valid for the current month and resets to 0 on the first day of each month.
If a service policy has a cellular or satellite limit set, all data is blocked once either limit is reached. For example, suppose you set a cellular data limit of 100 MB and a satellite data limit of 10 KB, and then your device reaches the satellite limit. In that case, your device is blocked from using both satellite and cellular data for the rest of the month.
Set limits
In Service Policies, choose the policy you want to update and expand the policy details.
In Data, ensure the Devices may use data toggle is switched on and you’ve selected the correct radio access technology (RAT) types. Then, click Edit next to Satellite data limit.
Fill in your Satellite data limit details as follows:
- In the Manage monthly data limit field, enter a non-negative number with up to two decimal places and select a unit.
- In the Warning event threshold field, enter a number for the percentage. You see an event after your devices reach this percentage.
Turn off limits
You should see Set limit as the value for Satellite data limit in the policy details.
Don’t switch off the Devices may use data toggle as this completely turns off data connectivity and takes your devices offline.
Allow or block connections to specific satellite networks
You can allow or block connections to specific satellite networks using the coverage policy assigned to your device. This is done in the Device Policies section of the emnify Portal.
In Coverage Policies, choose the policy you want to update and expand the policy details.
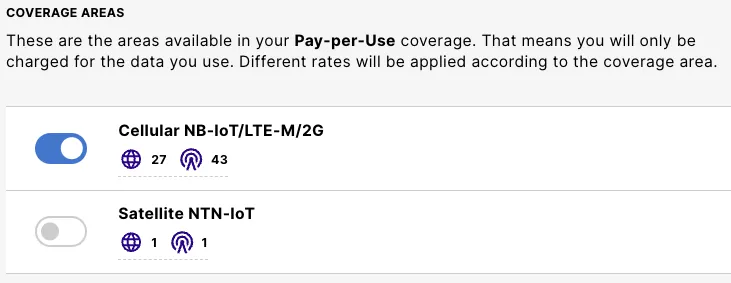
Changes save automatically, but your devices may take up to 24 hours to use the new settings due to caching. Be sure to reset the connectivity of devices on this service policy so that the change takes effect sooner.