Activation code
Activation codes provide a straightforward way to install your eSIM directly through your device settings. After retrieving your activation code, you can manually enter it to complete the setup.
This guide applies to both Consumer eSIM and Advanced eSIM profiles.
Step 1: Check device compatibility
Step 2: Order your eSIM profile
In the emnify Portal, open the SIM Shop and order your eSIM profiles.
You must create a virtual representation of each device in the portal before or after ordering. For instructions, see Create a device.
Step 3: Download your activation codes
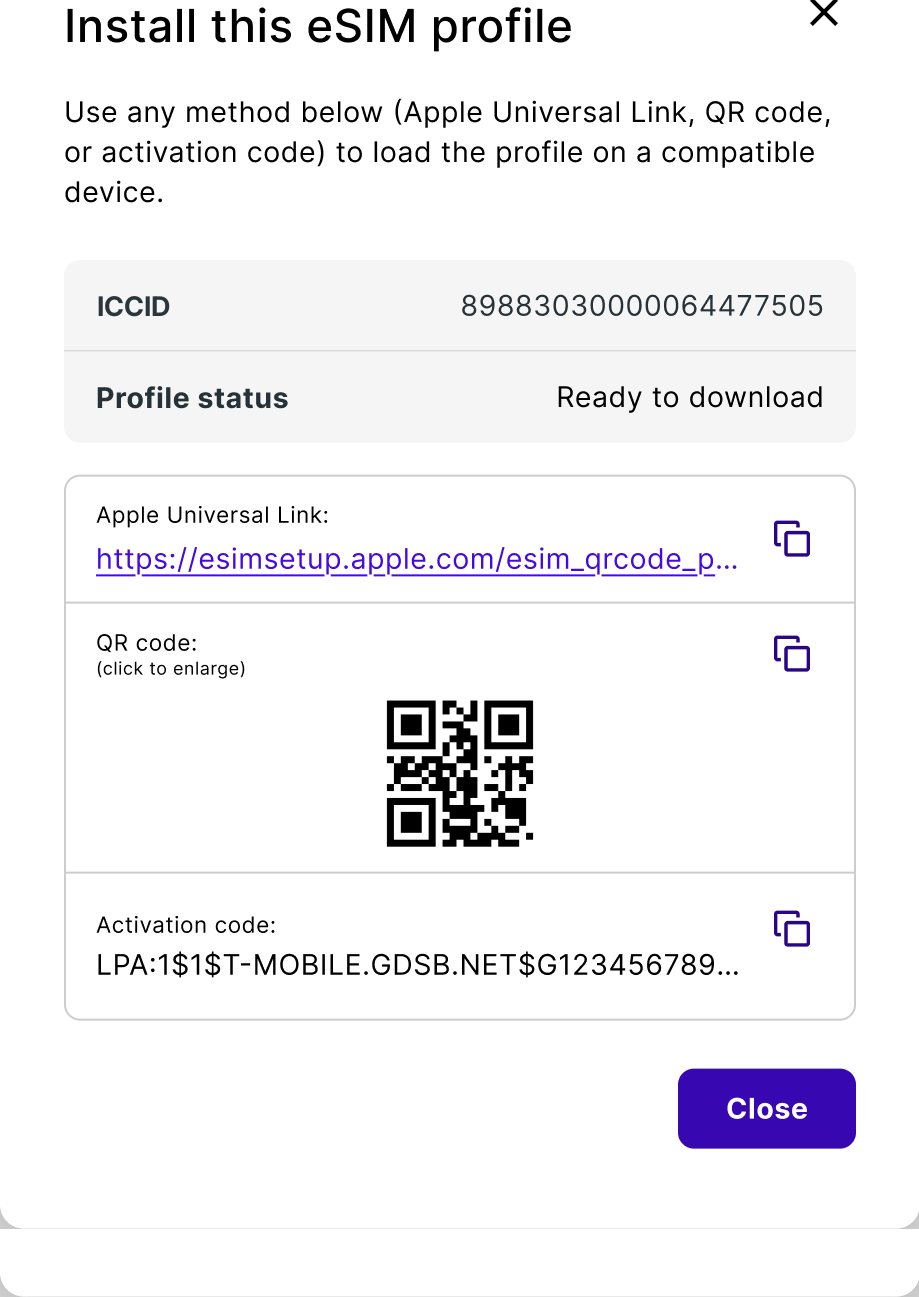
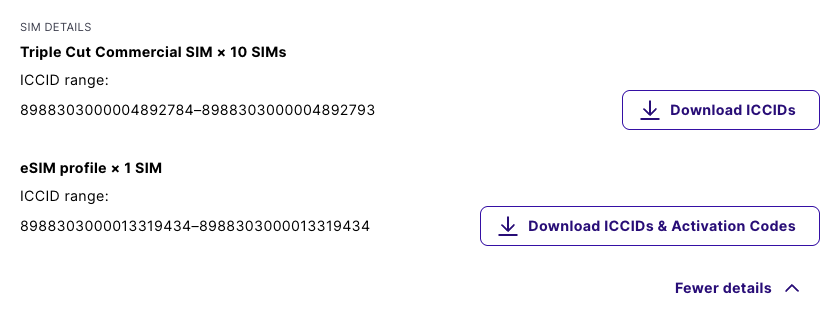
Once your order status changes to Delivered, download a CSV with the activation credentials for each profile.
In the emnify Portal, go to the Orders page and open the relevant order.
This download is only available when the order status is Delivered.
Step 4: Activate your eSIM
Enter the activation code in your device.
iPhone (iOS 13 or later)
Samsung (Android 10 or later)
RUT241 (Teltonika industrial 4G eSIM router)
Set up your device by following the RUT241 Industrial Cellular Router Quick Start Guide. For more detailed information, refer to the QSG RUT241 - Teltonika Networks Wiki.
Download and activate your eSIM using this configuration example: eSIM configuration example.
Step 5: Configure the APN
After activation, the Access Point Name (APN) must be set to em.
For configuration instructions by device type, see Configure the APN.
For RUT241 APN configuration, see Multi-APN - Teltonika Networks Wiki.
Once the APN is set, the device establishes data connection. You can verify by browsing the internet or streaming videos.
Retrieve an activation code for a specific device
If you need the activation code for a single device (for example, to re-download a profile), you can find it directly in the device details.
In Connected Devices, find and click the device.