Set up SSO with Microsoft Active Directory
This guide walks through enabling single sign-on (SSO), so your Workspace can access the emnify Portal using your Microsoft Business credentials.
Prerequisites
- An Azure Subscription with an Active Directory license
- An emnify account using the same email address as the one used to sign in to Azure
If your email address used in the emnify Portal differs from the one used to log in to Azure, this setup won’t work. You can verify your email in User Settings.
Instead, add an additional user with the Administrator role. To do this, go to Workspace settings > Users.
SSO with Microsoft
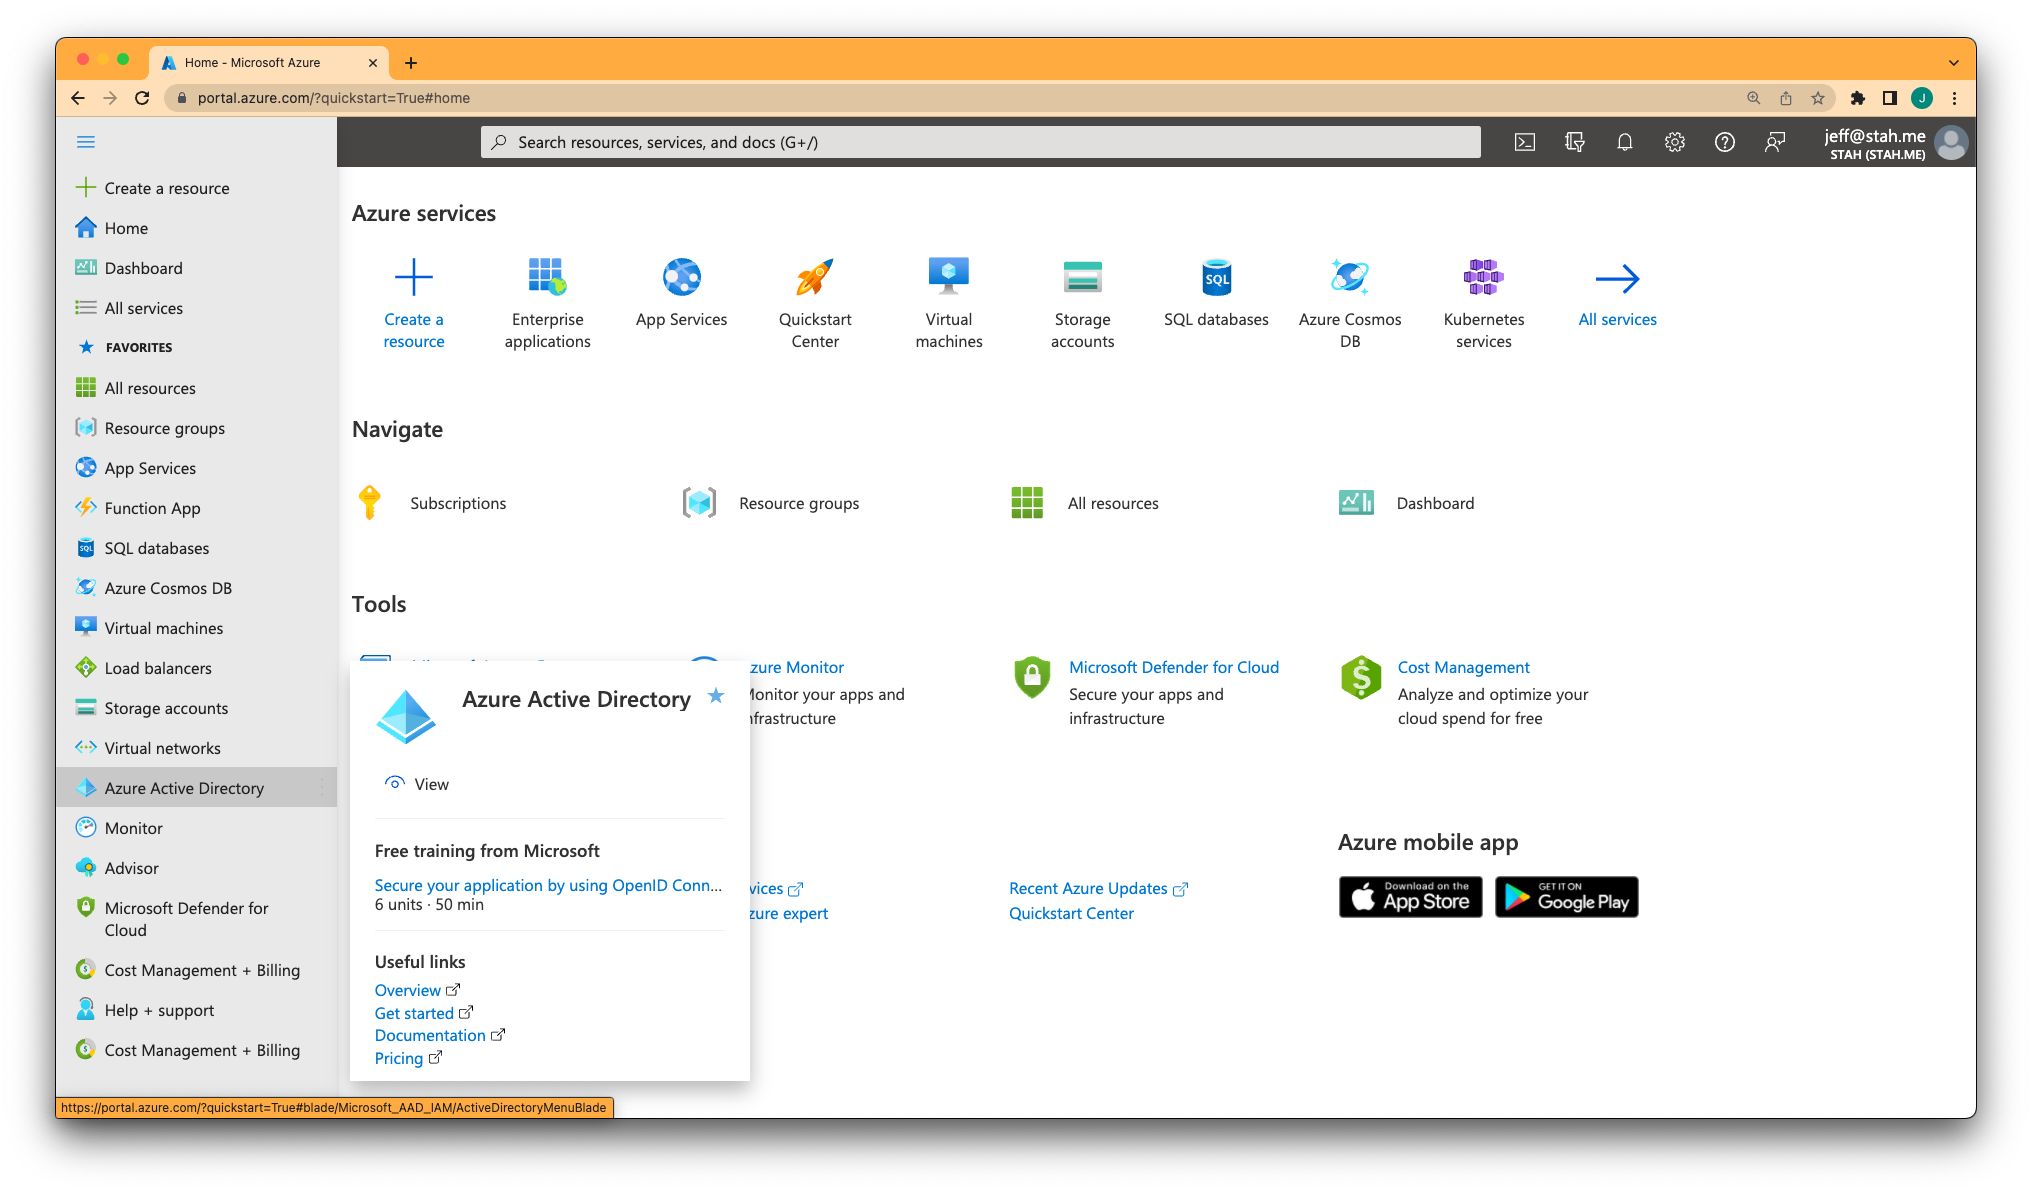
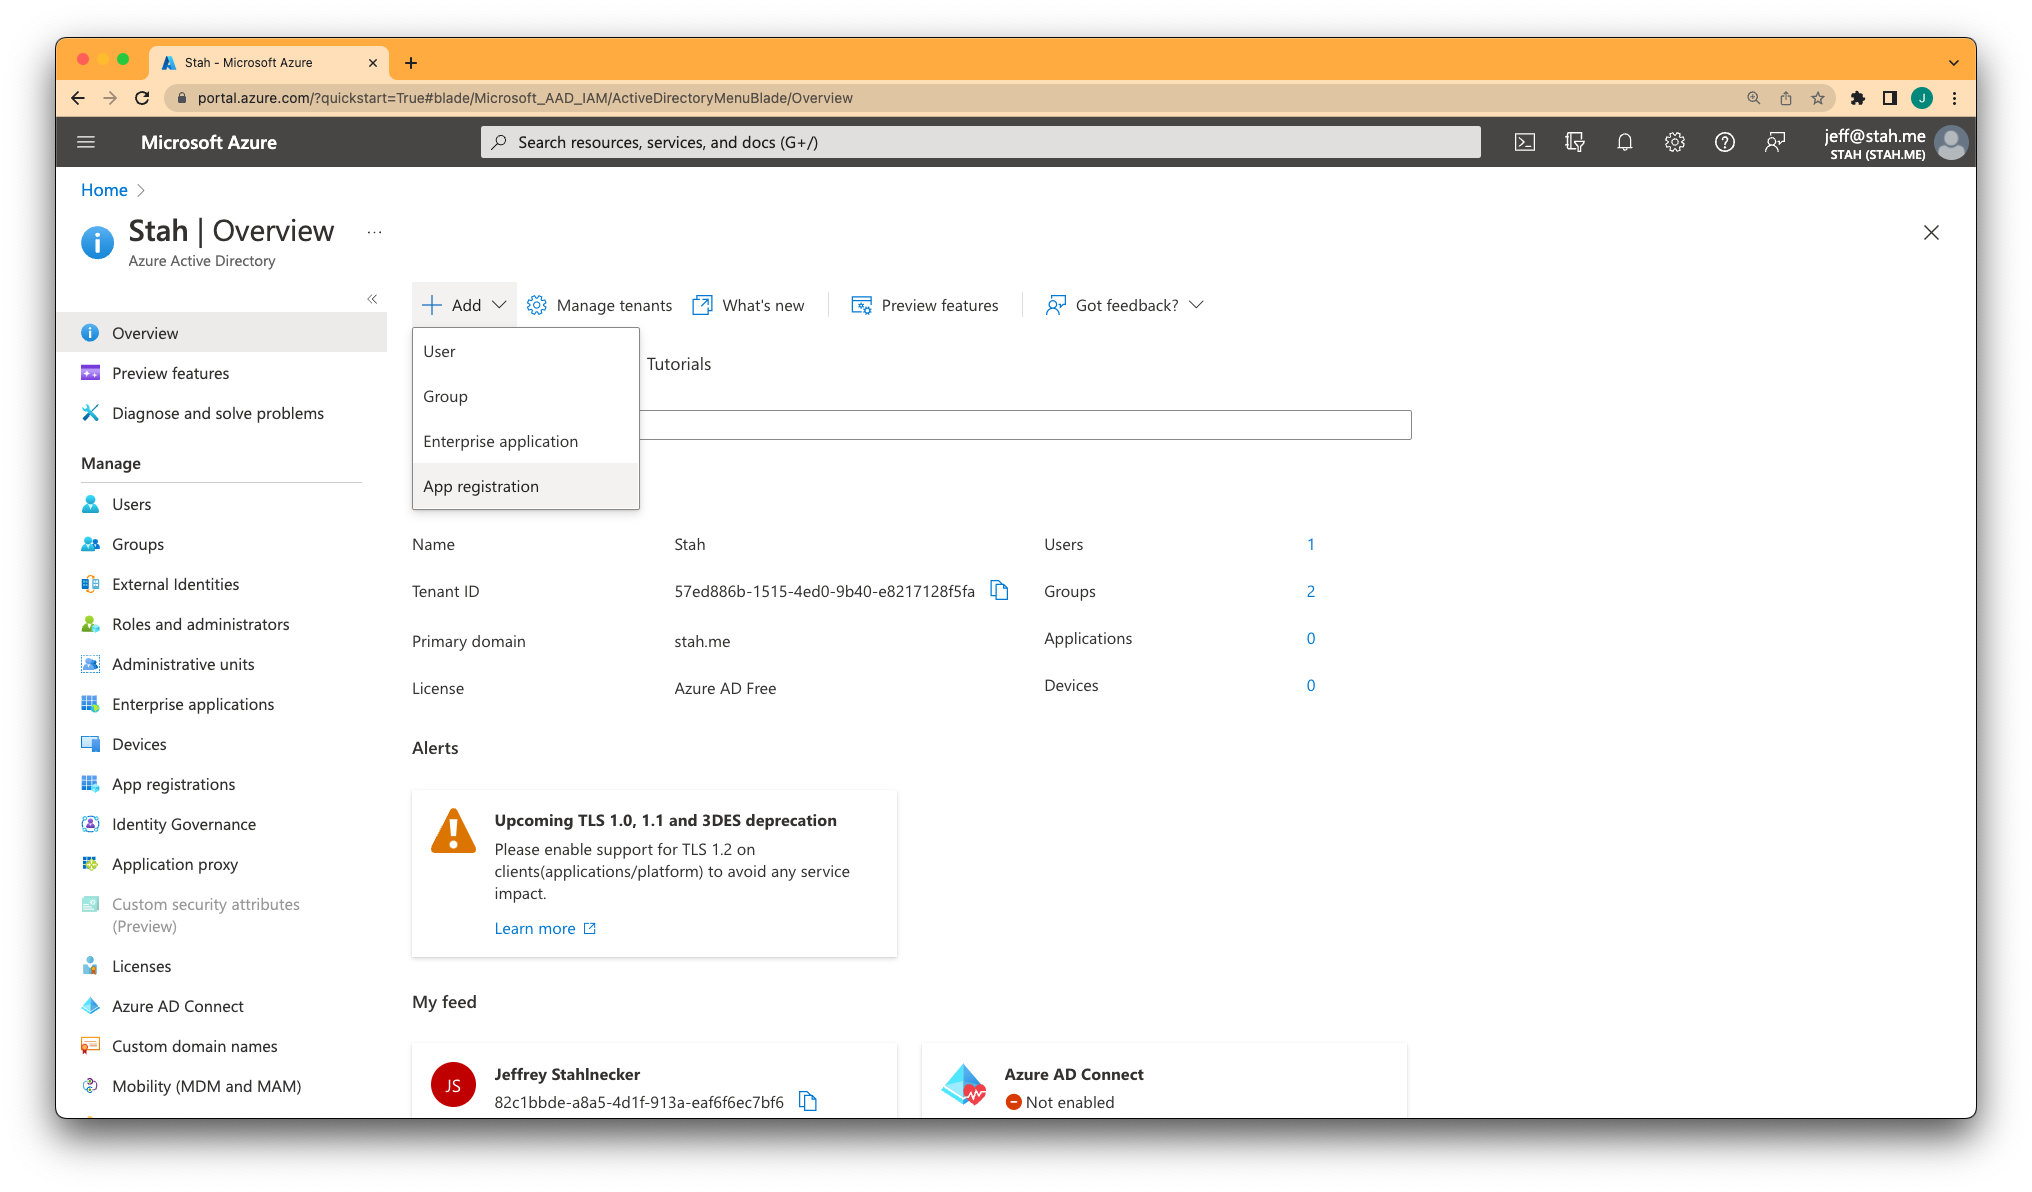
Log in to Azure and navigate to Azure Active Directory in the left sidebar.
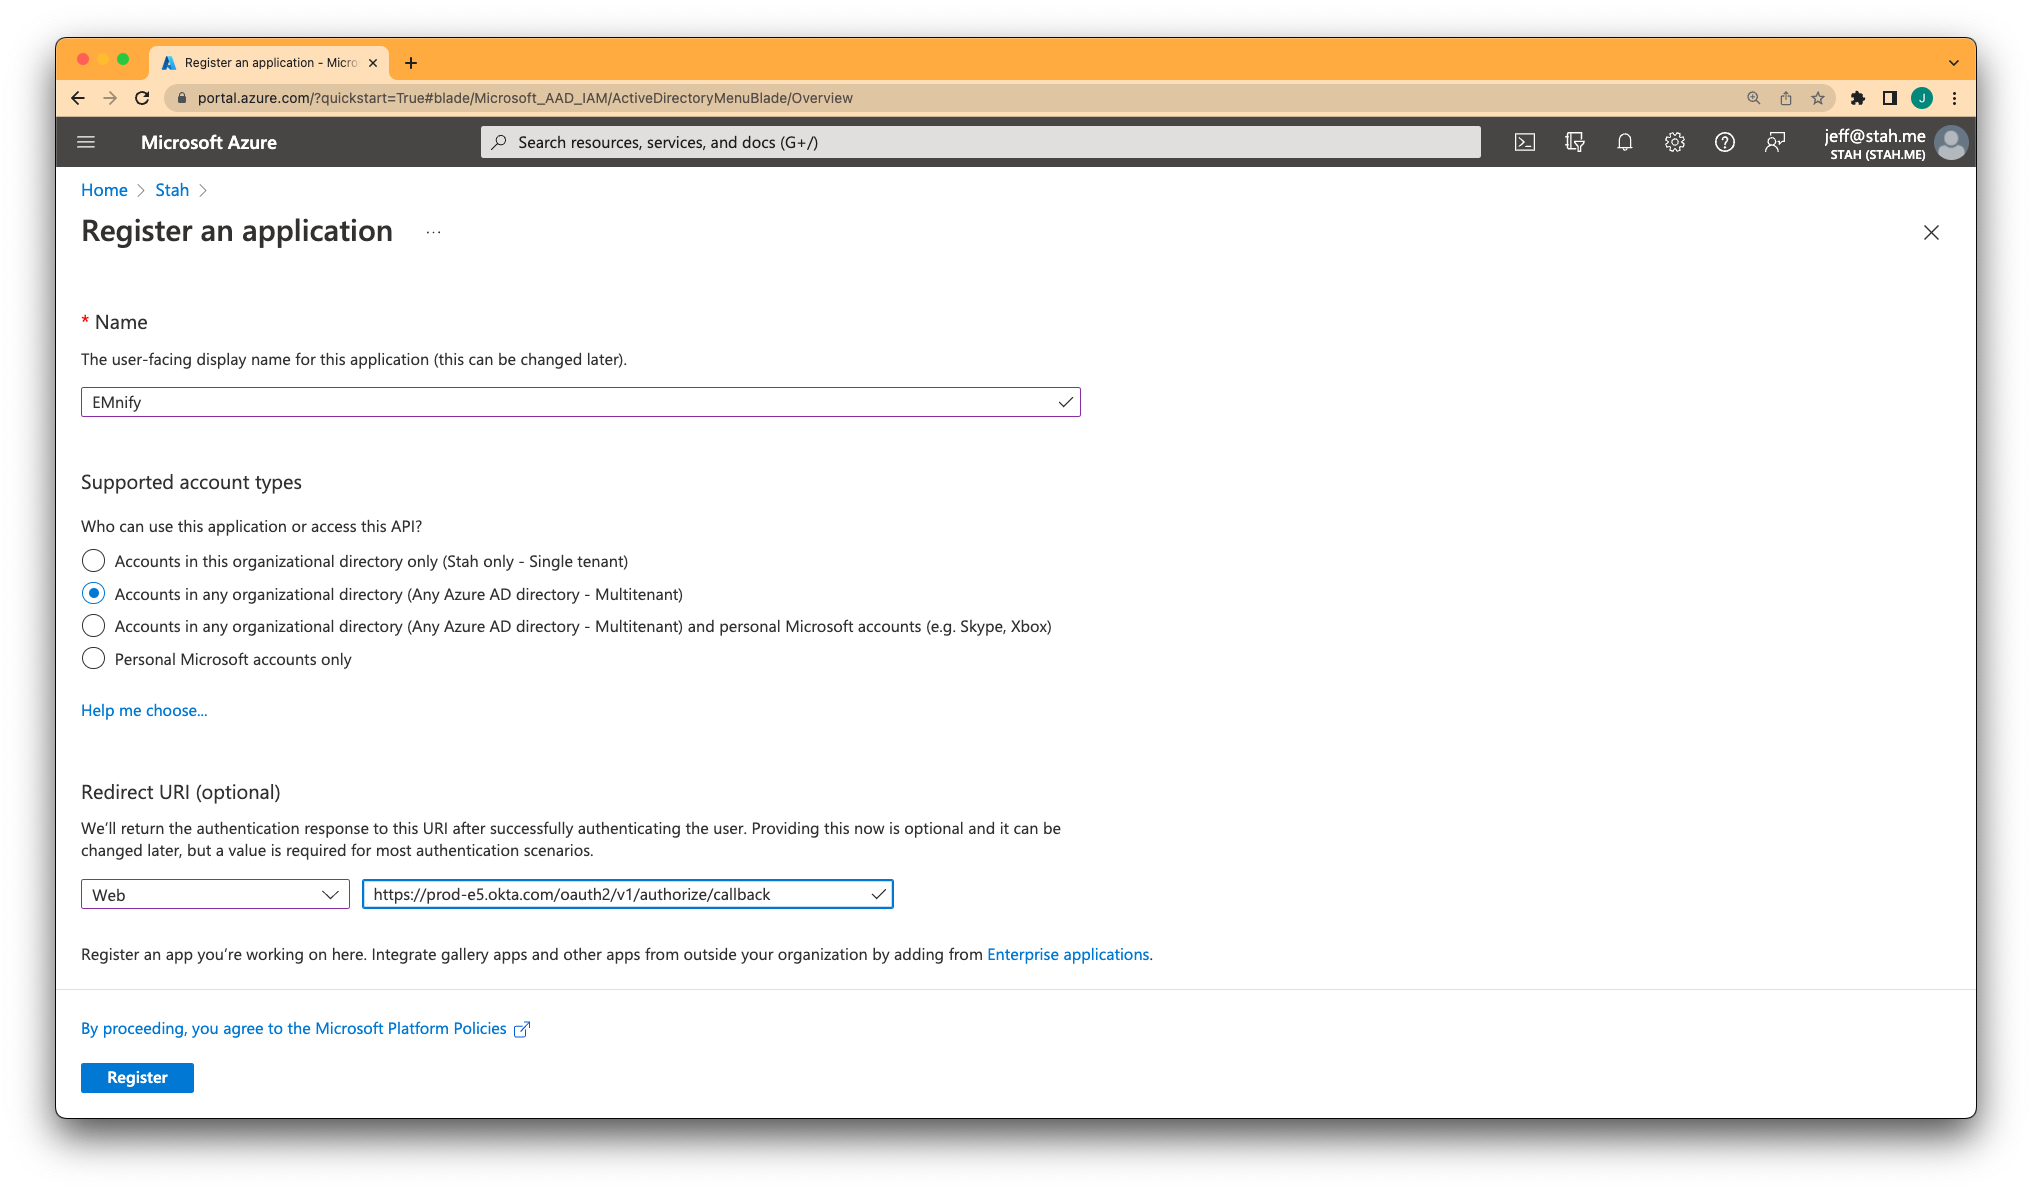
At the top of the page, click + Add and then App Registration. From there:
- Give your app a Name (for example, “emnify”).
- The Supported Account Types should be
Multitenant. This requests a consent screen on IDP verification in the Portal later. - Set the Redirect URI to type
Webwith the value:https://prod-e5.okta.com/oauth2/v1/authorize/callback
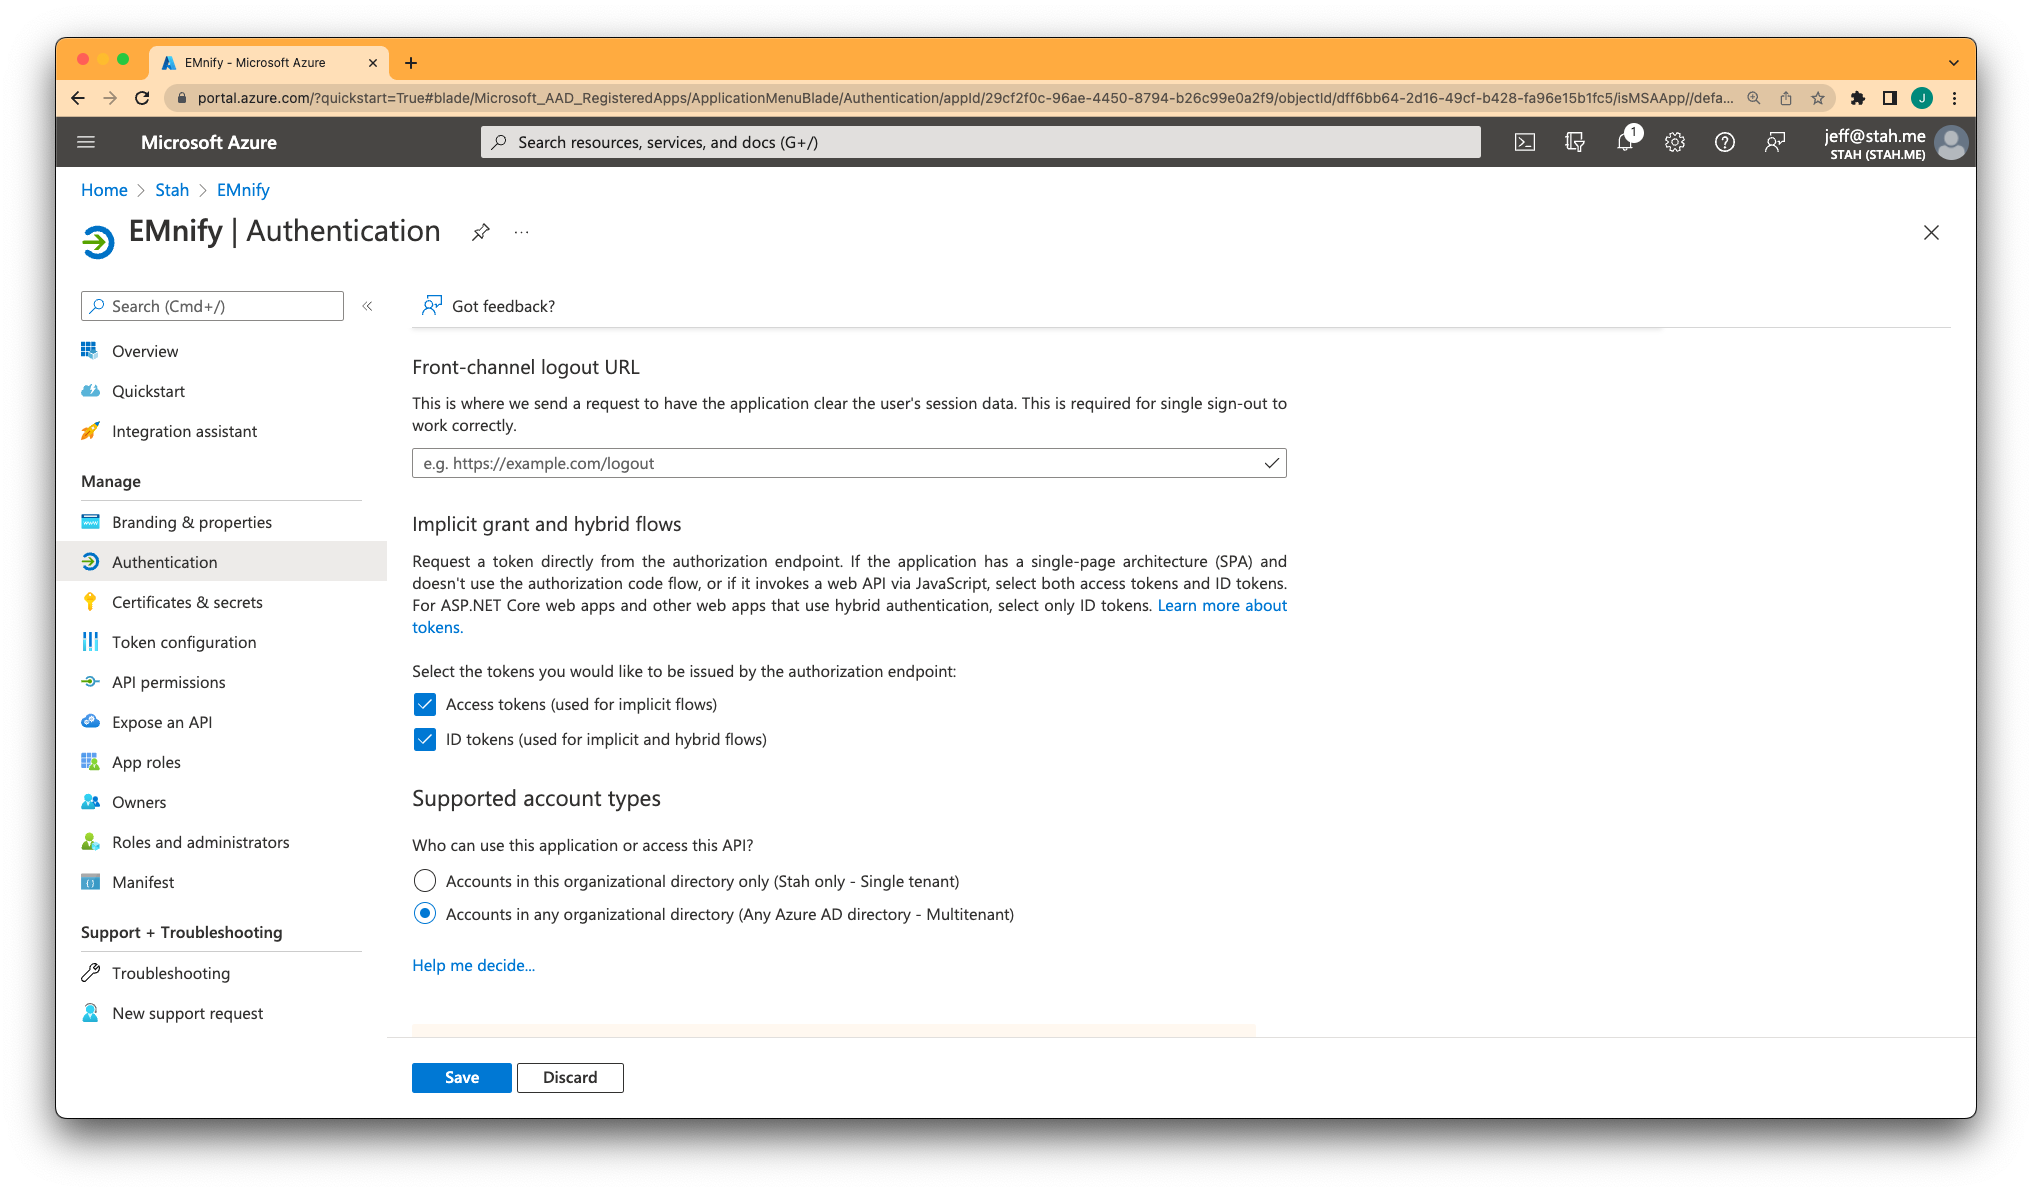
Navigate to Authentication in the left sidebar, and in the section Implicit grand and hybrid flows, enable Access tokens and ID tokens.
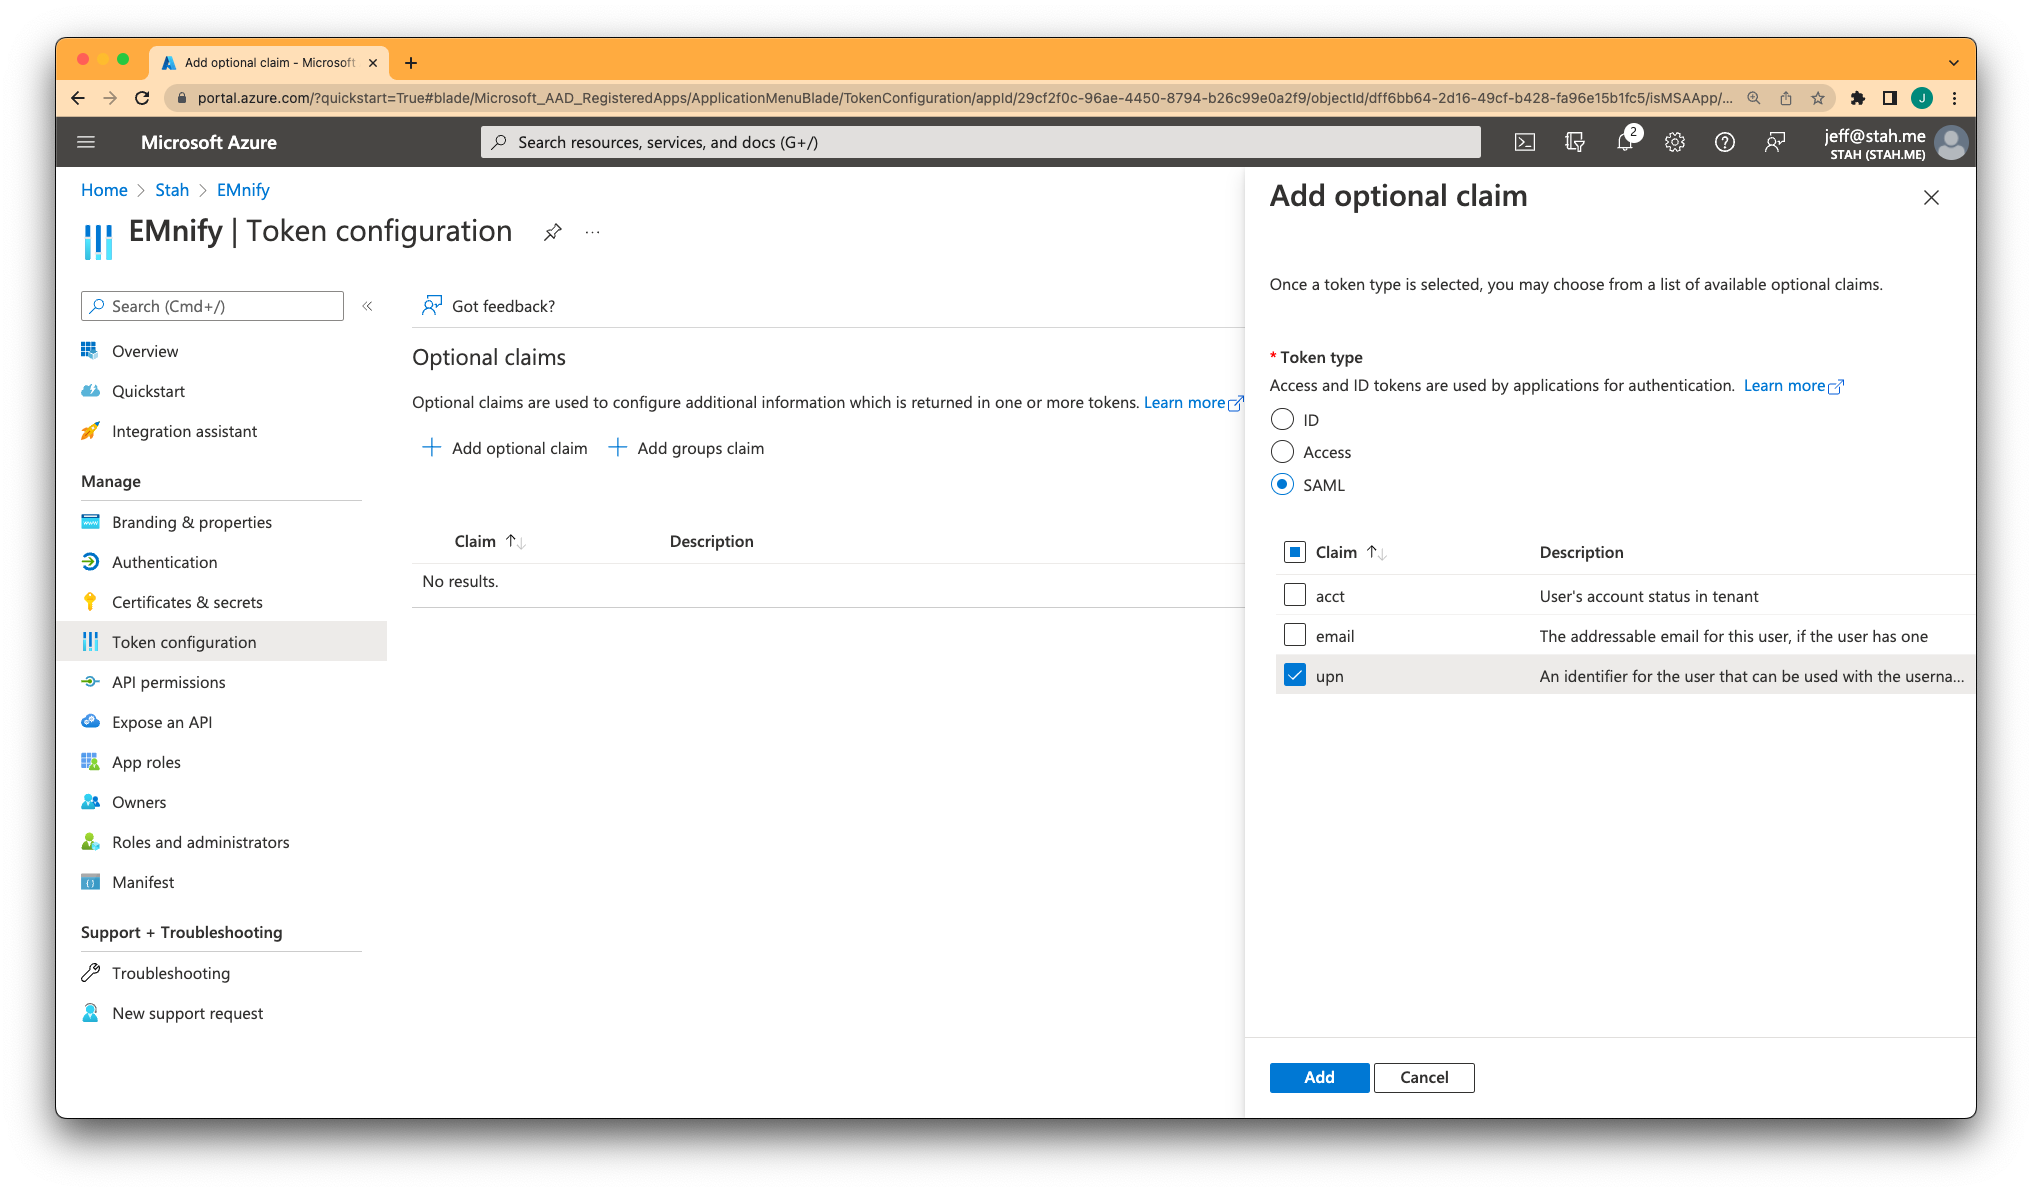
Go to Token configuration in the left sidebar, click Add optional claim, and under SAML, enable the upn claim.
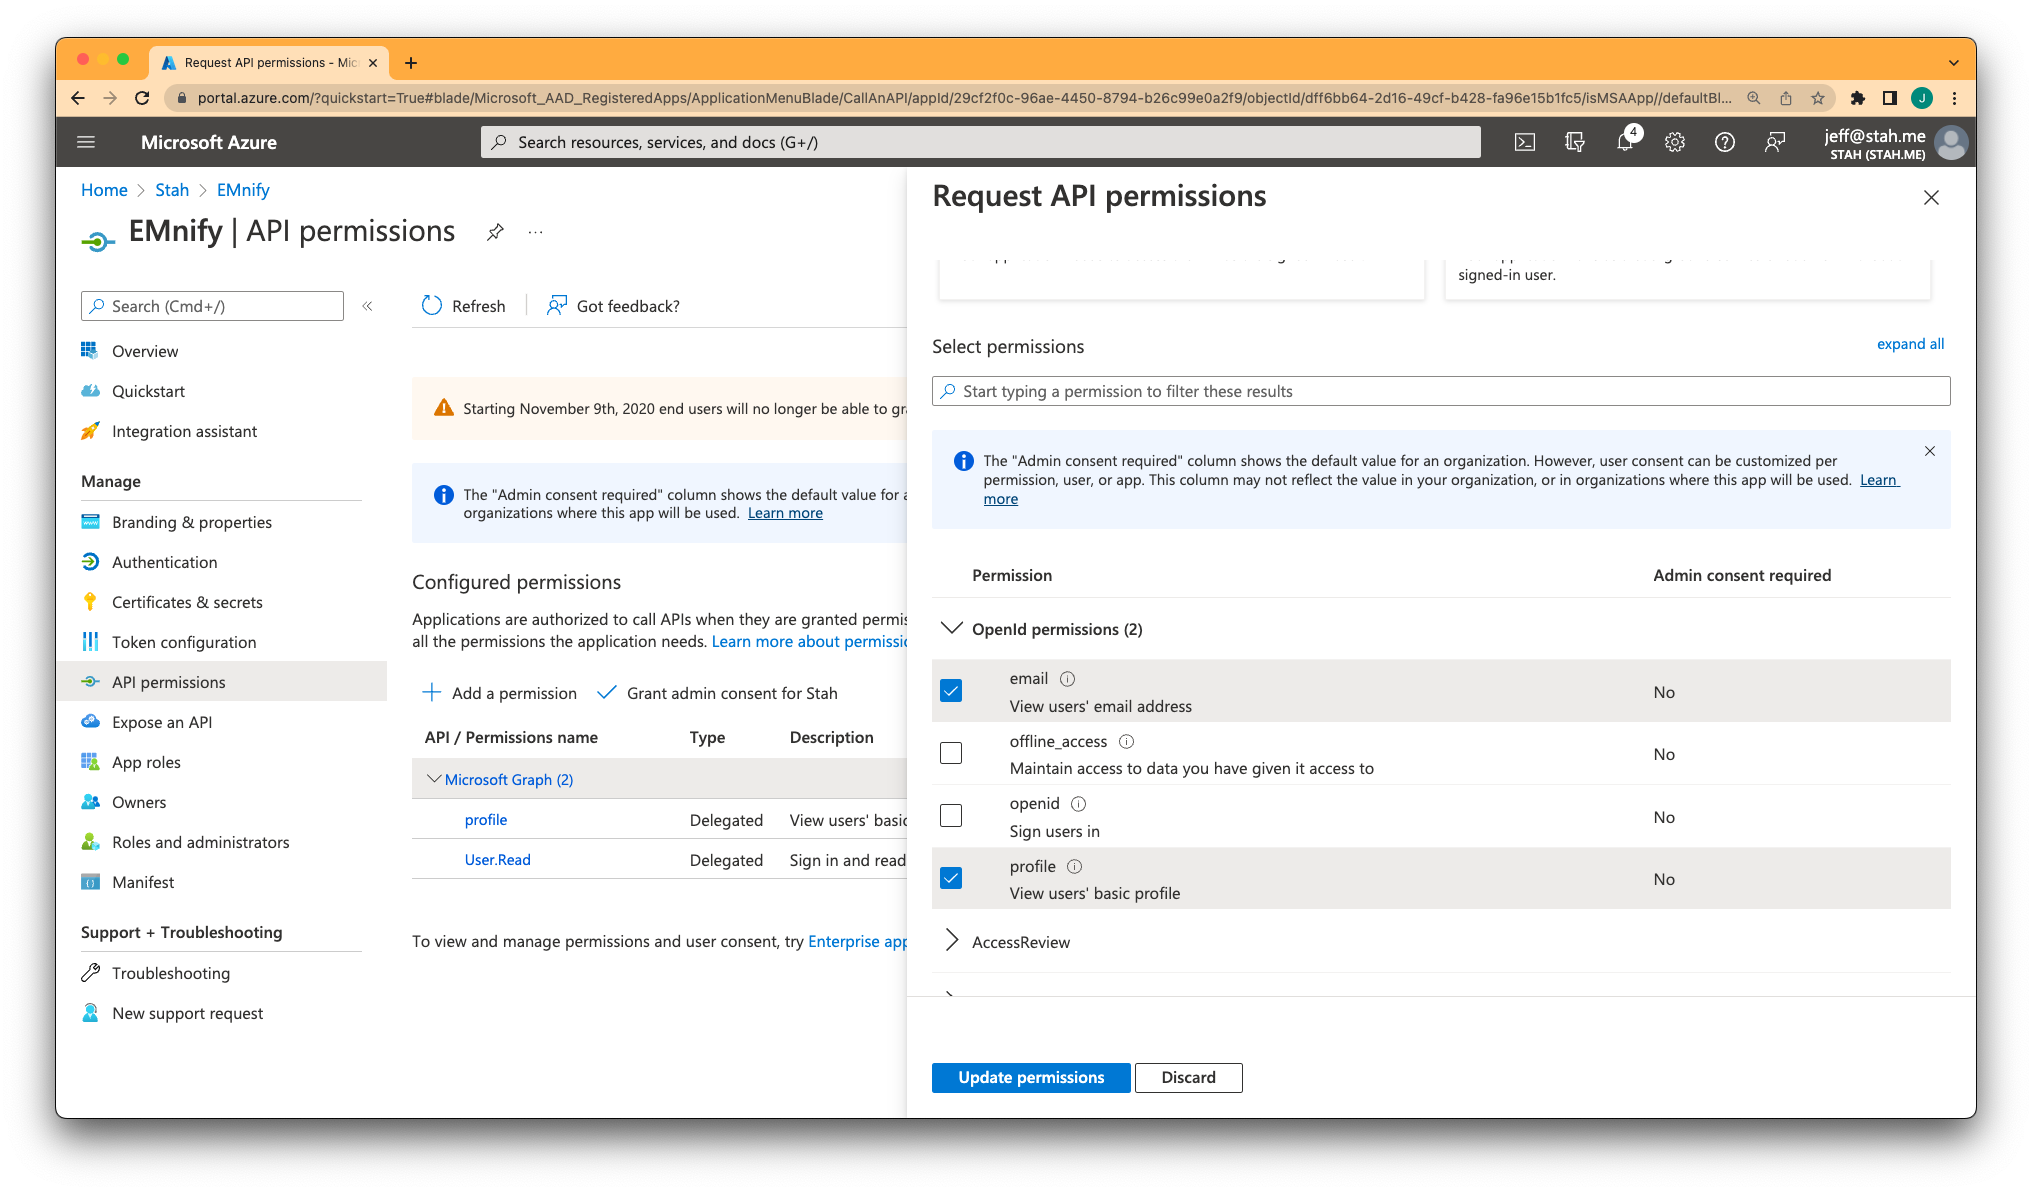
Leave the option Turn on the Microsoft Graph profile permission unchecked.
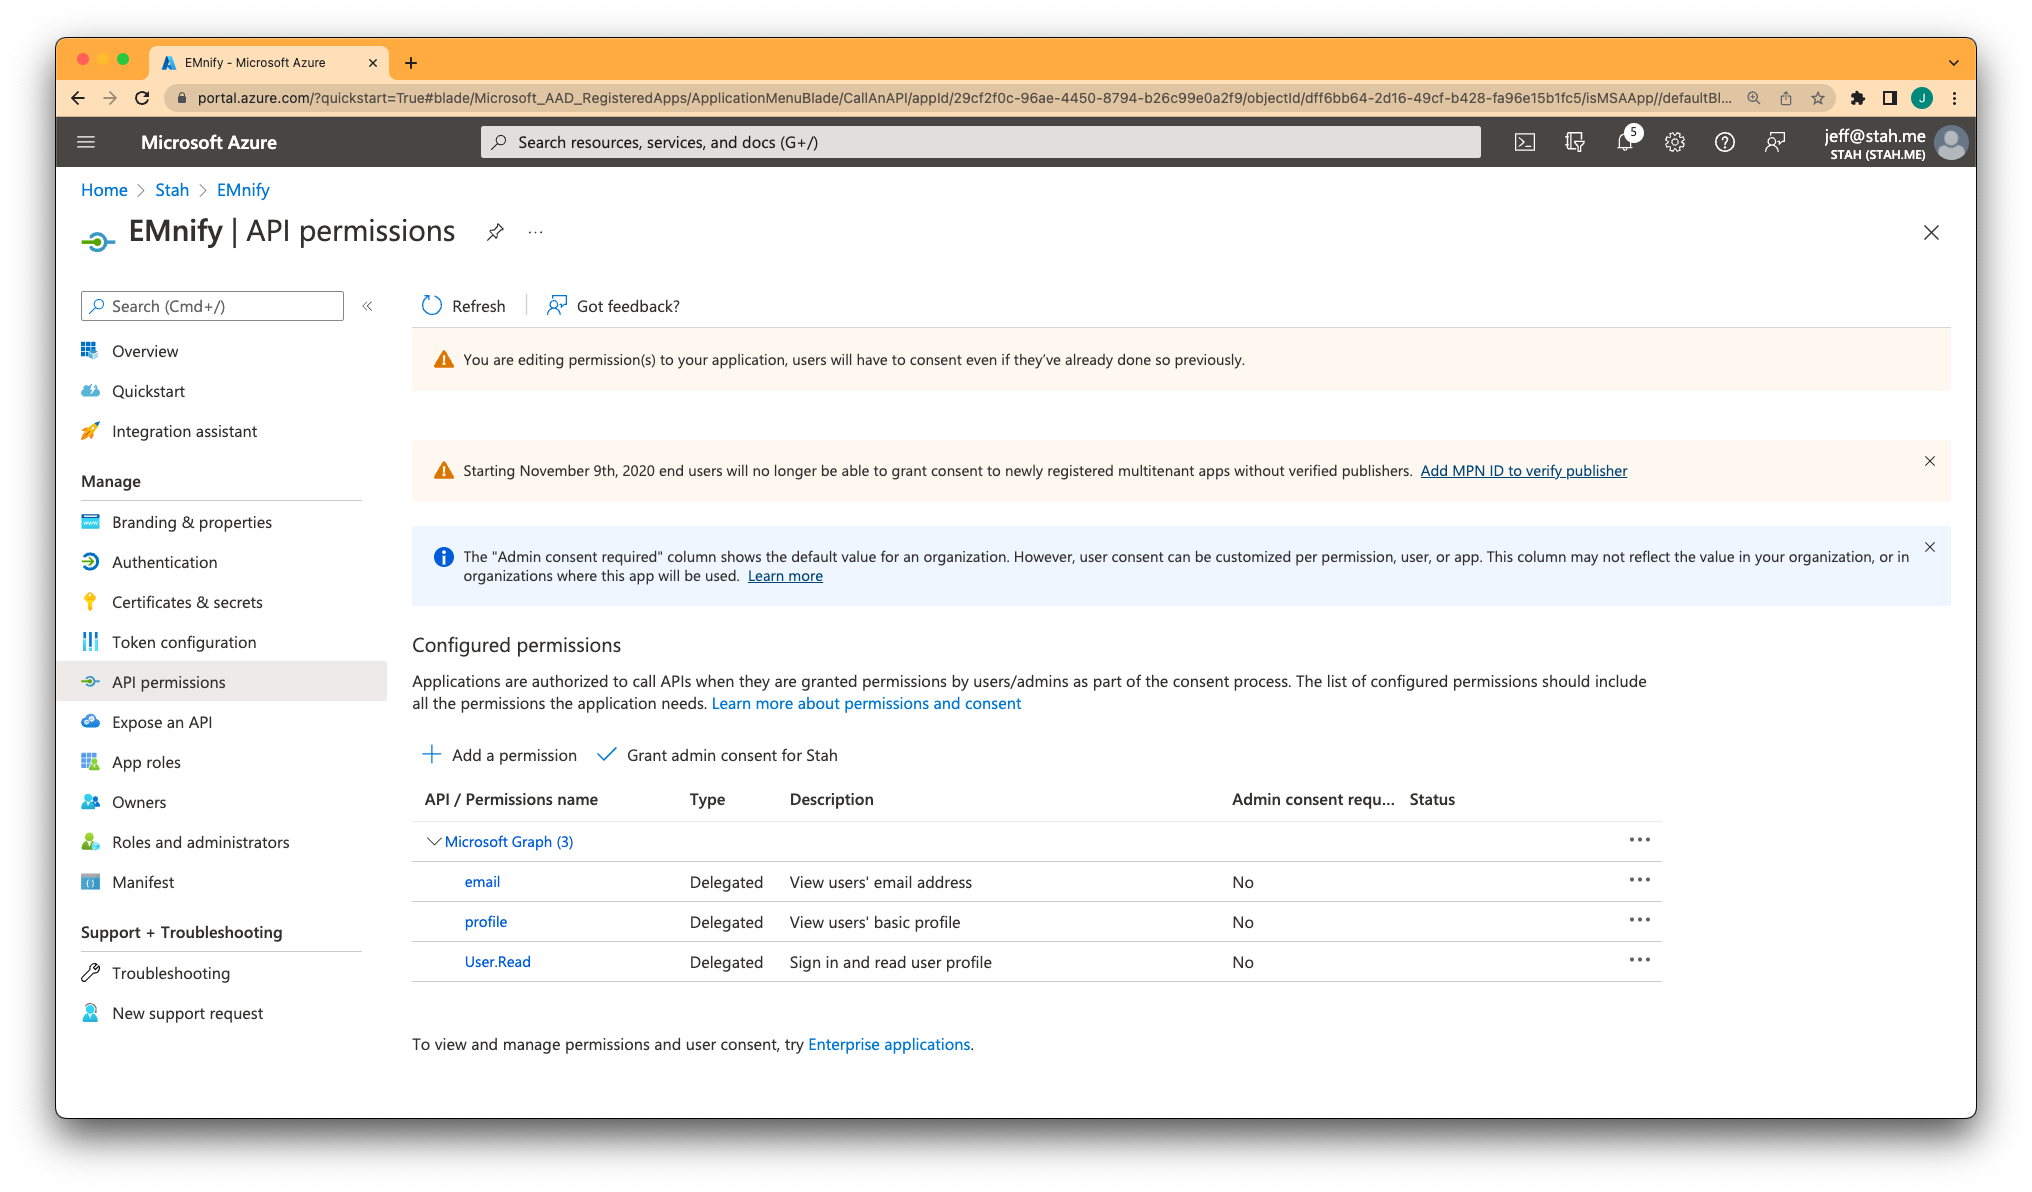
Head to API permissions in the left sidebar, click the existing permission entry Microsoft Graph (1) and confirm the email and profile OpenID permissions.
Your configuration should look like this:
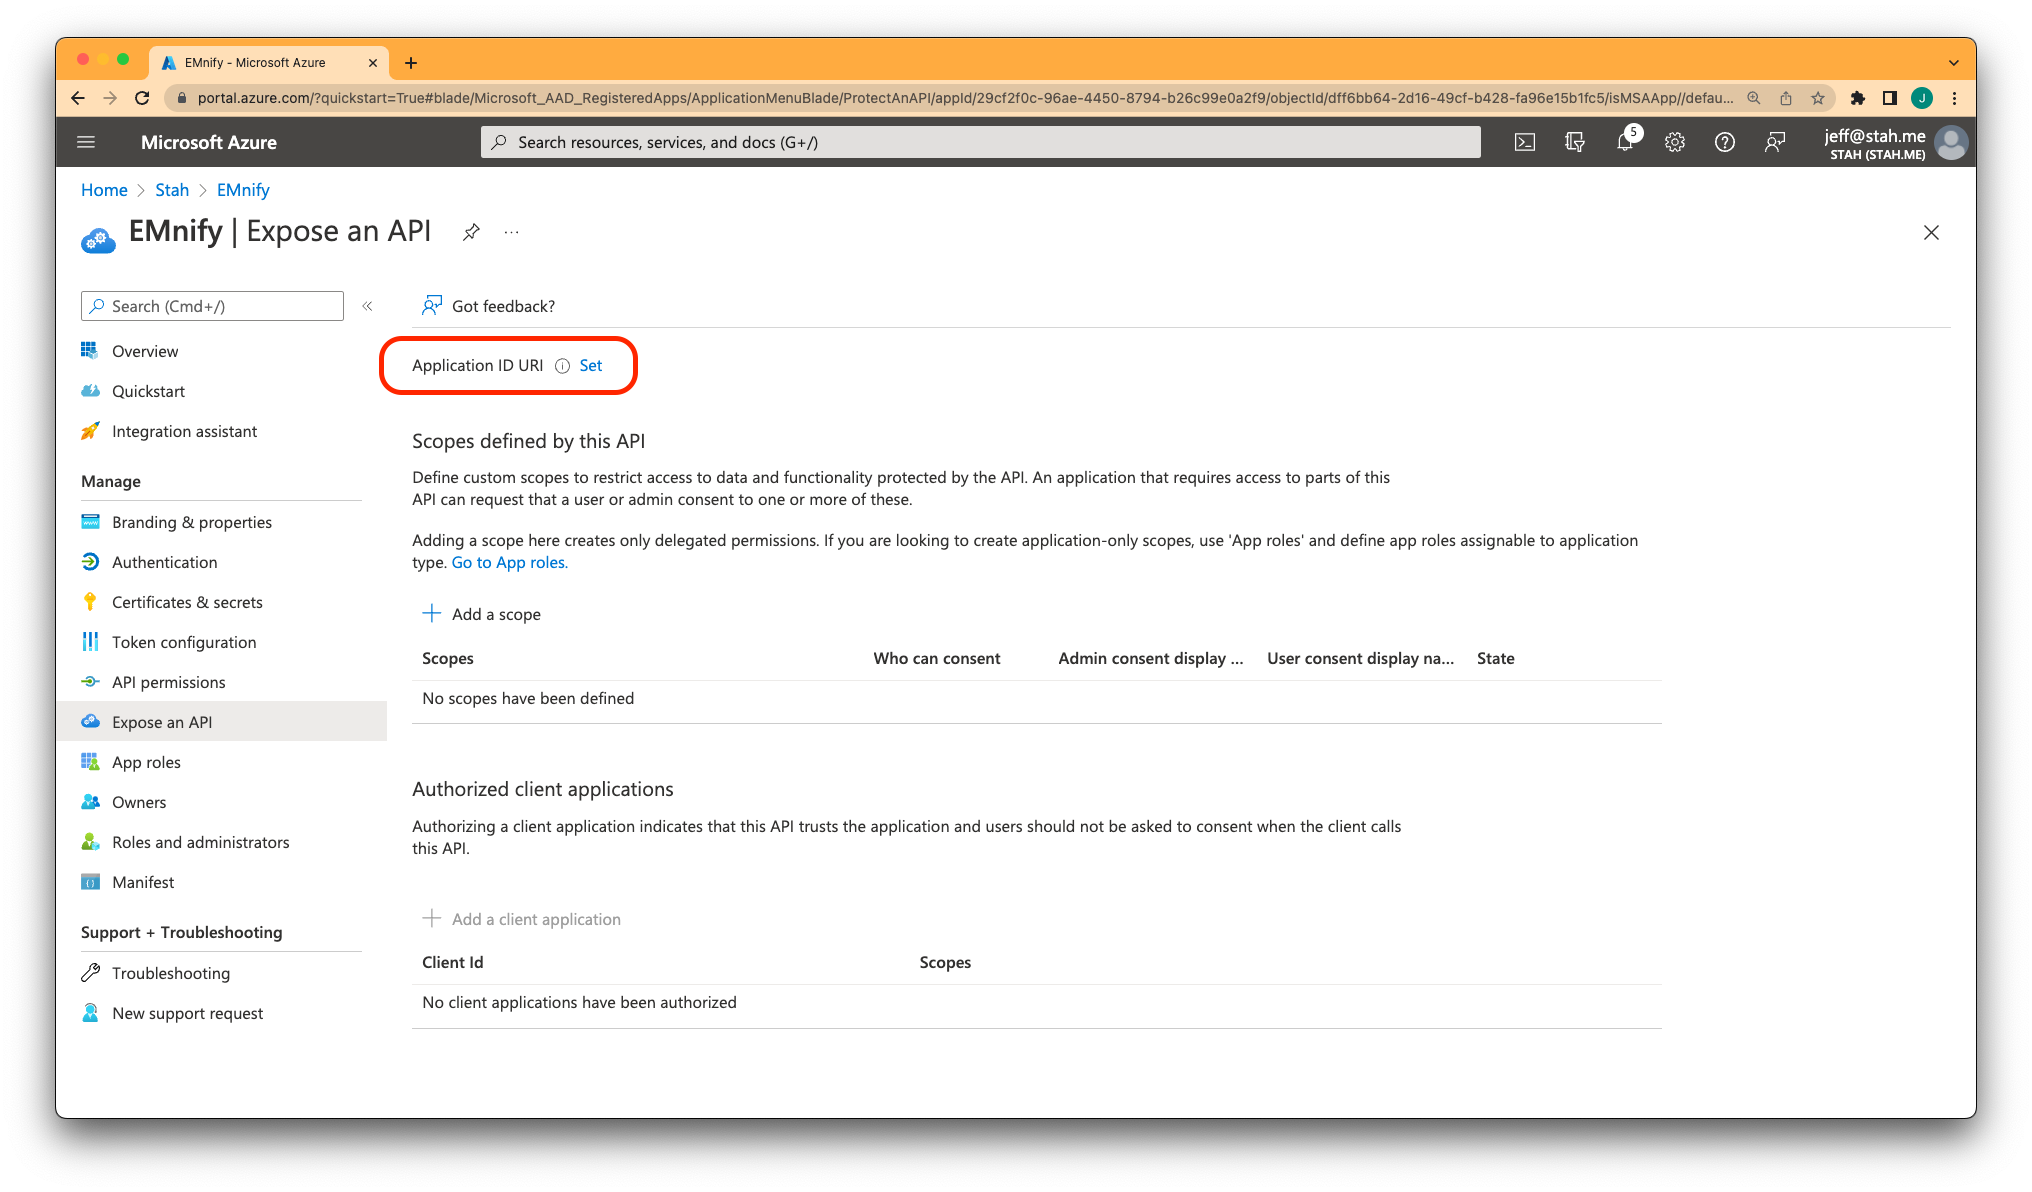
In the left sidebar, go to Expose an API, click Set, and then click Save.
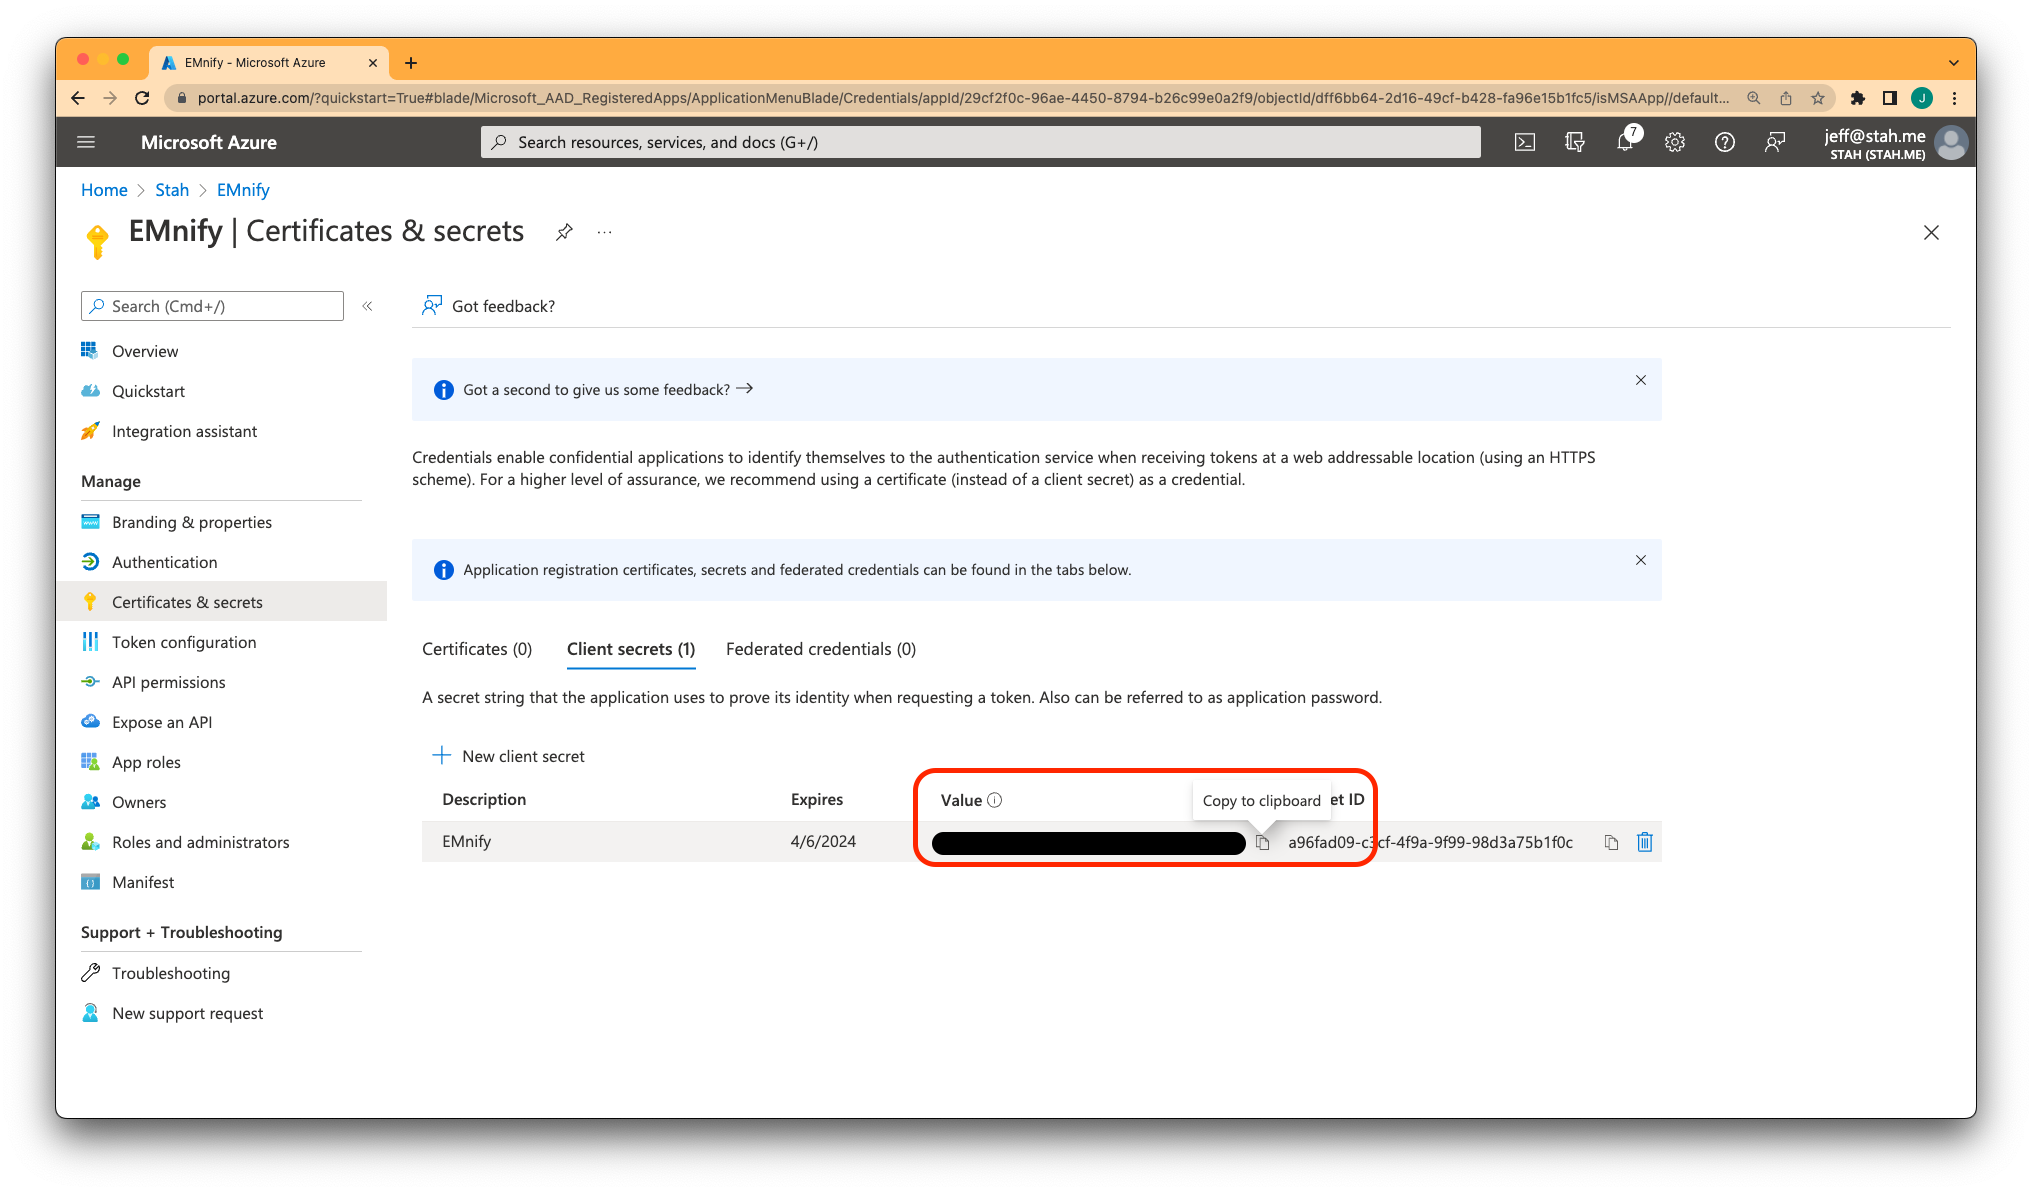
After navigating to Certificates & Secrets in the left sidebar, click New client secret.
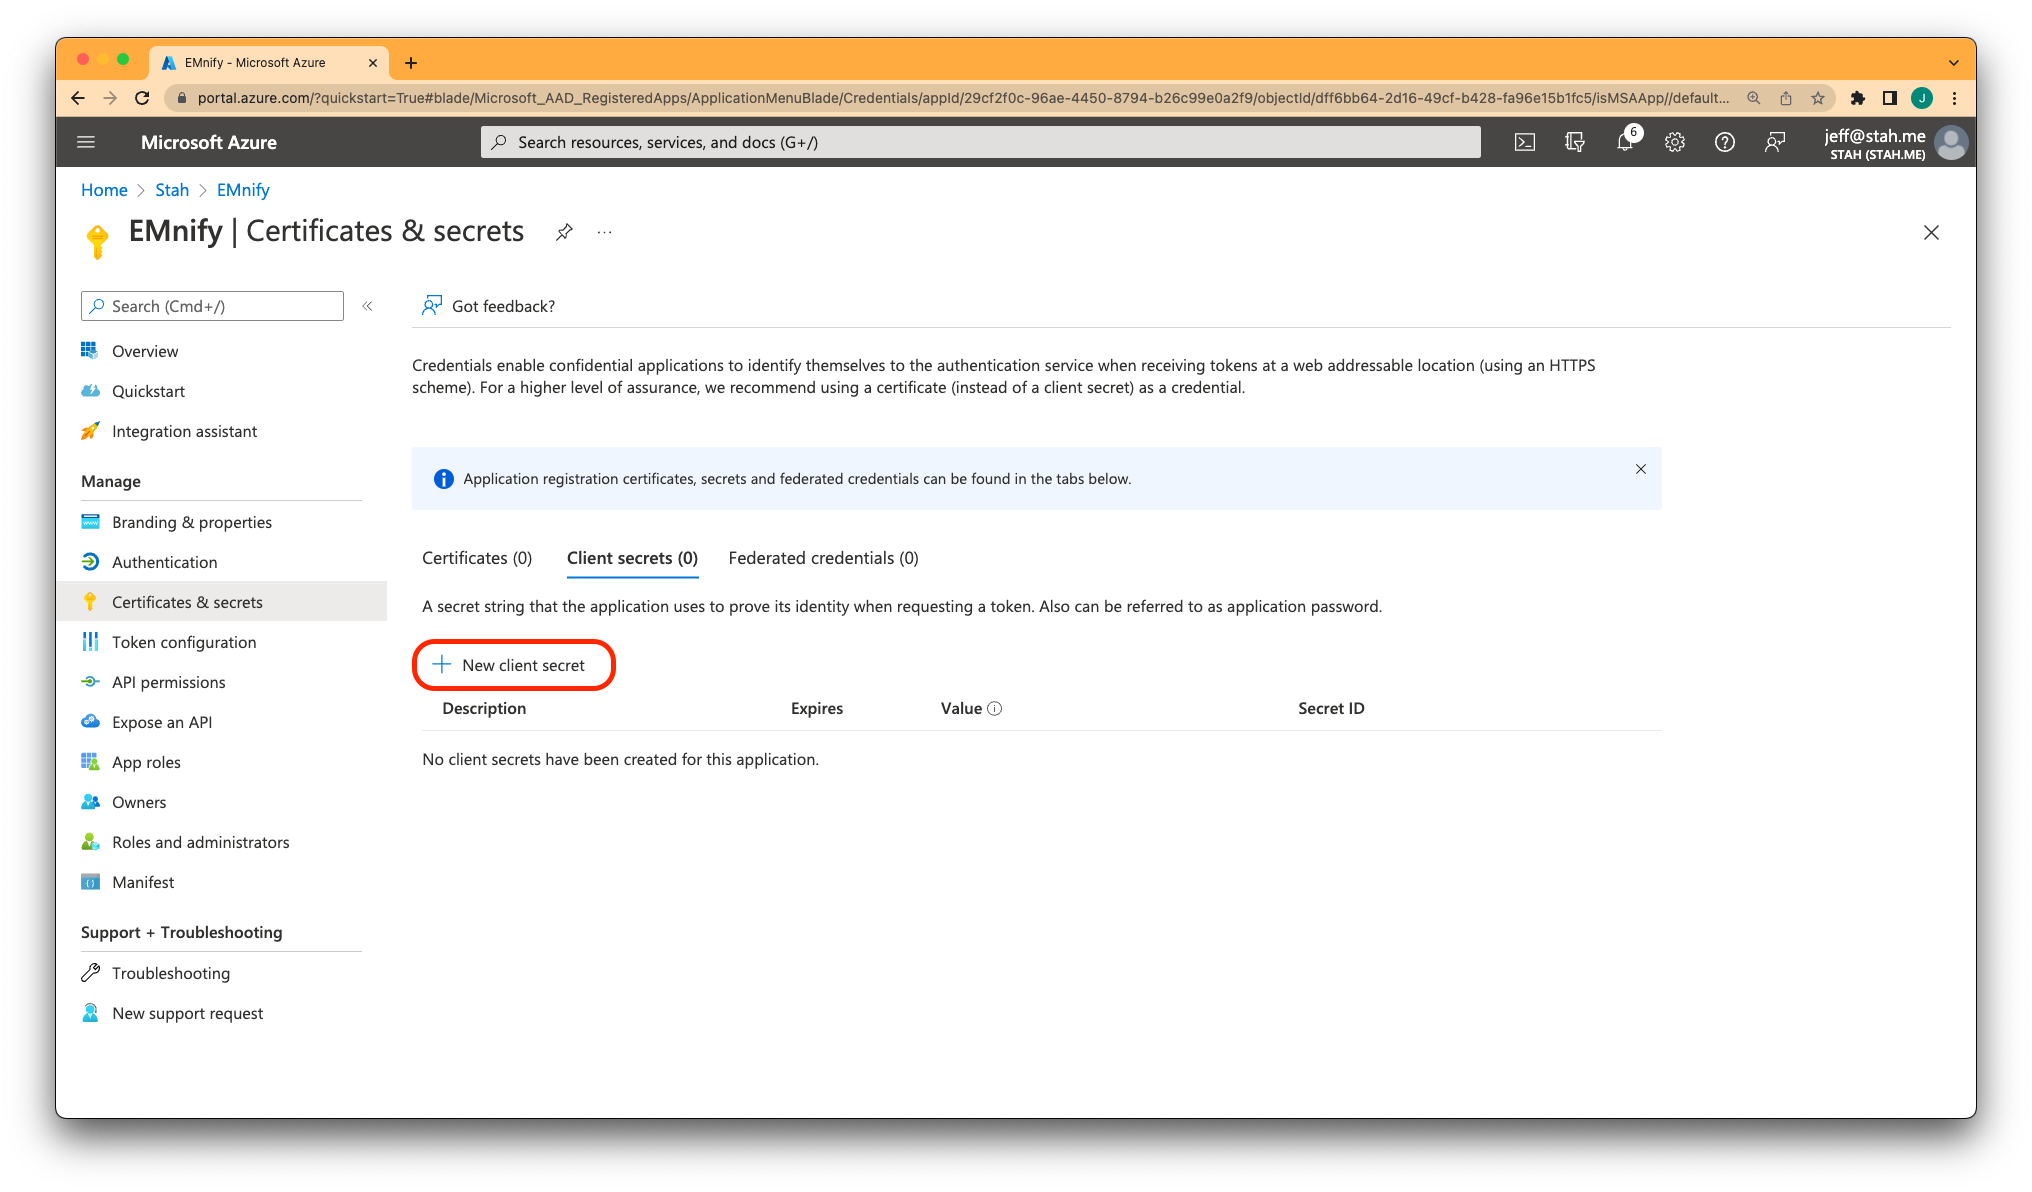
Copy the Value and save it to a secure location.
This value won’t be shown again.
Choose an expiration date and mark your calendar to generate and configure a new secret before it expires.
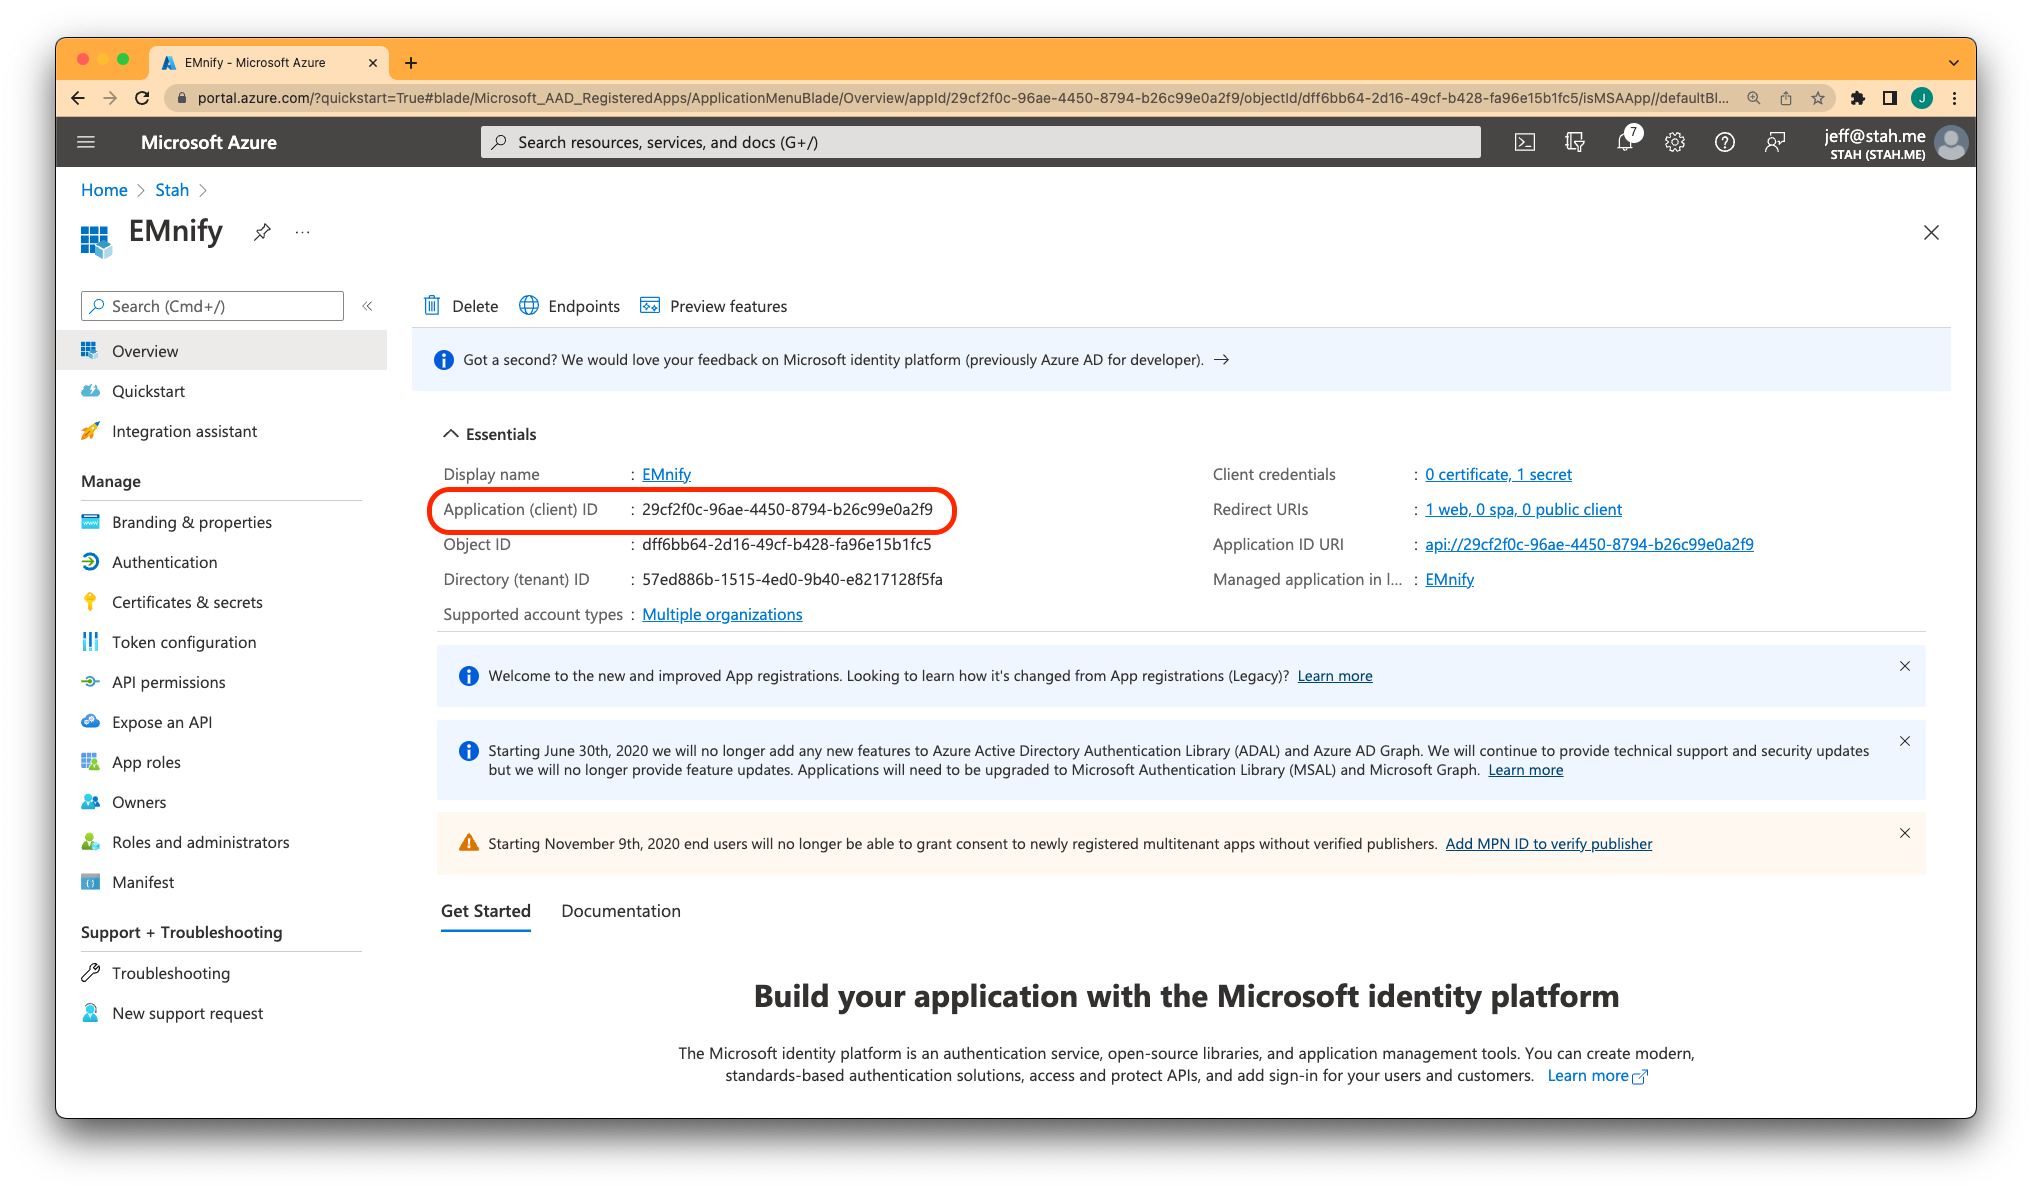
Navigate to Overview in the sidebar and copy the Application (client) ID to use later in the emnify Portal.
Configure the emnify Portal
Go to Workspace settings (building icon) in the top-level navigation and click Single Sign-On.
If you need SSO enabled for your account, contact emnify support. Otherwise, click Add under the Microsoft SSO provider.
You must complete the final step and verify the provider to configure SSO.
Refer to the Troubleshooting page if you encounter issues while setting up SSO.